Application Management and Patching
Using Remote Control within Application Workspace
This article describes how to configure and use your preferred remote-control solution from within Application Workspace, using TightVNC as the example.
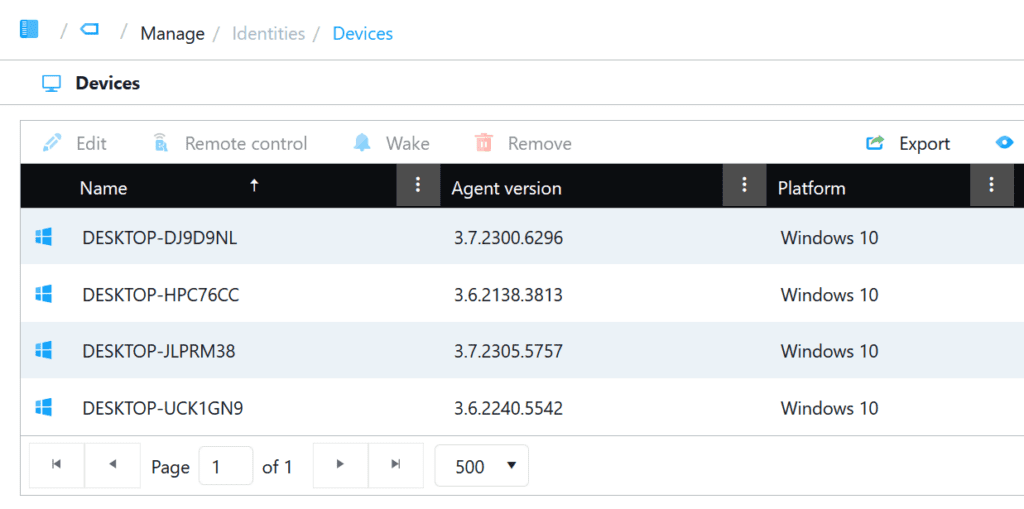
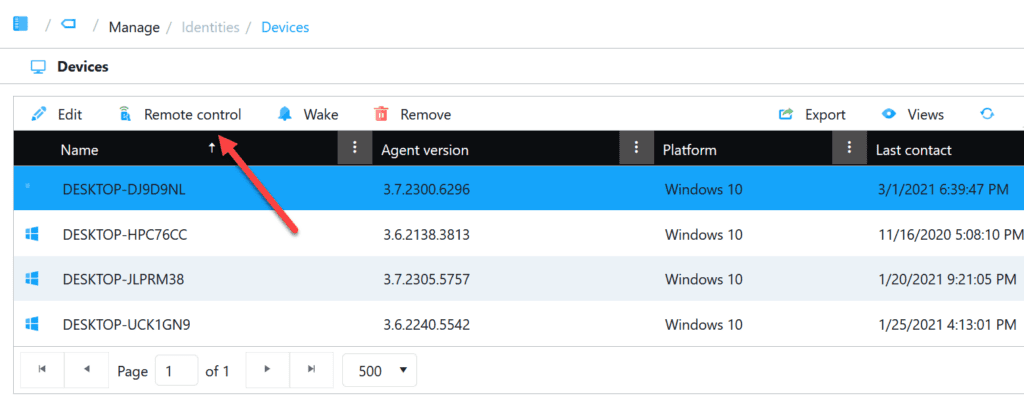
All Windows devices on which the Application Workspace Agent has been installed are listed under Manage, Identities, Devices. The values for Agent version, Platform and Last contact are shown.
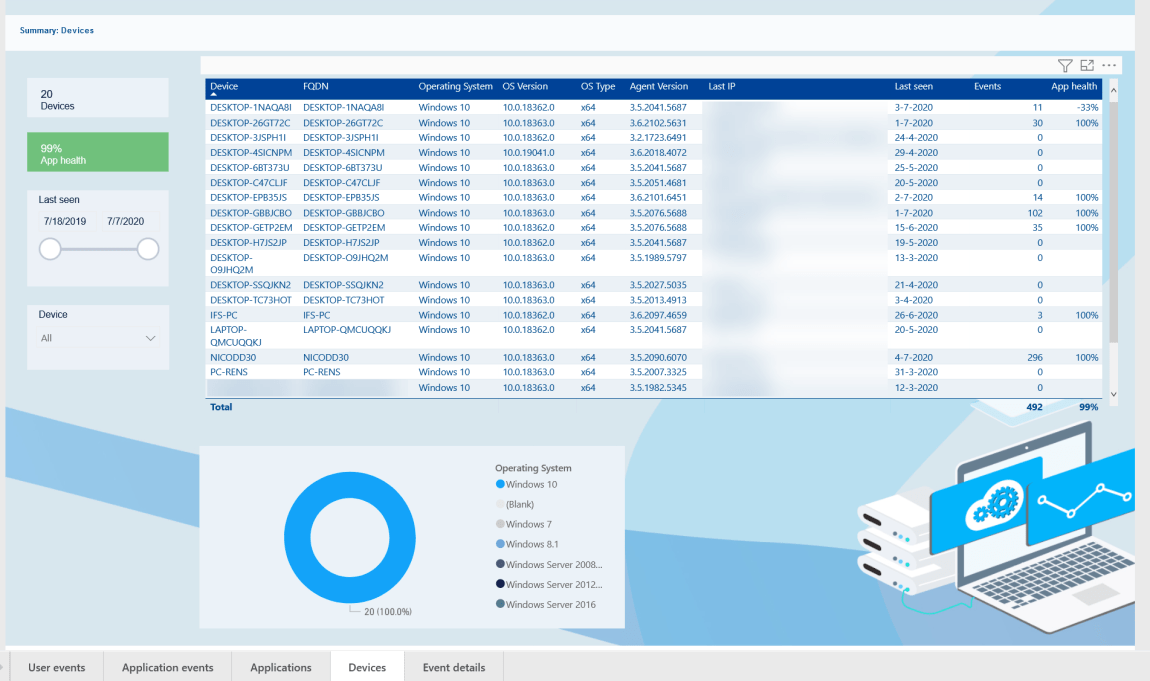
NB. If you need to zoom in and search for more device details, Application Workspace Reporting is what you’re looking for:
You’ve probably noticed the option ‘Remote control’, which gets enabled when you select a device:
Remote control is available selecting a device, but also when selecting a user:

In order to use ‘Remote control’ you to configure a few things first. First you need to decide which remote console software you want to use. That could be TeamViewer, Bomgar (now BeyondTrust), TightVNC, UltraVNC or any other remote control solution. For this blog I’ve used TightVNC.
The TightVNC MSI’s for 32-bit and 64-bit Windows are available in the Setup Store. You can create a ‘TightVNC’ Managed Package similar to other Managed Packages I’ve covered in my Application of the Week blogs.
This managed package can be used to delivered both the TightVNC Server and the TightVNC Viewer to selected endpoints.

The Configuration Wizards for these MSI’s enable you all what’s described in the TightVNC for Windows: Installing from MSI Packages documentation. E.g. which passwords are used for remote controlling devices.
Let’s create a Managed Package for TightVNC in Application Workspace using the Setup Store connector:
- Click Manage, Connector, then select the Setup Store connector
- Click Resources and search for ‘TightVNC’
- Select ‘TightVNC‘ (either the x64 or x86 MSI)
- Click ‘Create Package’
- In the Details screen opt for ‘TightVNC (x64)’ for the package name, click ‘Next’
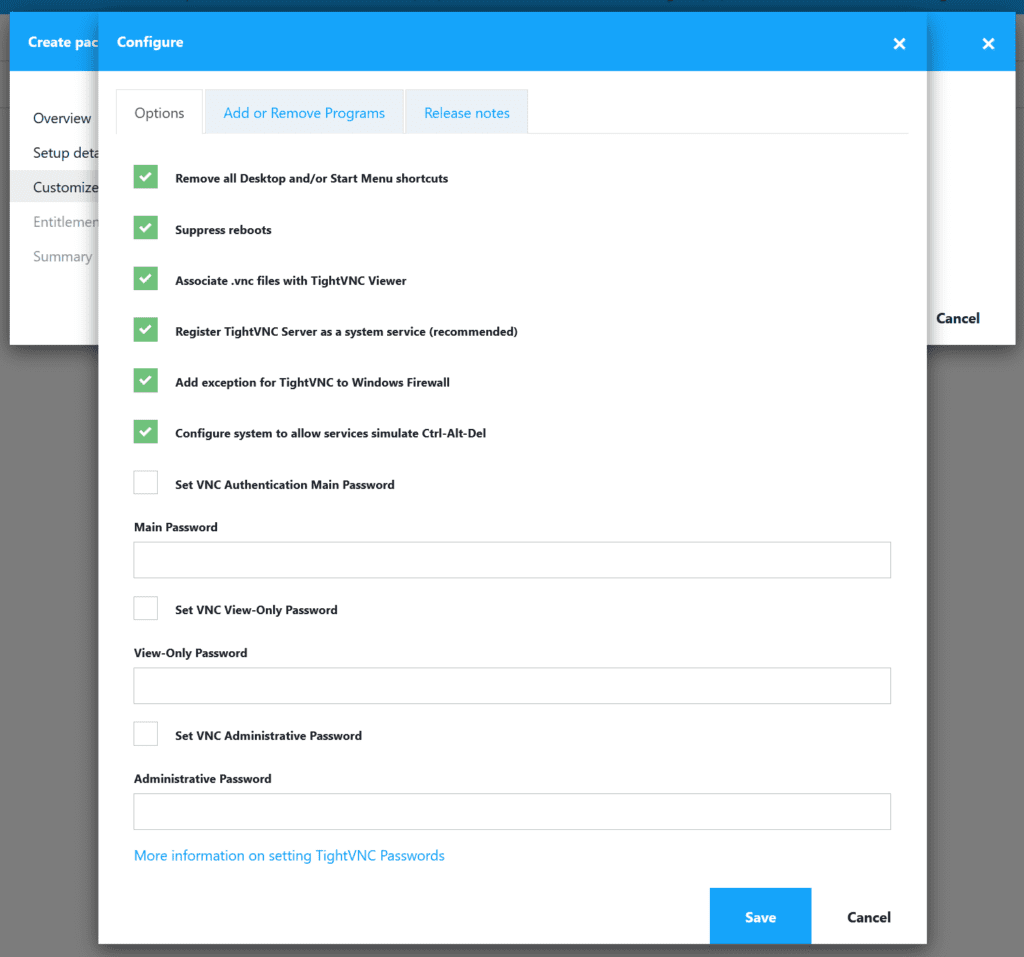
- In the Customize screen click the ‘Configure’ option.
This will show what we call a ‘Configuration Wizard’. With this wizard you can configure TightVNC using enterprise best practice settings. We already preconfigured this wizard using settings which are typical for enterprise deployment.
- Click ‘Next‘ after you’re done with the configuration.
- In the Entitlements screen add the devices you want to assign this package to, click ‘Next‘
- In the Summary screen uncheck the ‘Modify package after creation’
- Click ‘Finish’
Then you need to create a ‘Remote Package’ for TightVNC:
- Click Manage, Packages
- Click ‘Add’ and select ‘Remote control‘ from the Package Type list.
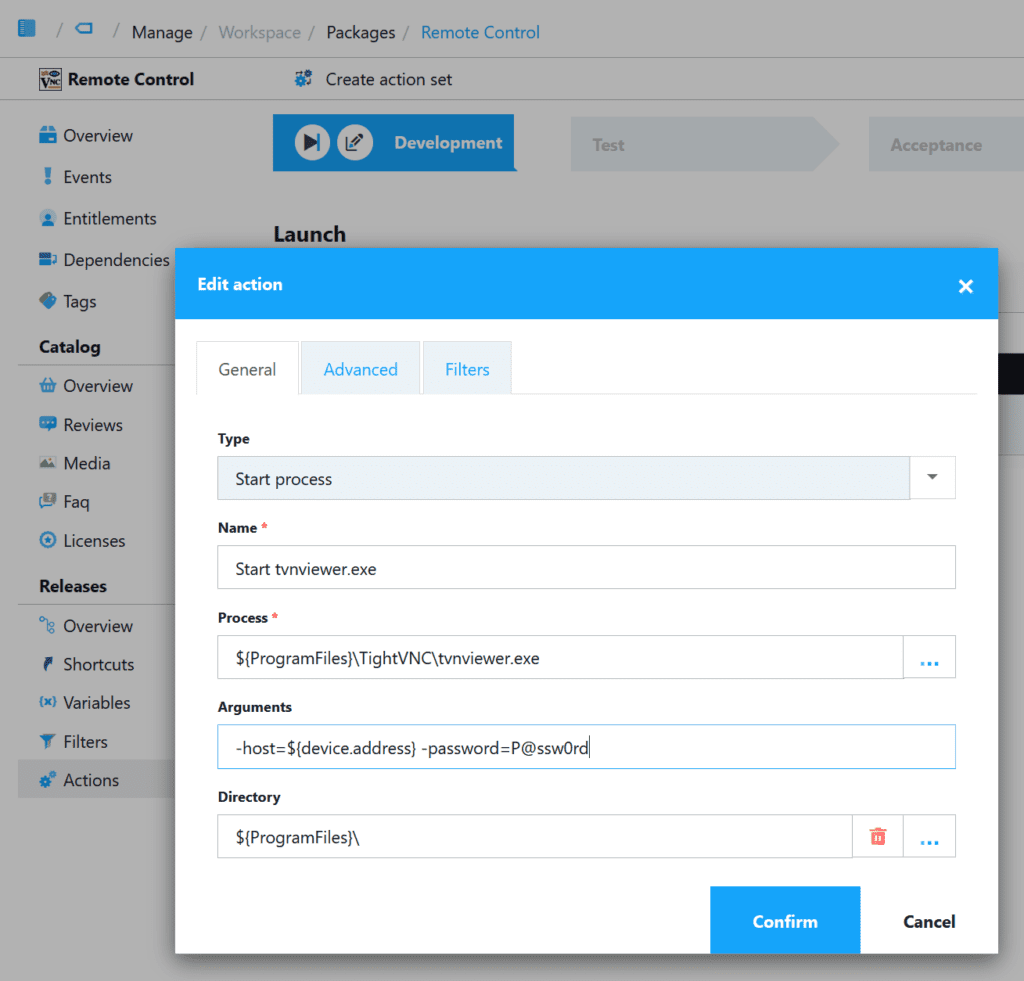
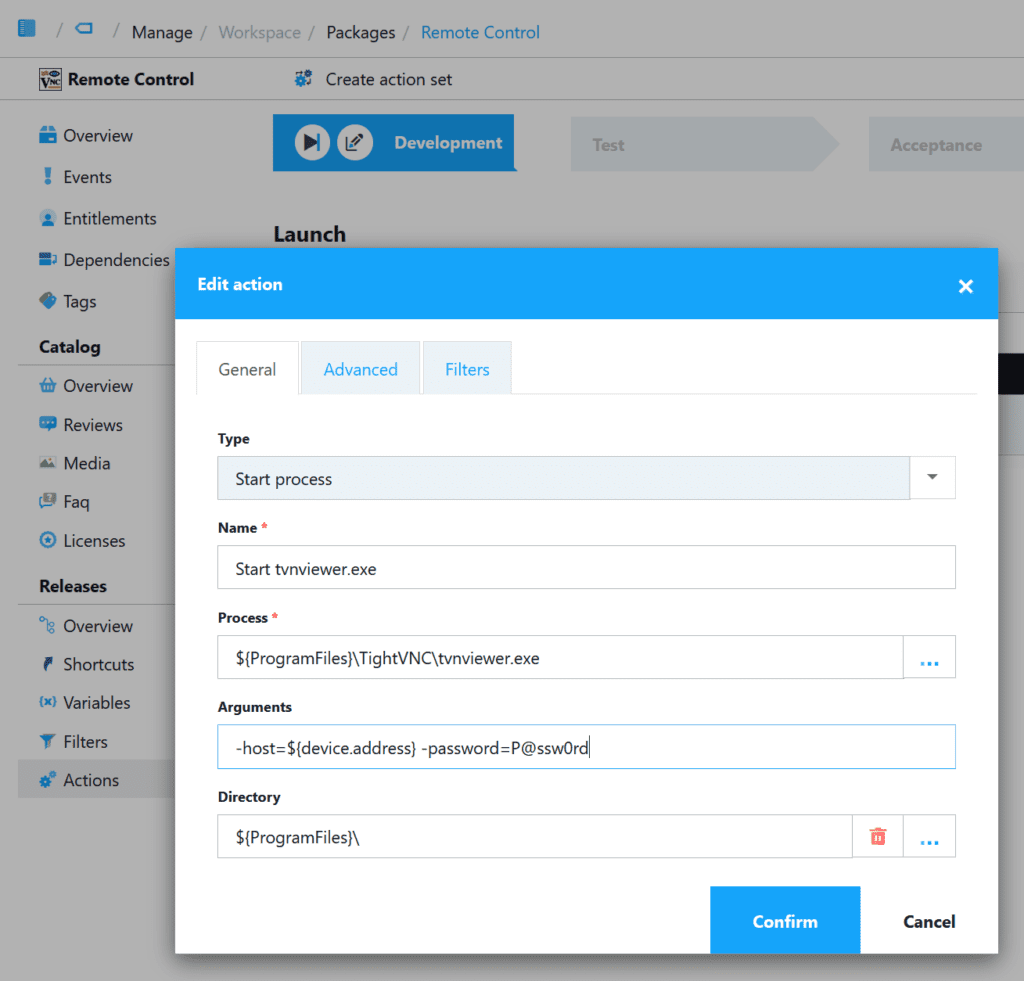
- Select ‘${ProgramFiles}TightVNCtvnviewer.exe‘ for ‘Process’
- Select ‘Use local file icon‘
- For Arguments use ‘-host=${device.address} -password=P@ssw0rd’
${Device.Address} is a Workspace variable in which the Primary IP of the device as reported by the agent is stored. That value, along with the remote control password, is passed to tvnviewer.exe. - Click ‘Next’
- Use ‘Remote Control’ for the package name and click ‘Next’
- Click ‘Finish’
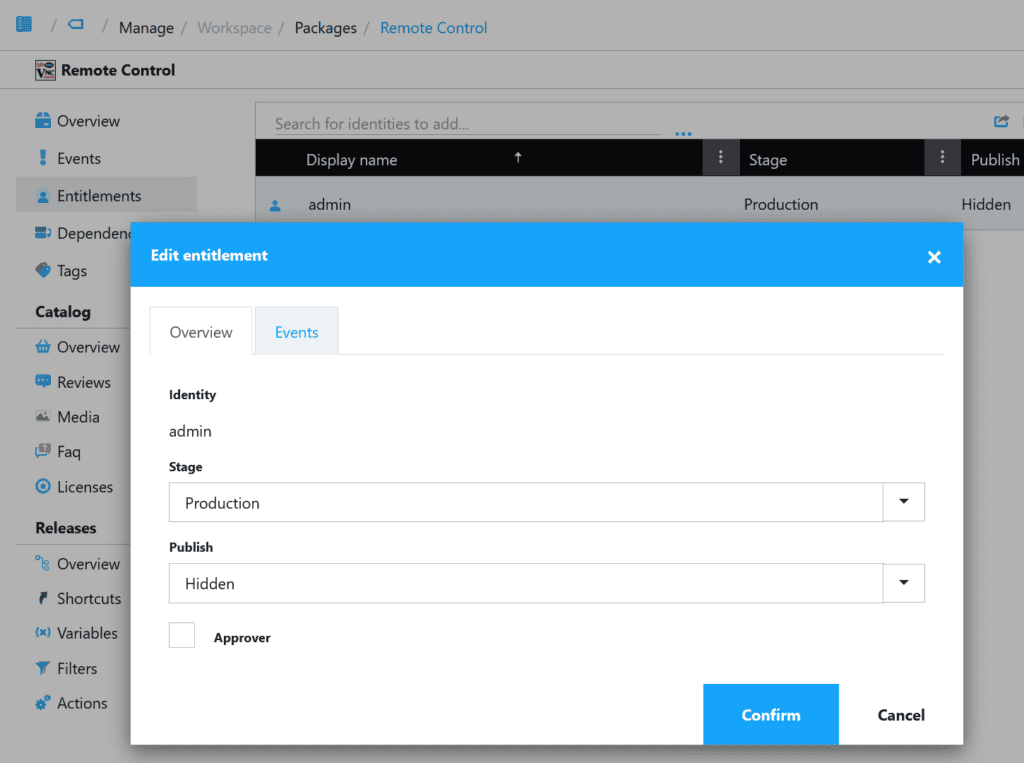
- Click ‘Entitlements‘ and add the user which needs to be able to remote control devices.
- Set ‘Stage‘ to ‘Production’ and ‘Publish‘ to ‘Hidden’.
In my example I’ve used ‘admin’, but that can be any other user As long as the user has been granted the ‘Remote Control devices’ Privilege.

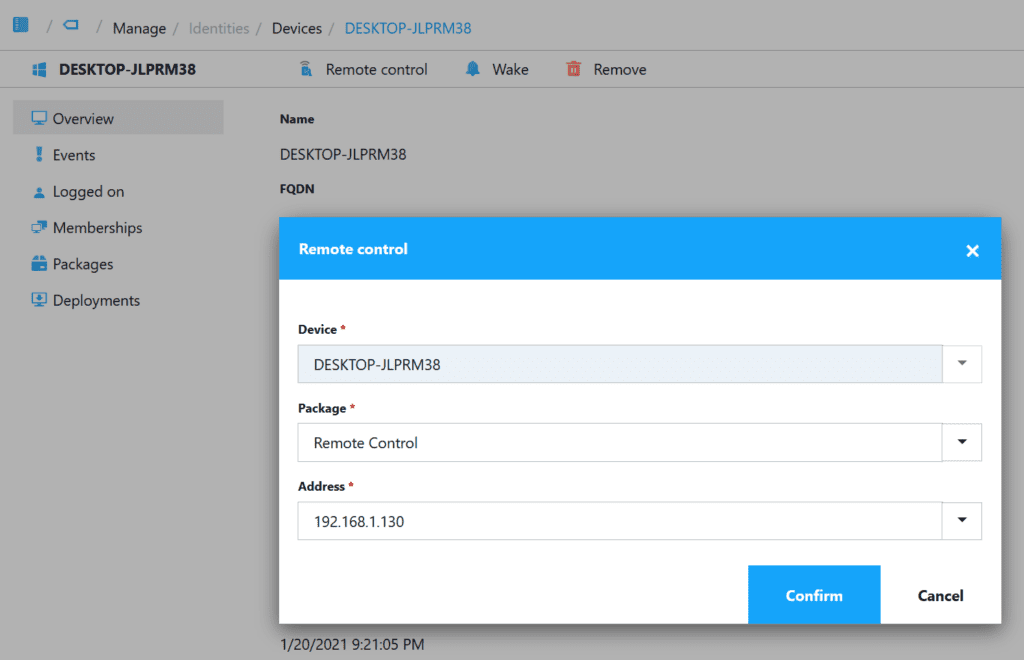
Now, after you’ve selected an user or device, click the option ‘Remote control’. This bring in the addressed (both the DNS name and the IP address are listed) of the to be controlled device, click ‘Confirm’.
TightVNC is launched. Click ‘Connect’ to remote control the device:
