Dana Epp (@DanaEpp) recently gave a fascinating presentation about the vulnerabilities facing Configuration Manager, from daily outside threats to the challenges confronting ConfigMgr administrators and Microsoft Deployment Toolkit (MDT) administrators to block these threats.
At the very least, Dana strongly recommends that you remove four specific files from all of your computers in order to make your environment more secure.
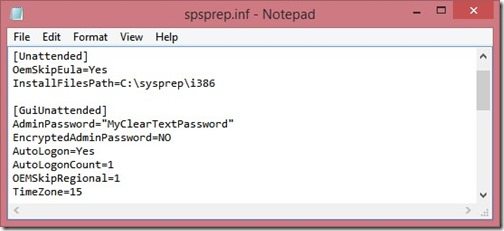
Do you need more convincing? Take the C:sysprep.inf file. You may not be aware of it, but it has the Local Administrator’s password information contained within it as clear text. With this piece of intelligence, a hacker can gain access to all workstations! If this is all a hacker needs to get a toe-hold within your environment, how long will it be until they have a Domain Administrator’s account username and password?
The Four Files to Remove
The four files that need to be removed are:
- C:sysprep.inf
- C:sysprepsysprep.xml
- %windir%PantherUnattendUnattend.xml
- %windir%PantherUnattend.xml
Below is a sample sysprep.inf file.
I will be encouraging all of my clients to follow Dana’s advice, and I agreed to help Dana get the word out by writing this blog post.
Keep in mind that this process involves a number of steps, so I will break this series into five blog posts.
Finding the Problem Computers
Let’s get started by finding these problem computers.
In the ConfigMgr 2012 console, we’ll create one Configuration Item (CI) for each of the four files in order to detect them on any workstation. Although these steps are written for ConfigMgr 2012, they are basically the same for ConfigMgr 2007.
I will show the process for sysprep.inf and then you will need to repeat these steps for the remaining three files yourself.
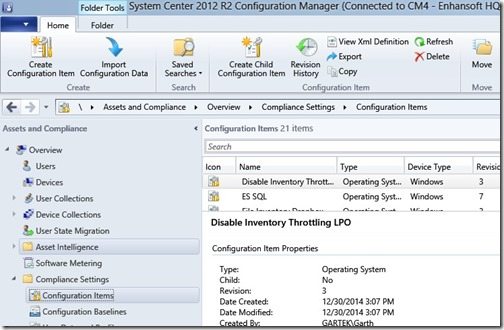
1. In the ConfigMgr 2012 console, go to Assets and Compliance | Overview | Compliance Settings | Configuration Items, and then click Create Configuration Item in the toolbar.
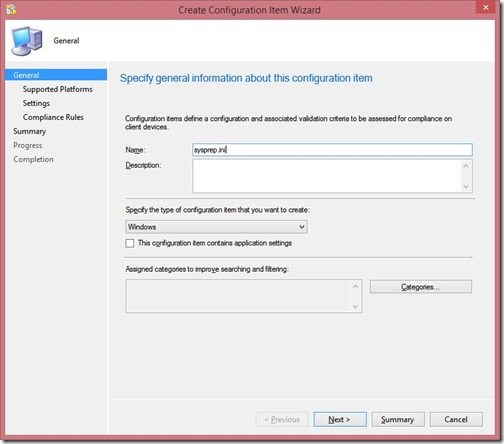
2. Enter a Name for the Configuration Item, and then click Next.
Note: Remember this name because we will be needing it in my next blog post about how to create the Configuration Baseline.
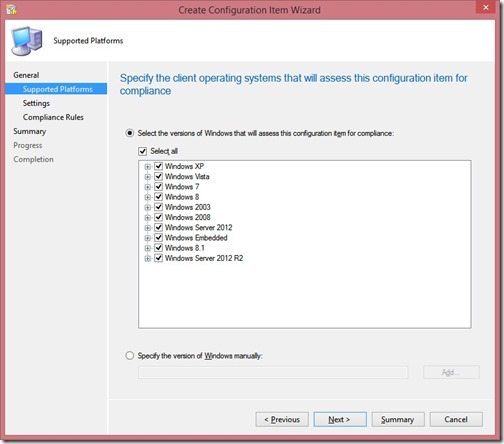
3. Click Next.
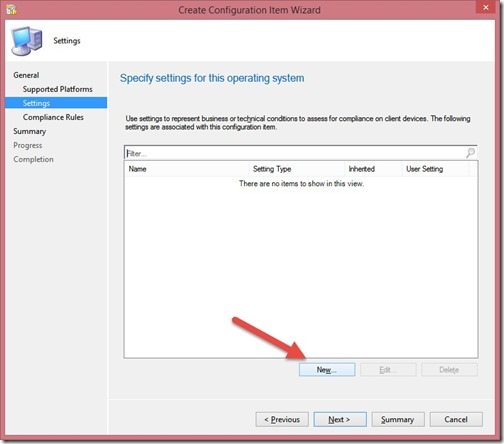
4. Click New.
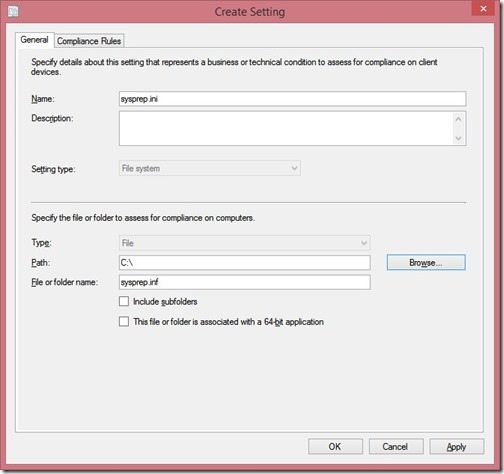
5. In the Name field enter the setting friendly name. In my example, I have used the file’s name, sysprep.inf in order to help with troubleshooting later.
Change the Setting type to File system.
Enter the Path to the file. C:
Enter the File name. sysprep.inf
Note: If browsing for the file on this screen a compliance rule will be automatically created. If a compliance rule is created, you will still need to adjust this rule in the next step.
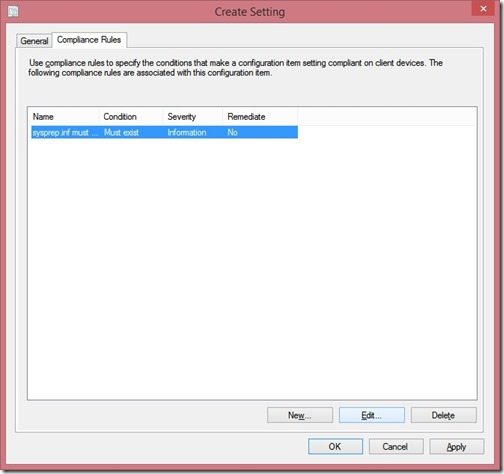
6. Click New or Edit (see note in the previous step).
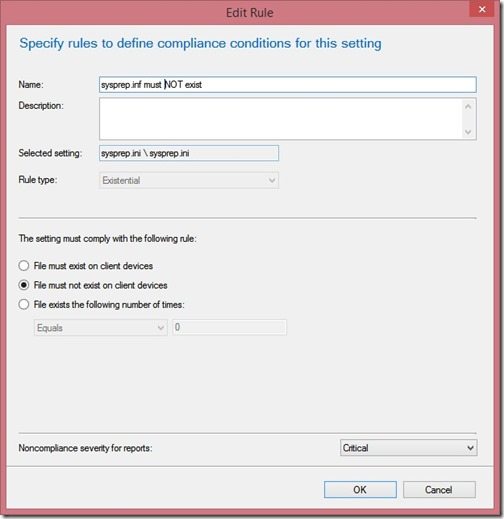
7. Set the rule name to sysprep.inf must NOT exist
Change the Rule type to Existential.
Select File must not exist on client devices.
Change the non-compliance severity for reports to Critical, and then click OK twice in order to return to the Wizard.
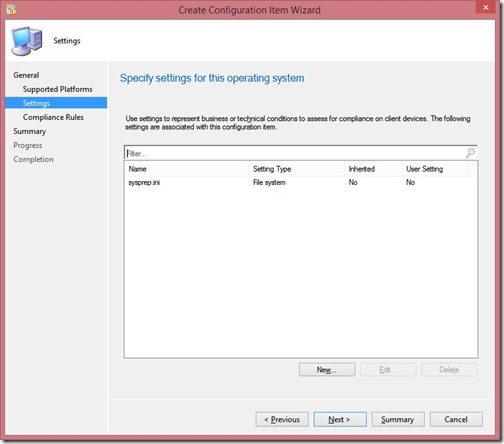
8. Click Summary.
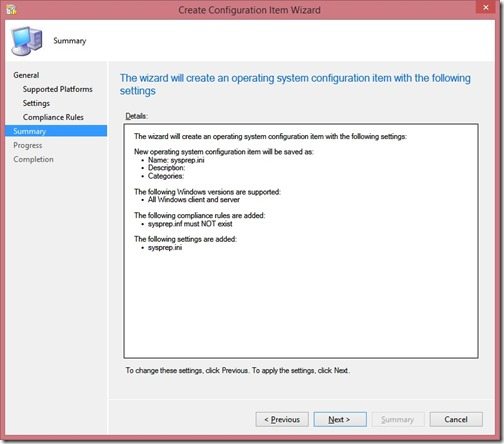
9. Click Next.
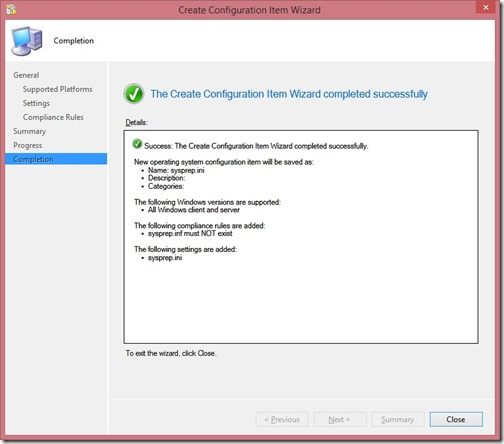
10. Click Close.
Repeat the above steps in order to create three additional Configuration Items for each of the remaining files to be removed.
- C:sysprepsysprep.xml
- %windir%PantherUnattendUnattend.xml
- %windir%PantherUnattend.xml
Next, I’ll show you how to create the Configuration Baseline in order to deploy these items.

