Systems Management
How to Install a CentOS 7 Linux Virtual Machine in Windows Hyper-V Server
Topics: Systems Management
Using System Center 2012 Configuration Manager (CM12) or CM12 R2, I wanted to confirm what steps were needed to inventory the *nix server operating system. In my example I chose CentOS 7, so over the next few blog posts, I will show you how to install a CentOS 7 Linux virtual machine in Windows Hyper-V Server, how to install CentOS 7 on Hyper-V with integration services, and how to install the CM12 client agent on the CentOS 7 server.
How to Install a CentOS 7 Linux VM in Windows Hyper-V Server
1. First, download CentOS 7 ISO from http://www.centos.org/.
2. While waiting for CentOS 7 ISO to download, create a virtual machine (VM) in Hyper-V, and use a legacy NIC.
3. Once the CentOS 7 ISO is downloaded, attach the ISO to the VM’s CD-ROM drive and start the VM.
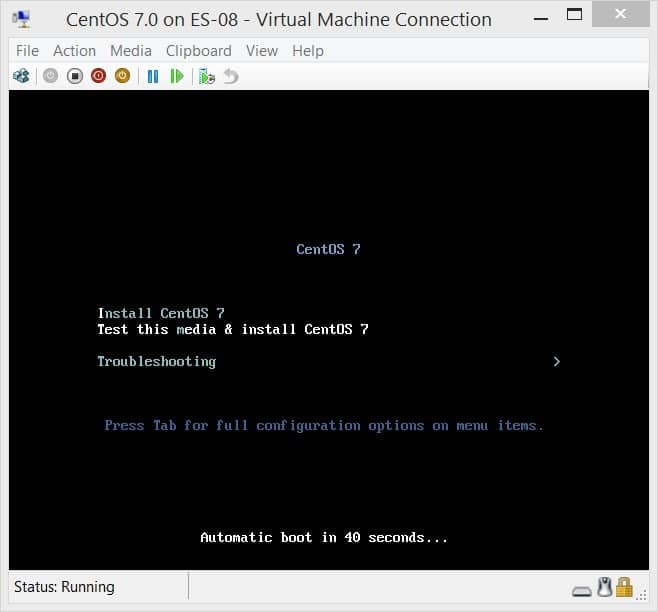
4. Click the letter I to install CentOS 7.
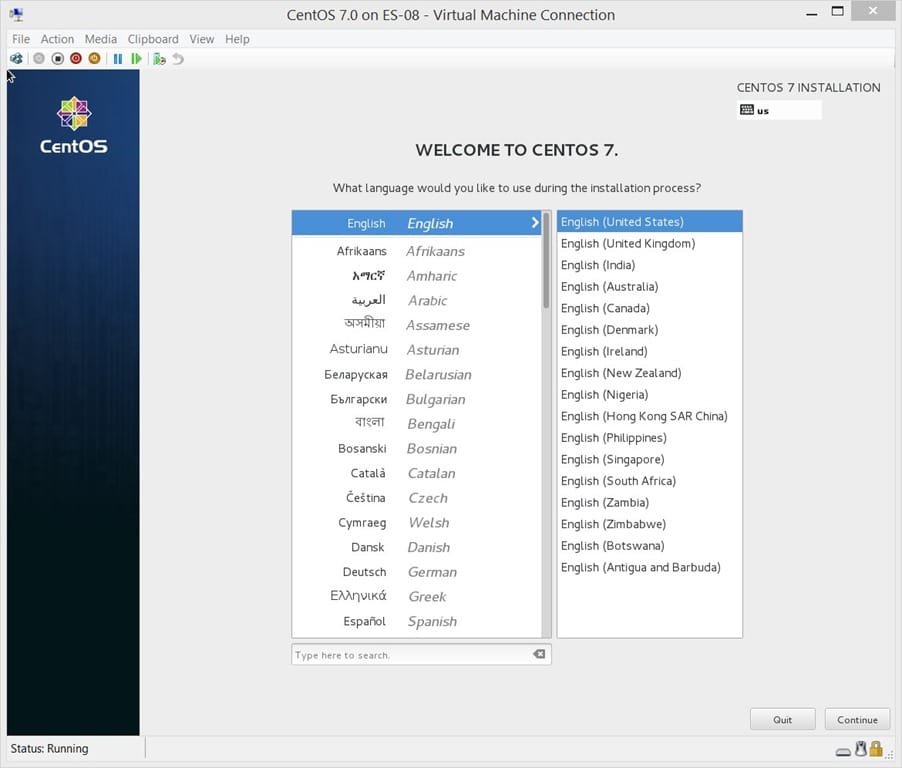
5. Select the appropriate language and click Continue.
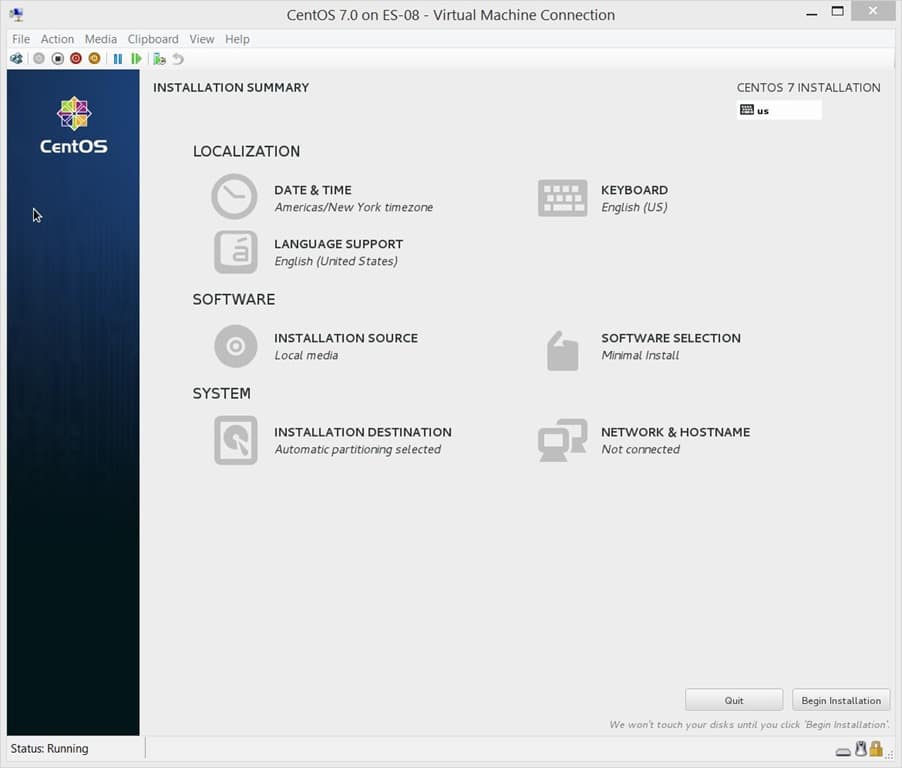
6. Click NETWORK & HOSTNAME.
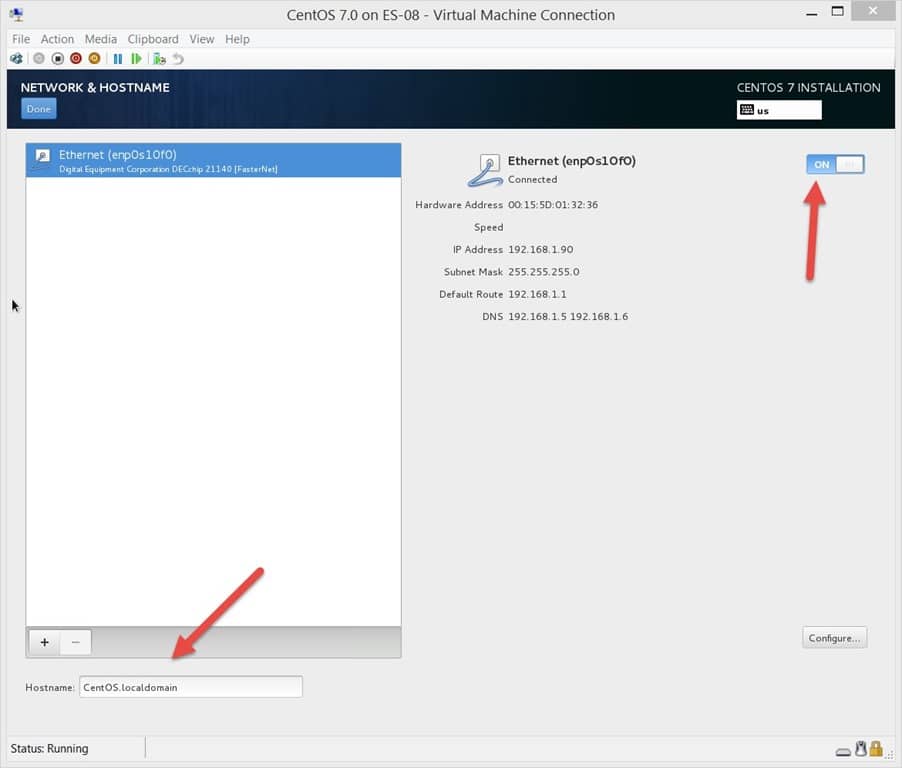
7. Enable the NIC and configure the Hostname. Click Done (top left) when completed.
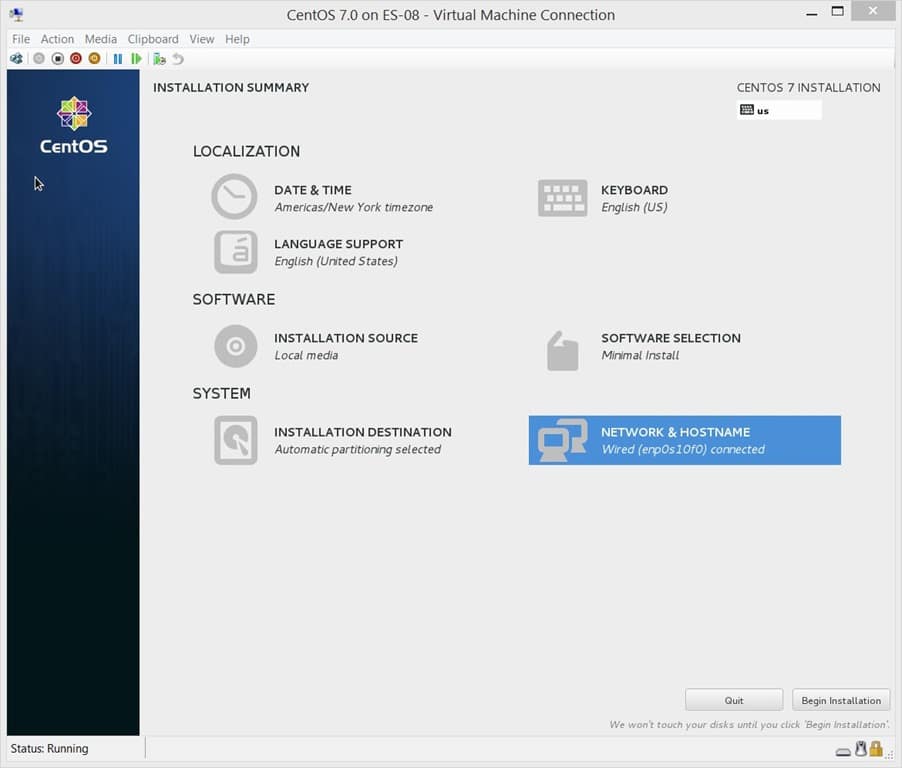
8. Click Begin Installation.
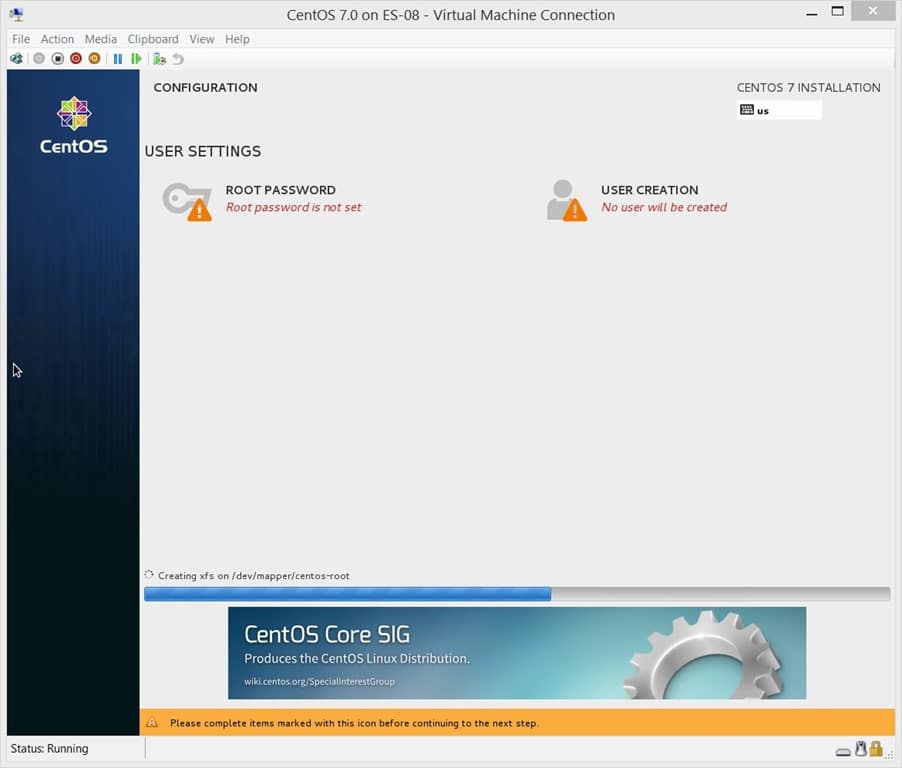
9. Click ROOT PASSWORD.

10. Set the Root Password and click Done.

11. Click USER CREATION.
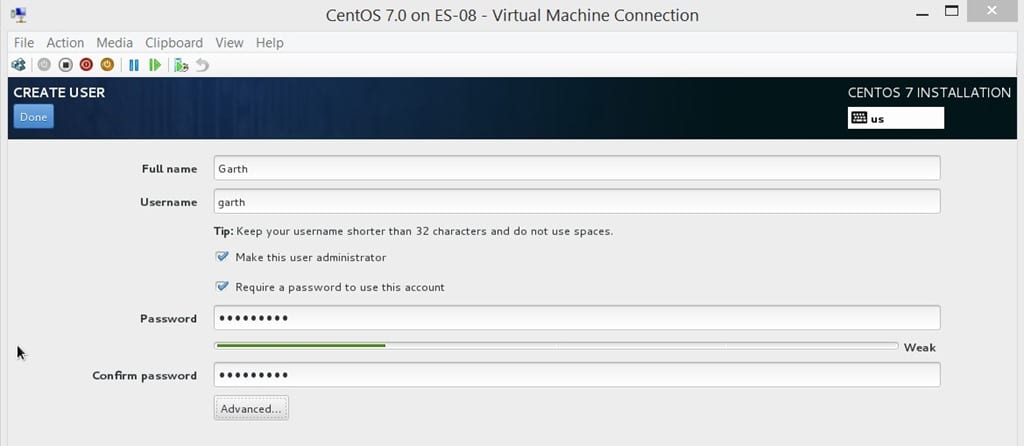
12. Fill in the user details and click Done.
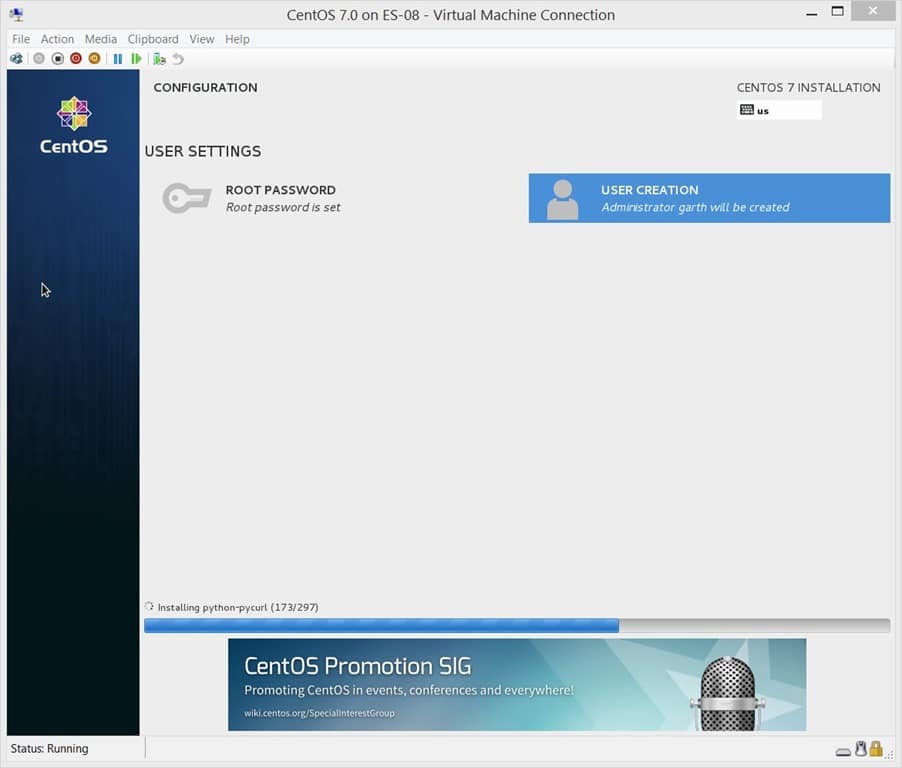
13. Wait while the CentOS 7 server completes the set-up.
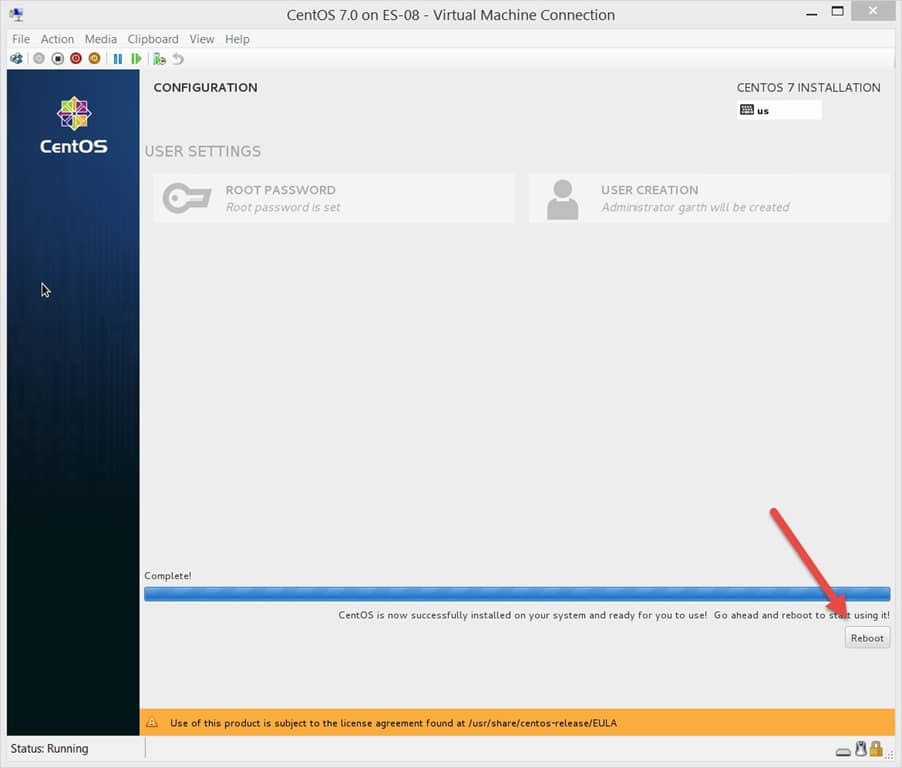
14. Once the configuration is complete, click Reboot.
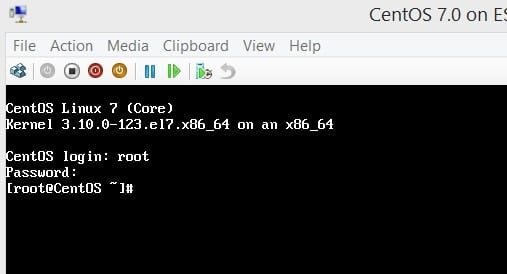
15. After the reboot, logon and you are done.


