Systems Management
Office 365 Deployment with ConfigMgr: Post 3 – Creating the Office Installer (advanced)
Topics: Systems Management
Office 365 Deployment with ConfigMgr
Post 3: Creating the Office Installer (advanced)
In the previous post on Deployment and Maintenance of Office 365 using Microsoft’s Endpoint Manager, Configuration Manager (SCCM), I walked you through the generic process to create an Office Installer Application using Configuration Manager. We also touched on the crazy amount of variations you might have to support.
In this post, we’re going to go over the magic of PowerShell and creating an XML file on the fly.
Basically, when you break down the XML [MS Docs], you get different elements that control the way Office is installed. If you understand these elements, you can treat them like “LEGO” bricks. As long as you know what you want to install, what you want to exclude, and how you want to control your installation process, you can build the XML during the deployment.
XML File
Let’s first look at an XML file and go over the sections:
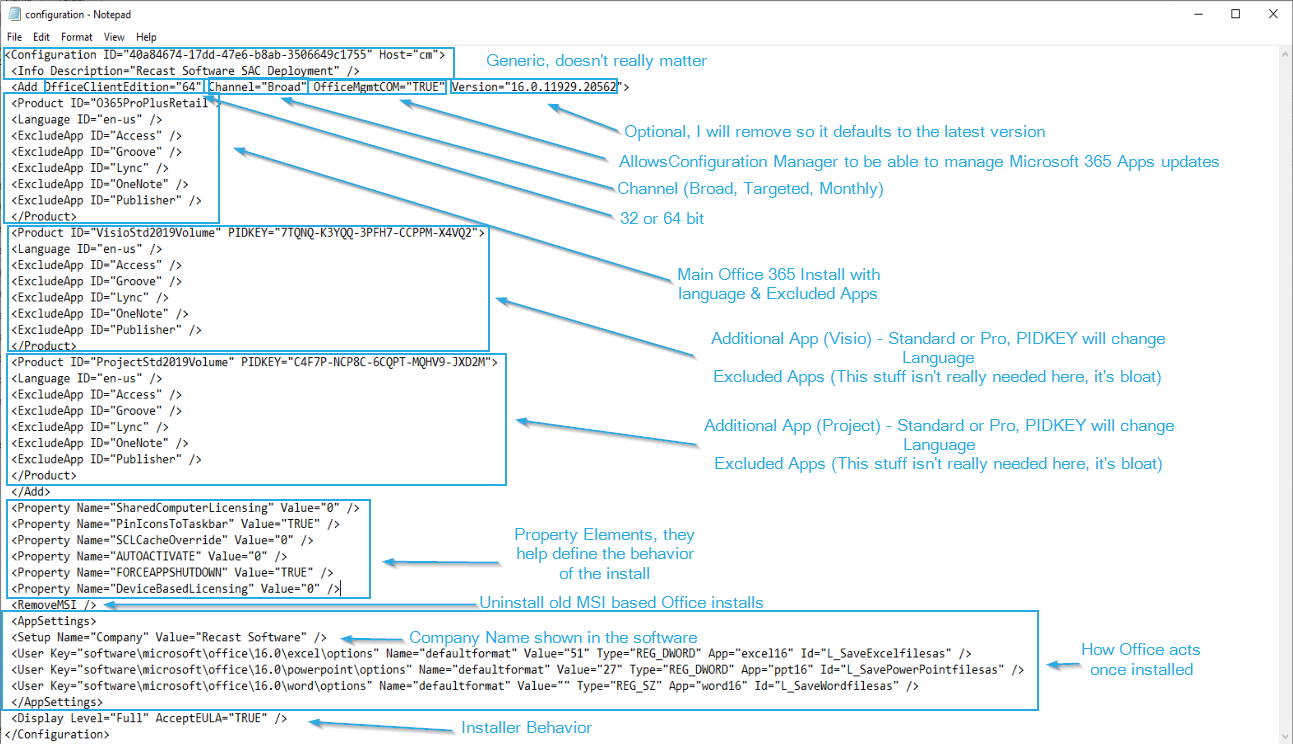
I’m going to let that sink in a bit. The XML file can be a bit overwhelming at first, but as you break down each section, you can see how it can be quite simple, and how you can then modify each section to fit your individual needs.
I referenced that Doc [MS Docs] constantly as I was building our deployments and I’d recommend you become familiar to know the options best for your organization’s deployment.
Use PowerShell to Create and Modify XML Configuration File
So, now that you understand the XML file, and the options you have, we can use PowerShell to create / modify or own XML Configuration File. I’m no developer, unlike my co-workers like Bryan, Mark & Chris, but I’ve managed to become very proficient at googling things and reading documentation. I first found this [MS Dev Blog], which proved my idea plausible, then I found an article [PowerShell Magazine] that explained how to modify XML, and it was enough to get me to my final solution.
My goal was to use one single installer script to install Office 365 in several different scenarios. While I’d still have to make several applications, the content would be identical and the install script would be the same, but just passed different parameters in the “Install Program”. We planned to use our installer to also reinstall Access, Visio or Project if they were previously installed, so we added detection into the script to check for currently installed Office Apps before removing them and installing the Office 365 versions. We also decided to have office install from a cache location that we created instead of the CCMCache. This idea was borrowed from Mike, read more info about it here.
Creating an XML file that is generic enough to start with, getting the basics that would be in your normal install of office, that you can then easily modify to accommodate all of your variations.
Lets dig into the PowerShell / XML : Script on GitHub – o365_install.ps1
NOTE: Since the time I took all of these screen captures, the script has already been updated to accommodate both Project & Visio Standard and Pro versions. Anytime you see Visio or Project in the screen captures, imaging “ProjectPro” or “VisioPro” or “ProjectStd” or “VisioStd”. This was done to accommodate those who needed to install either Pro or Standard.
Also, this script assumes you have the content in the same folder as the script. Later in this series I’ll be covering “Lessons Learned” where we actually broke out the content into it’s own Application and I’ll go deeper into the why and how it works. But for now, we’re going to keep it more simple.
The script starts with collecting information passed in through parameters, this allows us to use the same script / content for installing office in several flavors. Office w/ Access, w/ Visio, w/ Project, or any combo.

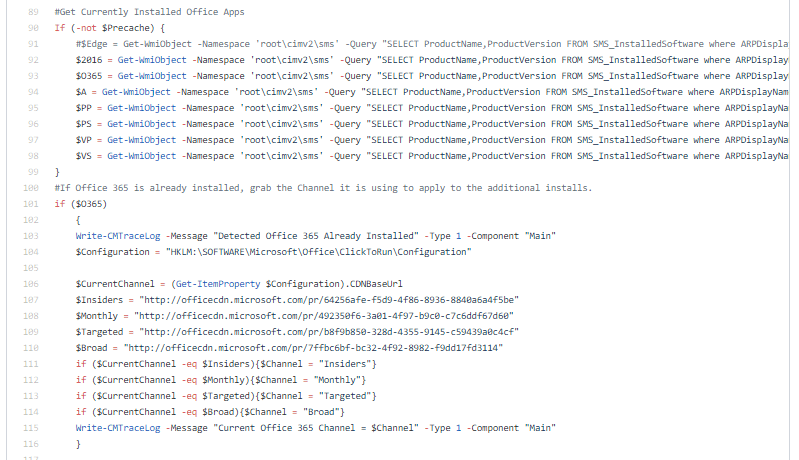
We then collect information based on previously installed versions of Office programs to know what to put back on in the case of an upgrade scenario. We also detect if Office 365 is already installed, in the case where you had Office 365, but now are adding Visio or Project, it would check the current Office Channel you are on, then install the additional apps using the same Channel.
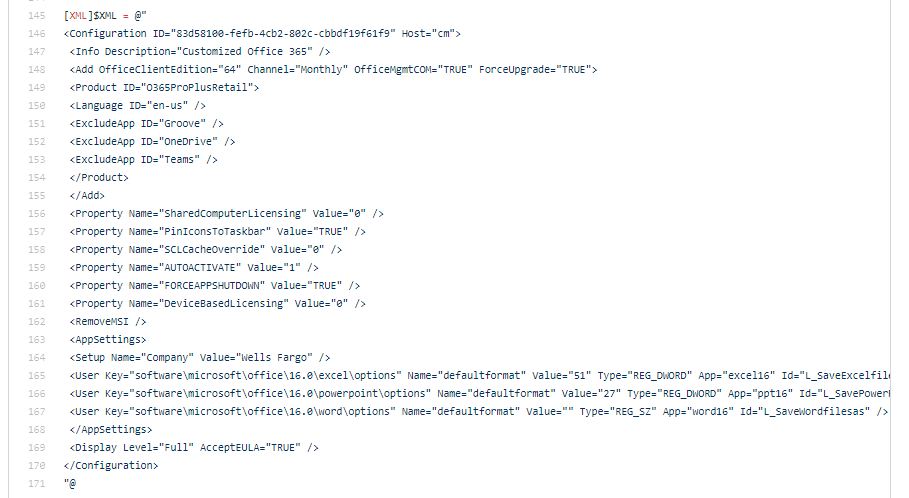
This first part is the generic XML that will be the base for all configuration XML files we use to deploy all variations of Office. You can see it has all the basic build blocks for the install. You’ll see many of the same building blocks from the config xml above that was created for us in the previous post.
Customize the Office Install
Then to customize the install, we inject additional XML content into that. Here is the code we use to change the Channel (Broad / Targeted / Monthly) but changing the $Channel variable via a parameter. It then gets injected into the XML.

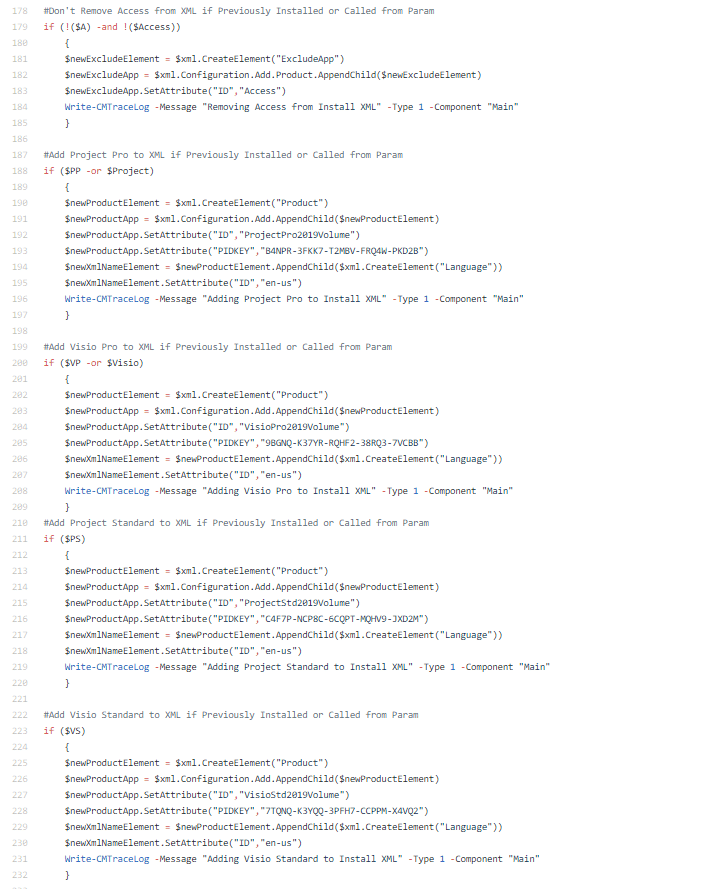
Here is how we add Visio / Project into the XML. These will be added into the XML based on a parameter fed into the script from the install command in the CM Application, or if the application was detected previously installed.
For Access, I have it add the “ExcludeApp” element into the OfficeProPlusRetail Prod XML, it will show up right under the other ExcludeApp IDs in that section. For Visio and Project I add another Project Element along with the required information.
Once we’ve created all of the XML settings, we can then build the full XML file:

Now that we’ve saved the XML File to our Install Cache, we call a “prep script” which helps clean up previous installs, then trigger the Office Setup (line 248 below). We capture the exit code and pass it back to CM. Also depending on the situation, we pass back different exit codes, like if the process had to uninstall Office 2016, we pass back a return code of 3010 instead of 0 to tell CM to reboot.
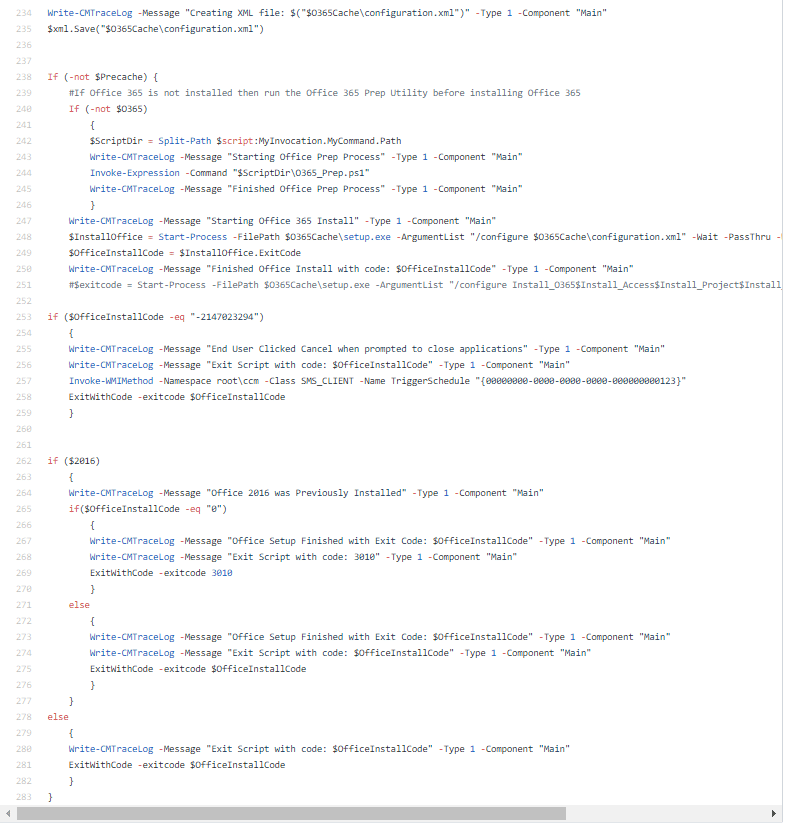
The entire upgrade is also logged using the Write-CMTraceLog function.
Set Up
Ok, so let’s set this up in CM. Basically add the scripts to the Content and replace the Install line:


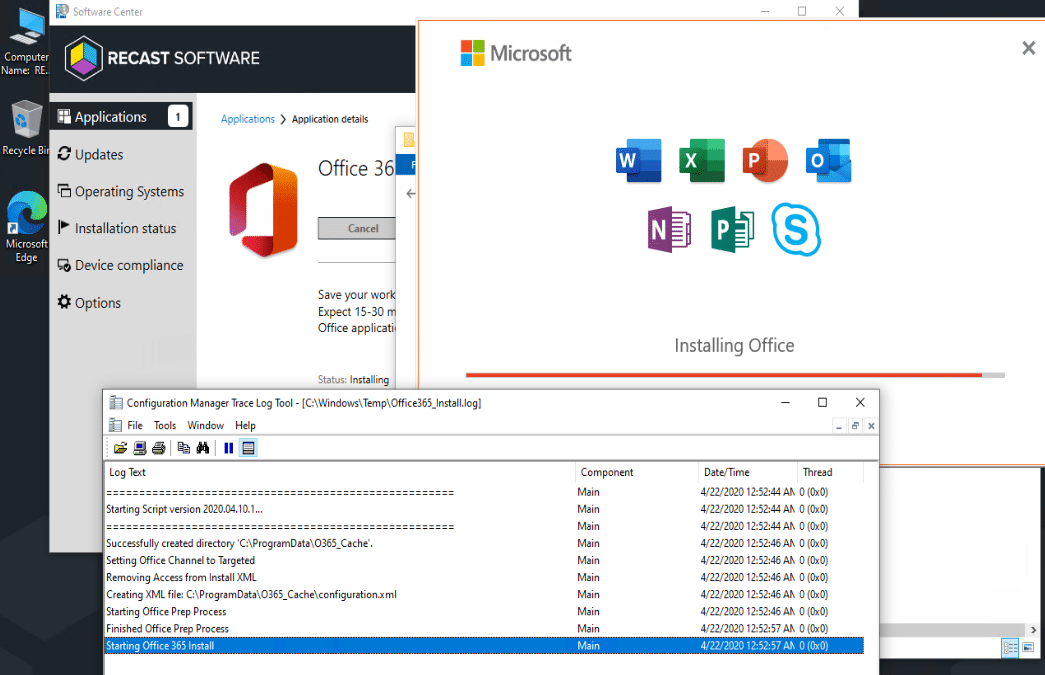
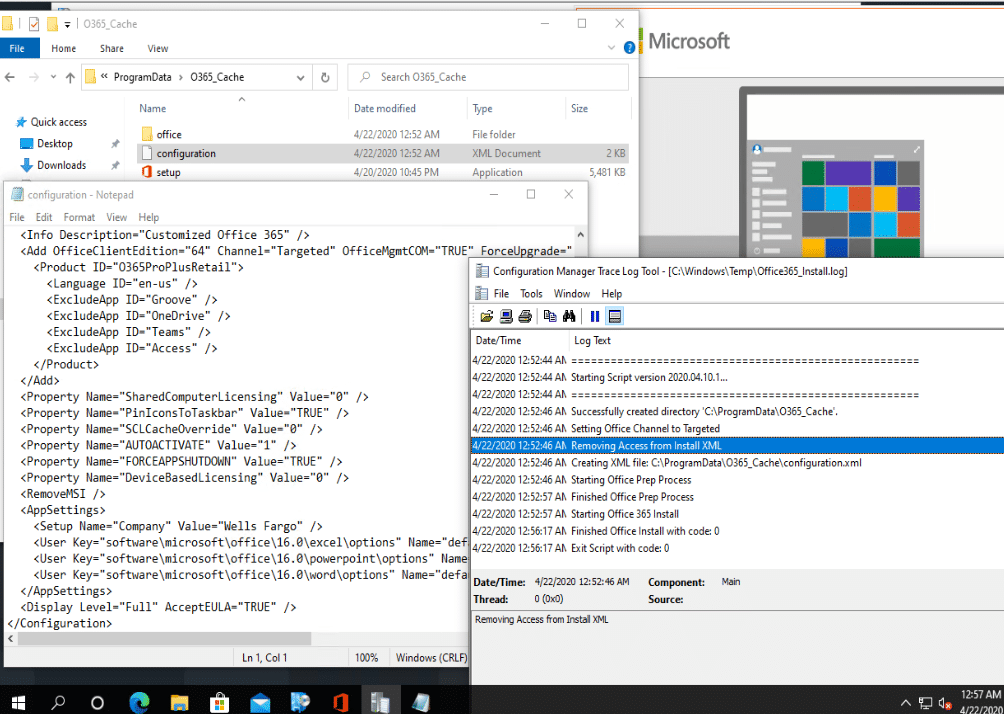
From the log, you can see the Channel was set properly by the passed in parameter, as well as the Access software was added to the ExcludeApp element.
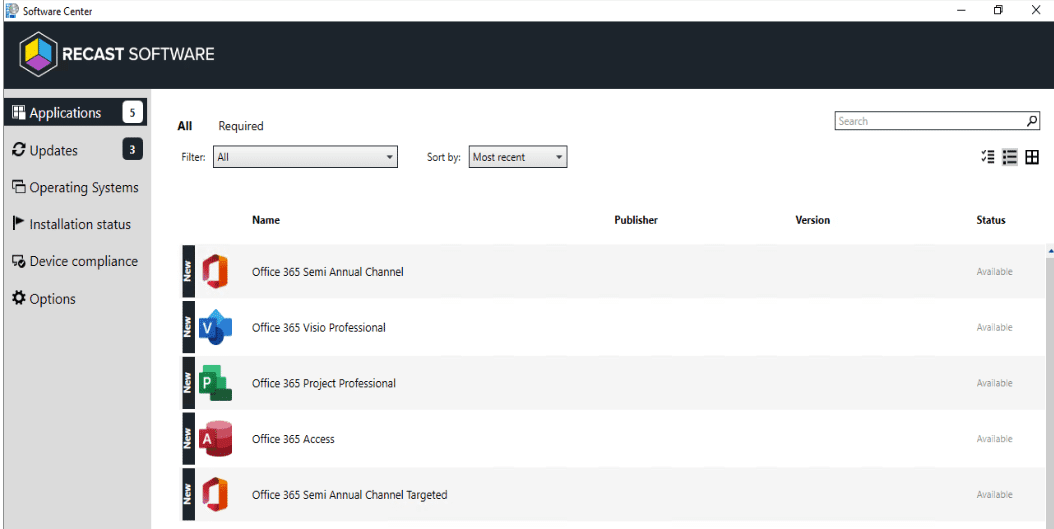
Each App is using the same Content Source. The Applications are just slightly different Install Command and Detection Method.
Adding Access
Let’s take a look at Access. Say someone wants to add Access to their base Office Install.
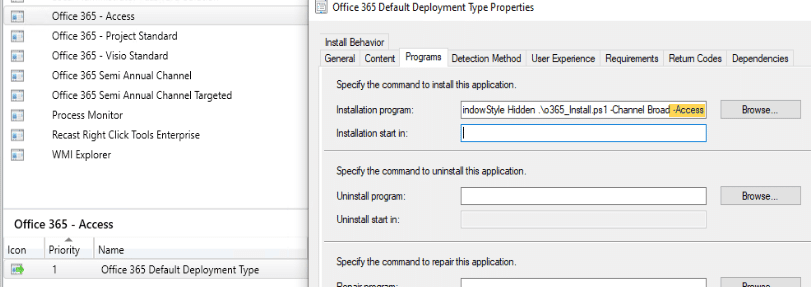
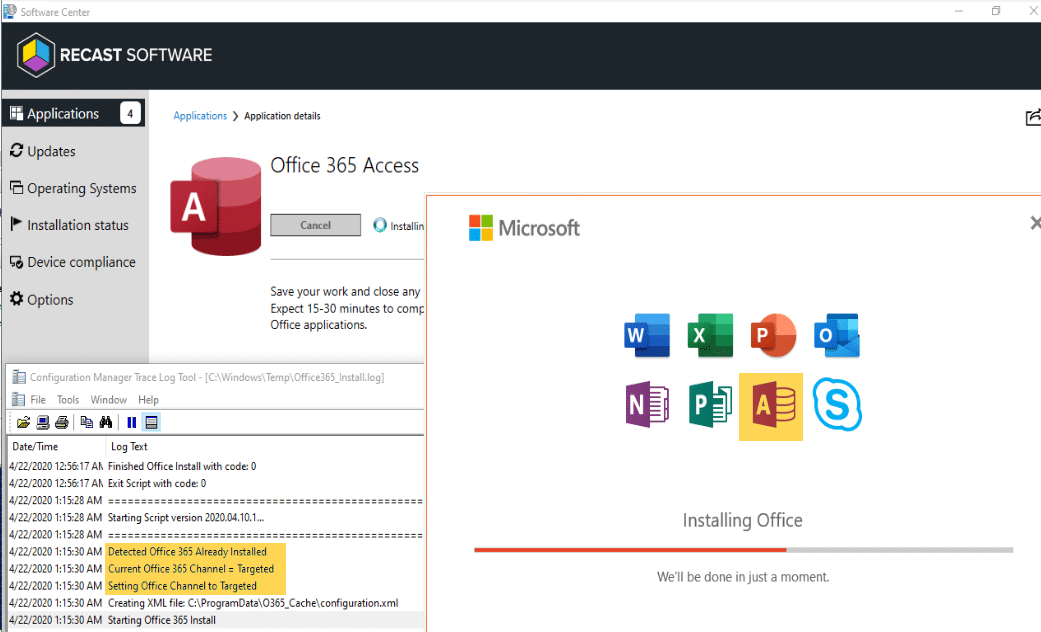
Same goes for Project & Visio, a quick modification to the Install Line, and you’re set.
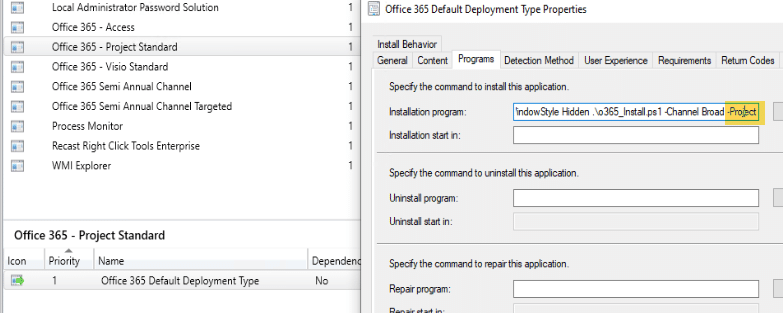

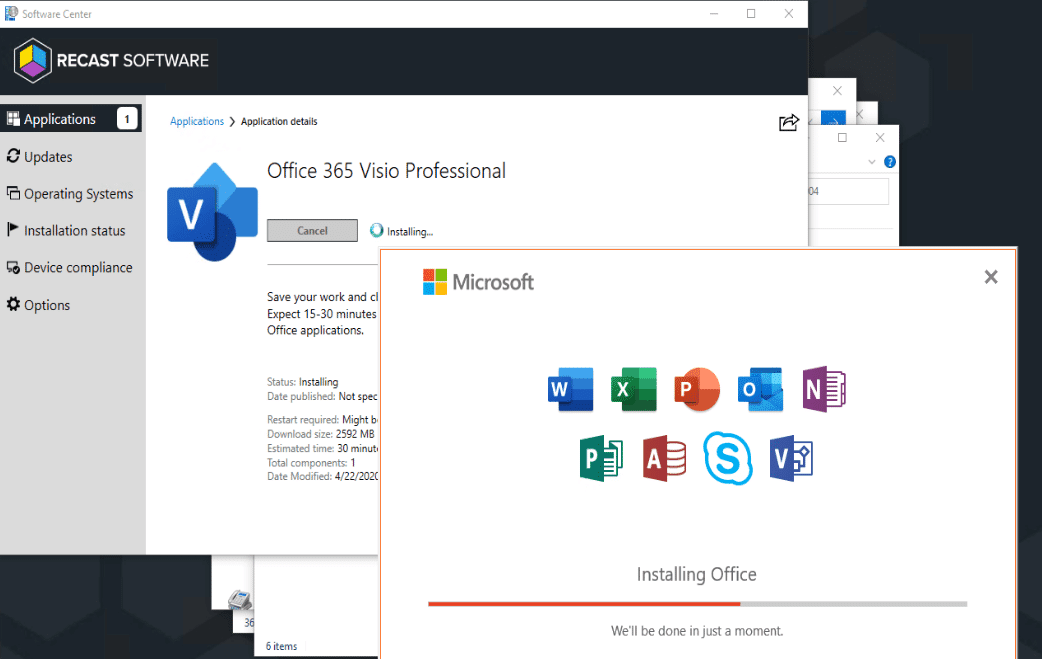
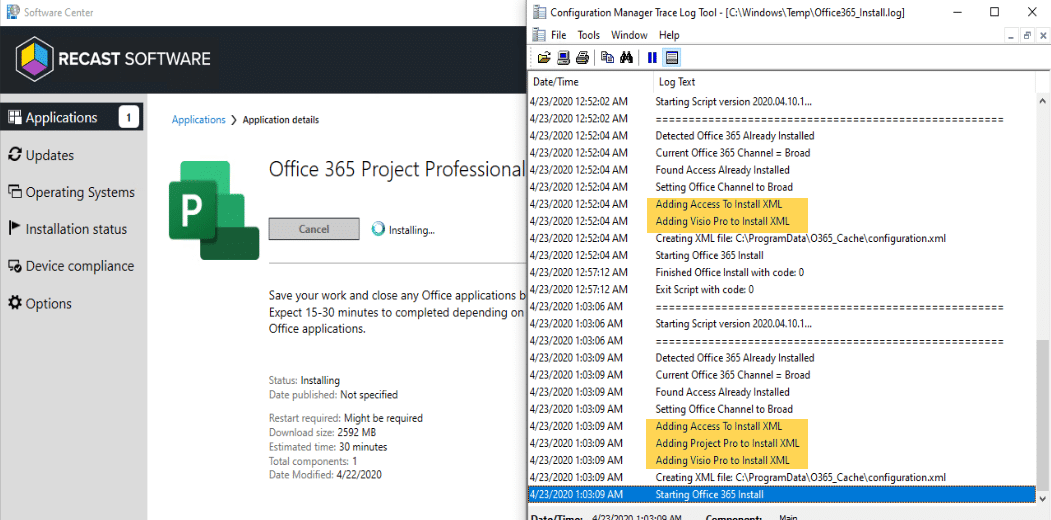
As I’ve shown, using a PowerShell script and building the XML file on the fly allows you to use one source folder and one install script to account for all variations of the installer. This makes maintaining it much easier as you only have one source to keep updated and ensures you’re using the same content for each deployment for better peer to peer / branch cache efficiencies.
Next Up
In the next post, we’ll cover some different deployment methods and how to change the Office Channel.
Office 365 Deployment Series with ConfigMgr
- Office 365 Deployment Series with ConfigMgr – Intro & PreReqs
- Office 365 Deployment Series with ConfigMgr – Creating the Office Installer – Simple
- Office 365 Deployment Series with ConfigMgr – Creating the Office Installer – Advanced – You are Here
- Office 365 Deployment Series with ConfigMgr – Deployment Methods
- Office 365 Deployment Series with ConfigMgr – Office Updates / ADR
- Office 365 Deployment Series with ConfigMgr – Channel Info


