Endpoint Insights
How to Insert a ConfigMgr Report Description
Topics: Endpoint Insights
How to Insert a ConfigMgr Report Description
Oftentimes I get my best ideas for blog post topics from you! This time is no exception. In this blog post I’ll walk you through the process of how to create a report description.
Before getting started, though, I’ll show you what I’m talking about. Notice how the description box is closed in the image below?
Simply by clicking on the word, “Description,” I am able to reveal a short summary about this report (below).
You probably already knew that, but now I’ll show you how to create a report description yourself!
How to Insert a Custom ConfigMgr Report Description
I’ll start by adding this feature to one of the Endpoint Insights reports. I’m going to add the report’s description just above the line (green arrow) within the report.
First, after opening the report in SQL Server Data Tools (SSDT), I will move the line and the pie chart down a few spots on the report canvas.
Next, I’ll drag a table to the report canvas. Notice the Header and Data rows within this new table? You will use these details in the next step.

Select the Data row (as shown highlighted above) and then right-click on it. Point to Row Group and then select Delete Group.
Select Delete group and related rows and columns and then click OK.
Notice that the header row is now gone from the table.
There’s no trick to this part, simply format the table as you want to see it when it is expanded. In this case I made the first cell 1-inch wide and the second cell 7-inches wide. I highlighted the cell in the above screenshot to make it more visible.
Next select the description cell. This cell will be your toggle item for the full text report description cell. Make note of the name of the text box listed under the Properties window. In my case it is Textbox31.
Next select the full text report description cell. In the Properties box on the right, scroll down until you find the Visibility section.
Change Hidden to True and InitialToggleState to True. Finally set the ToggleItem to your text box. That’s the one you located in the previous step. In my case it’s Textbox31.
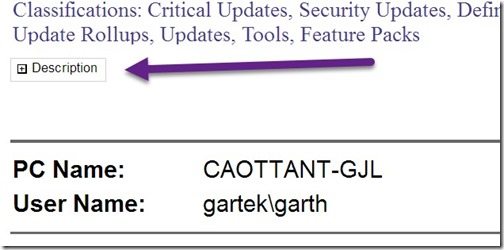
Now if you preview the report, you will see that you can click on the Description box and the report’s description will be displayed.
With that last step you are done! Sure you might want to adjust the borders, etc., but that’s essentially it.
Insert Custom ConfigMgr Report Descriptions
The idea for this blog post came from two customers who use the Endpoint Insights reports for the “hard stuff,” but also create their own “easy” reports. Thank you for sharing your thoughts.
If you have any questions, please feel free to contact me @GarthMJ.


