Systems Management
How to Enable WMI Logging in Windows
Topics: Systems Management
This is one of those things that you will ALMOST never use or care about until it personally effects you. There is a long story behind why I was looking at WMI logs, but the short version is that a client needed help with a custom WMI script that they wrote. If I wanted to track down the problem, I had to enable WMI logging. It turns out that enabling WMI logging is easy to do once you know where to look, so in this blog post I will show you the steps.
Warning: It goes without saying that this is NOT something that you should enable and then leave enabled! It consumes a fair amount of CPU and diskspace, so I recommend that you only enable it while troubleshooting. Definitely don’t forget to disable it once you are done.
How to Enable WMI Logging in Windows
First, open Event Viewer. Yes, I said Event Viewer and not WMI Control. I know this sounds counter-intuitive, but who said everything must be logical? By the way, there are two different WMI logging options. The first one is on Event Viewer and the second one is a more traditional log file. I am going to talk about the Event Viewer WMI logging option first.
Event Viewer
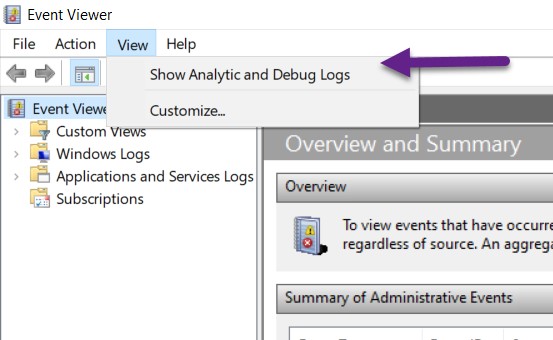
After opening Event Viewer, in the tool menu, click on the View tab and then click on Show Analytic and Debug Logs.
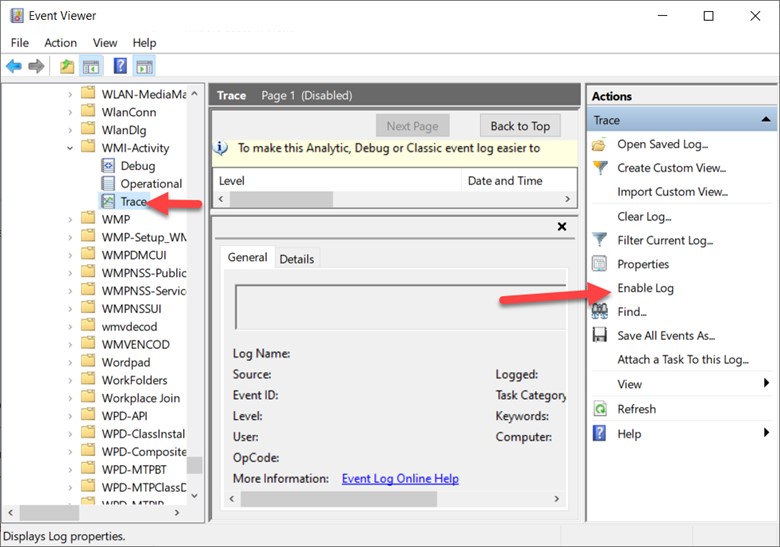
Expand Applications and Services Logs/Microsoft/Windows/WMI-Activity, and then click on Trace (red arrow). Next, in the Actions pane, click on Enable Log (red arrow).
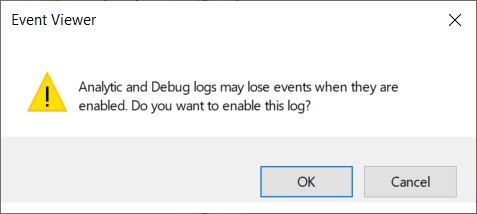
Finally, click on the OK button and, that is it! Now that you know how to enable WMI logging, you can troubleshoot any WMI issues.
How to View the WMI Event in Event Viewer
Now that logging is enabled, you can see each event within Event Viewer. This also means that all standard Event Viewer filter options are available to review the WMI logging.
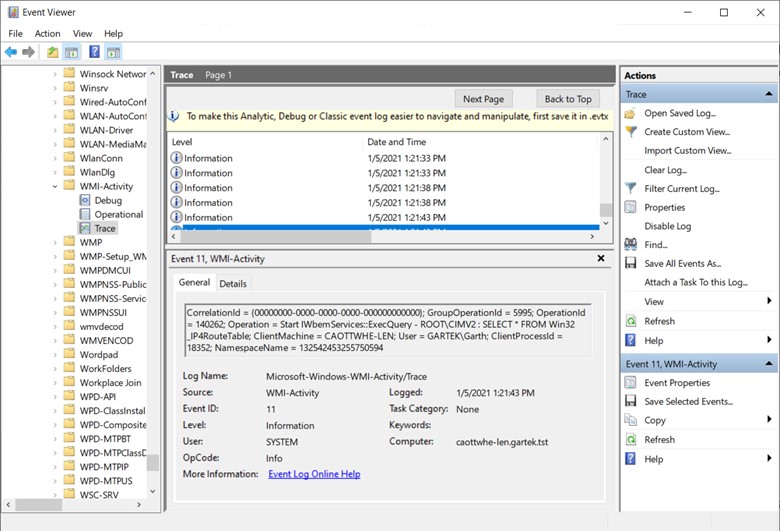
Above is a sample screenshot of what you will see once WMI logging is enabled.
How to Disable WMI Logging in Event Viewer
Again, please make sure that you disable WMI logging in Event Viewer after you are finished troubleshooting.
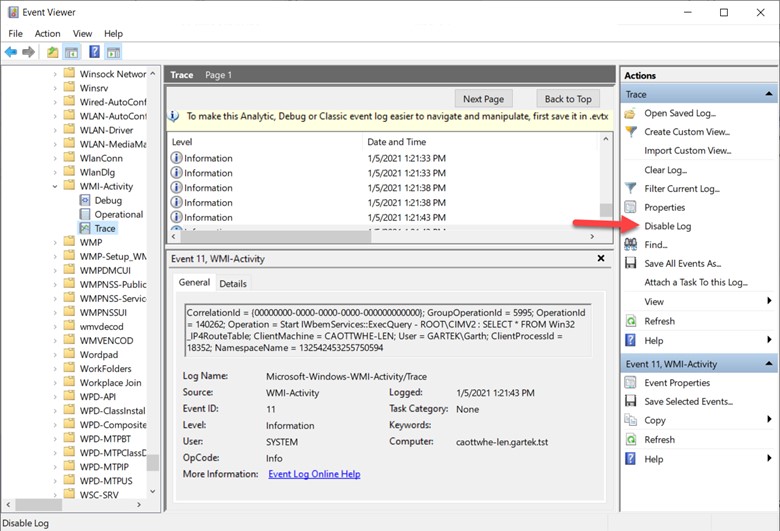
Simply click on the Disabled Log link and you are done.
Log File

There are no big tricks about how to enable WMI logging when you use this method. First, open the Registry Editor (Regedit) and browse to ComputerHKEY_LOCAL_MACHINESOFTWAREMicrosoftWbemCIMOM. On the Logging attribute, change the value from 0 to 2.
The values are:
0 – No Logging/Disabled
1 – Log Errors Only
2 – Verbose Logging
Where is the Log File?
In the screenshot above, you can see where the logs are stored (Logging Directory) %systemroot%system32wbemLogs.
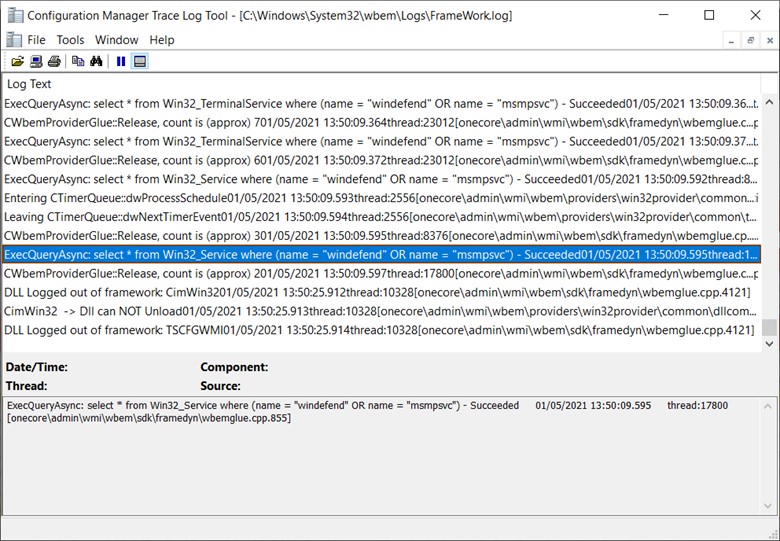
Next, I open the logs with CMTrace. Above is another example of what you will see. If you’d like to know more details about CMTrace, please see my blog post What is CMTrace?
How to Disable WMI Logging
Again, please remember to disable WMI logging once you are done troubleshooting. I can’t emphasize this point enough. In this case, all you do is change the logging attribute back to 0.
Additional WMI Information
If you have any questions about how to enable or disable WMI logging in Windows, please reach out to Recast Software.


