


In this guide, we’ll explore how to use Liquit Deployments during Autopilot on Windows devices, enabling your end users to access all necessary applications through the Liquit platform. While this process is tailored for Autopilot, with a few modifications, you can deploy the Liquit agent and its deployments via other deployment mechanisms.
Prerequisites
If you want to use SSO with Entra, ensure that Entra ID is configured as your Identity Source. If not, please follow the instructions at Microsoft Entra ID – Identity Sources to set it up.
This process will walk through the following:
- Liquit Bootstrapper
- Certificate, for Agent based registration
- Agent.json (sample below)
- Liquit Deployment
- In the world of Liquit, deployments are the pillar of the imaging process for both virtual and physical devices. Think of a deployment as a carefully orchestrated sequence of packages. But Liquit packages are not just for installing applications. They can also include driver installations, registry key settings, or even a combination of all these elements. This flexibility makes Liquit a powerful tool for managing your IT environment. The term ‘Deployments’ in this sense can be ambiguous in IT contexts. For this guide, ‘Deployments’ refers specifically to the section in the Liquit server labeled ‘Deployments.’
The steps outlined here were derived from both trial and error and Liquit documentation, particularly the Liquit Agent Bootstrapper deployment with Intune. While these are the steps I followed, your environment may require different settings and customizations. Please consult the documentation for a complete list of settings for your JSON file.
Note: This guide focuses on configuring the Liquit bootstrapper and agent settings, not Autopilot.
Step-by-Step Guide to Liquit Deployments
Begin by logging into your Liquit portal. We’ll start by configuring and downloading the necessary components. First, you should create a new device collection that meets different criteria, as we call filters in Liquit. In most organizations, devices are prefixed by Intune, for example use that as a filter in combination with System Manufacturer and System Model. This way we have limited the deployment to Intune only. Secondly, create your deployment, which is a collection of packages you intend to deploy to a machine during agent installation.
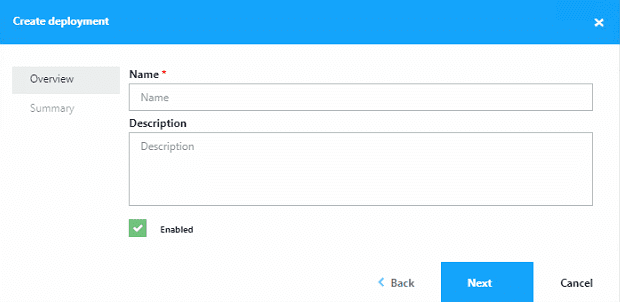
- Create your deployment in Liquit.
- In Liquit > Manage > Deployments.
- Click Create.
- Enter a name for your deployment and Click Next.
- In Liquit > Manage > Deployments.
- Click Finish
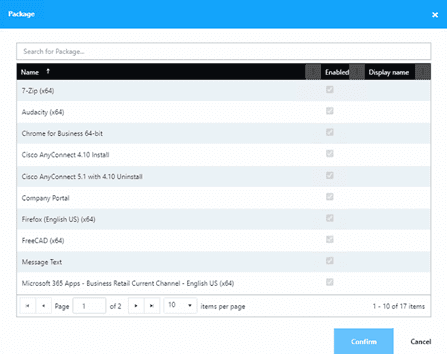
- Once the properties load, proceed with the following steps.
- Click Packages.
- Search for and add any packages that you would like for this deployment, be sure to specify the “Install” action.
- Click Assignments.
- Be sure to add an assignment for the new collection you created above.

Now we will move on to getting the certificates needed for the agent installation.
Certificates for Liquit Deployments
- Certificate-based registration is recommended for optimal device registration. The following steps ensure a smooth process.
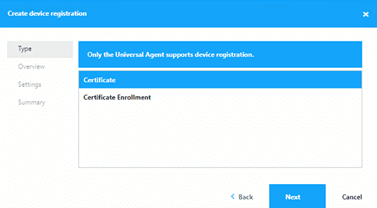
- In Liquit < Manage < Device Registration, follow the below steps:
- Click Create.
- Keep the “Certificate” section highlighted and click Next.
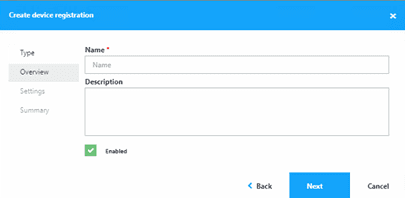
- In Liquit < Manage < Device Registration, follow the below steps:
- Name your Certificate and click Next.
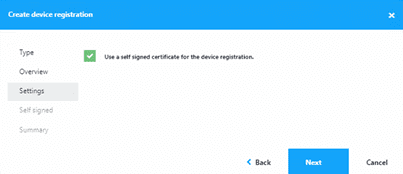
- Select the box for Use a self-signed certificate for device registration and click Next.
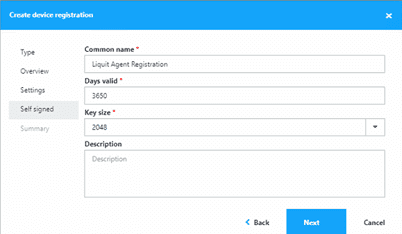
Give your certificate a name, validity period, and key size. If desired, add a description, then click Next.
- Click Finish.
- When the properties come up, click on Settings.
- On the right-hand side, click the button for Download for agent registration button.

- Save this file for use when creating the Intunewin file.
- Export out the three certificates from the Liquit Server and Certificate Management. This may be different from your environment. We need to establish that trust chain between your client and our Liquit server.
- IIS Cert you used.
- CA Cert for that IIS Cert.
- Liquit Self-Signed Cert.
- Create three profiles in Intune, one that pushes out the above three certs to devices in their root store Create trusted certificate profiles in Microsoft Intune | Microsoft Learn.
Download and Create Required Files
- Create a folder on your C: drive (or any folder you choose) to store all the downloaded files.
- Navigate to Support – Liquit and download the Agent Bootstrapper and save it in the above folder.
- Log in to your Liquit server and click on your user picture in the right-hand corner and click the link to download the agent. Once downloaded, save to above folder, and rename to Agent.exe.
- Copy the downloaded certificate file from above to the same folder.
- Use Notepad++ (or your choice of editor) to create a Json file named “agent.json” and save it to that same folder.
- Create your Json file. At the end of this document is the Json file that I used that you could copy and modify according to your own settings. I’ve highlighted the areas that require modification. Review the remaining settings to determine if further customization is needed.
- The Zone will be your zone that you have created.
- The certificate thumbprint will be from the certificate you downloaded in Step 1.
- The deployment will be the name of the deployment you created in Step 2.
- The identity source will be the name of the Identity source you have created for SSO.
- The trusted zone is where you would enter your zone name. This can be multiple zones if you have more than one.
- Create your IntuneWin file and create your app in Intune.
- Follow the documentation guide from Liquit Agent Bootstrapper deployment with Intune to create and upload your package to Intune.
- Add ‘/certificate=”AgentRegistration.cer”’ to the install command line so that it copies the certificate you uploaded into the right location so that agent can register correctly with Liquit.
- Change the command line for the log to a location that is easily accessible. I used C:WindowsTemp as my log file location.
- Modify the detection method so that instead of using the provided script, you hard code it to look in c:Program FilesLiquit Universal Agent.
- Deploy as required to your autopilot or other devices.
Achieving a Functional Autopilot Deployment with Liquit Deployments
There are a lot of benefits of using Liquit for the deployments, these include:
- Consistent Application Delivery
- Ability to deliver virtual apps in same manner as normal applications
- Ability to delivery custom settings
By following these instructions, you should achieve a fully functional Autopilot deployment of applications during device provisioning or initial agent installation.
Note: There are different ways to host Liquit. We offer SaaS, or it can be self-hosted, either on-prem or in the cloud. If self-hosting, ensure port 443 is open on your Liquit server to facilitate communication with clients. After deployment, a device reboot is required to allow the agent to exit deployment mode and restart as a normal process.
Additional Note: This guide focuses on deploying Liquit on Windows devices. A separate guide for deploying on macOS devices will be published soon.
Happy deploying!
Example agent.json
{
  "zone": "https://donnyvanderlinde.liquit.com/",
  "registration": {
    "type": "Certificate"
  },
  "login": {
    "sso": true,
    "identitySource": "DonnyFunny"
  },
  "deployment": {
    "enabled": true,
    "context": "Device",
    "autoStart": {
      "enabled": true,
      "deployment": "Lab Deployment",
      "timer": 30
    }
  }
}