


Azure Logic Apps provide an easy way to build scalable workflows that integrate apps, data, services, and systems. Logic Apps are designed for cloud-based and hybrid integration, making it simple to automate tasks and business processes across different platforms. In this blog post, I’ll walk you through creating your first Azure Logic App.
Requirements for Creating an Azure Logic App
- An Azure tenant.
- Access to the Azure portal (you can sign up for free here).
In the Function App tutorial, I showed you how to build it directly in the browser using the Azure portal. Similarly, you can also build Logic Apps in the browser, and I recommend using the portal for this as well.
Step-by-Step Guide to Creating Your First Azure Logic App
To create your first Azure Logic App, follow these steps:
Open the Azure Portal
- Navigate to the Azure Portal and log in with your Azure credentials.
Create a Logic App
- In the portal, click on Search and Search for Logic App.
- Select the Logic apps service.

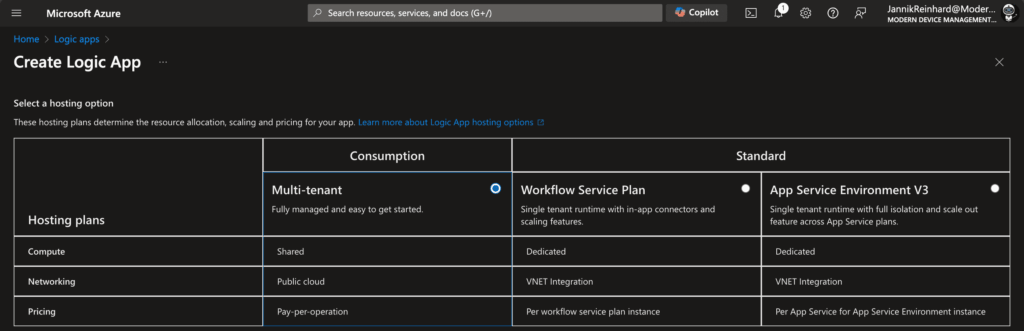
Select the Plan
Select the plan you want to use. For beginners, I recommend the Consumption Plan.
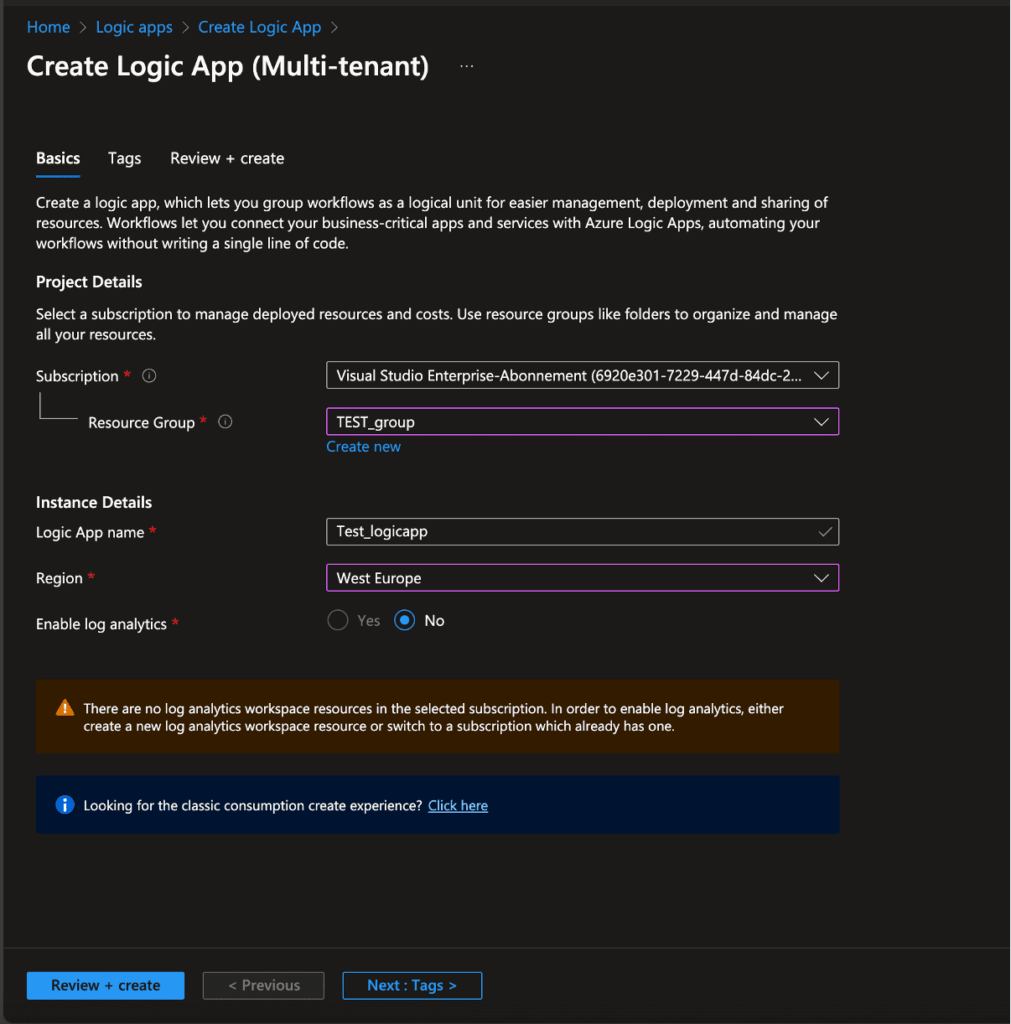
Configuring Your Azure Logic App
- Choose a Resource Group or create a new one.
- Provide a name for your Logic App (for this example, we will use “Test_logicapp”).
- Select your preferred Region.
- Click Review + Create, then click Create to deploy your Logic App.
Defining Your Azure Logic App Workflow
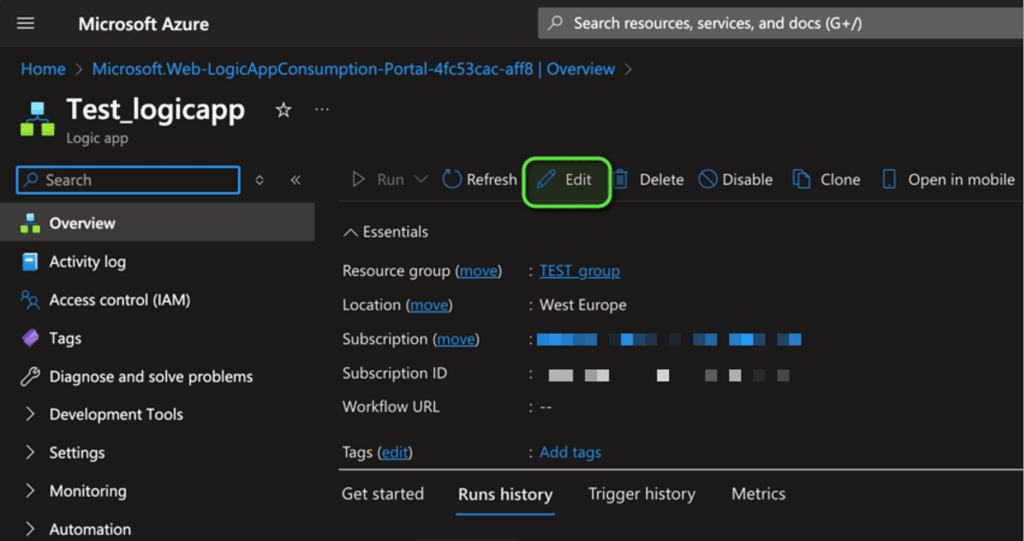
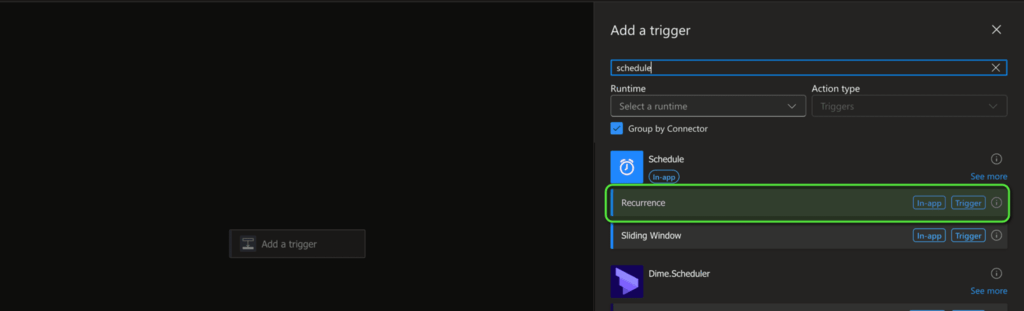
After the deployment completes, navigate to the newly created Logic App resource. Click Edit to define your workflow. You will start by selecting a Trigger for the workflow.
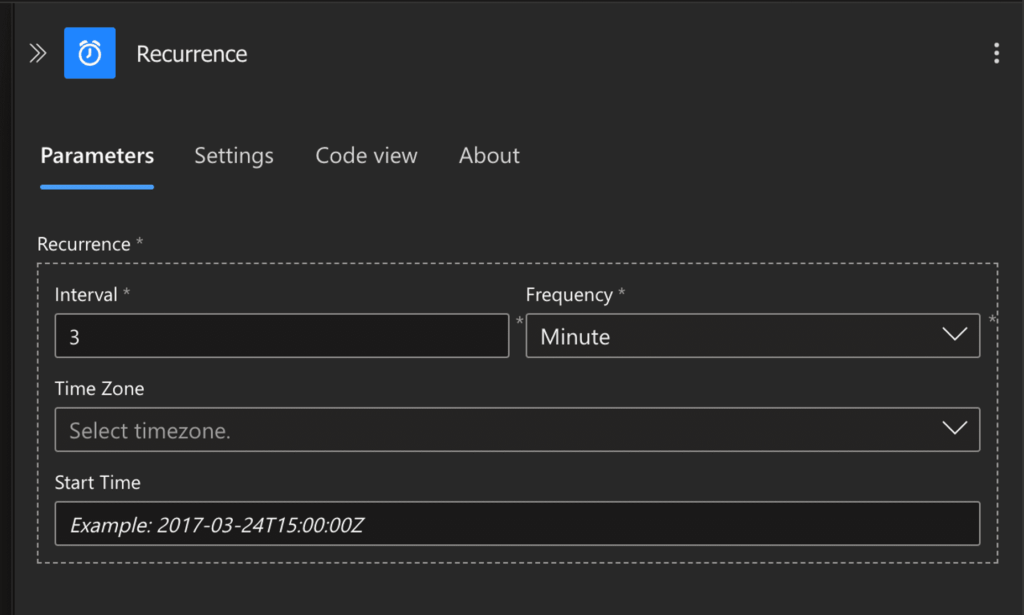
Select Recurrence as the trigger. This will allow us to trigger the Logic App in a defined interval.
Here you can configure the interval parameter.
Add an Action
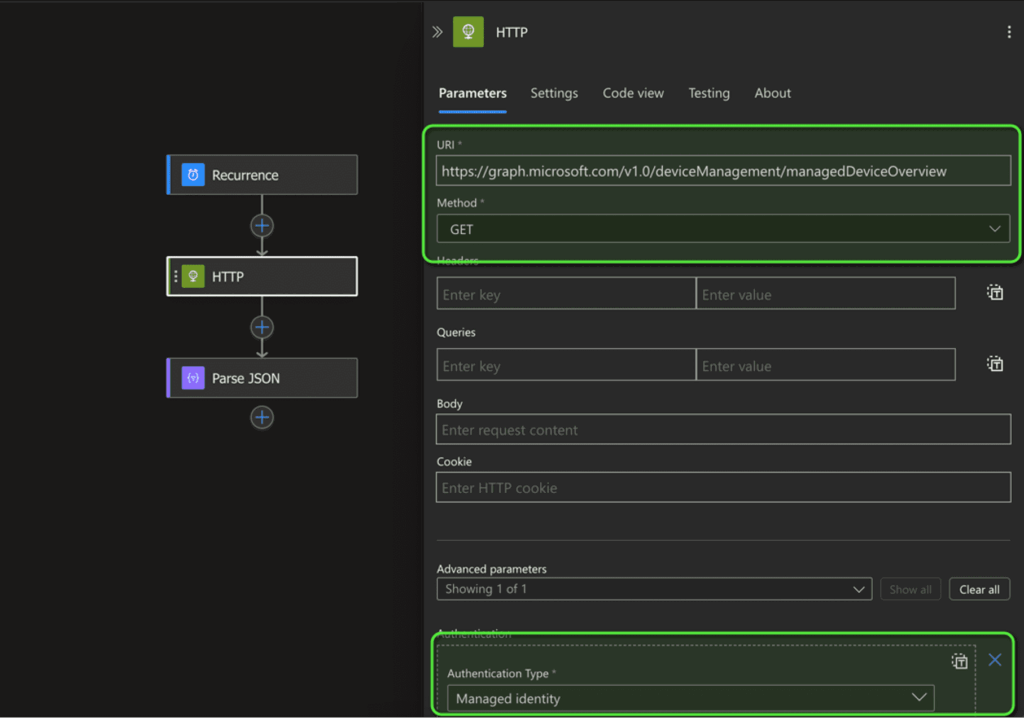
Now that the trigger is set, we need to define an action. For this example, we will send a daily email with the count of your devices.
- For this, we need an HTTP action where we add the following Graph URL as a GET request:
Add Permissions
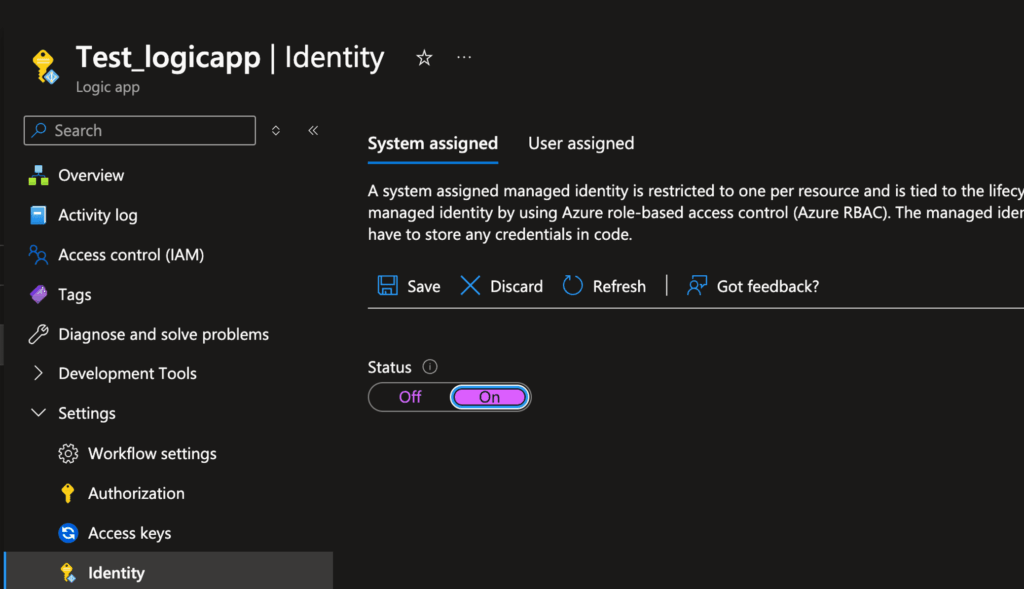
Once this is done, we also need to add permissions to our managed identity to make this Graph call. This must be done in the Logic App settings under Identity. Here, you have to turn on the system-assigned identity.
You can do this with the following script in Azure PowerShell:
Install-Module Microsoft.Graph -Scope CurrentUser
Connect-MgGraph -Scopes Application.Read.All, AppRoleAssignment.ReadWrite.All, RoleManagement.ReadWrite.Directory
$managedIdentityId = "Managed Identity Object ID"
$roleName = "DeviceManagementManagedDevices.Read.All"
$msgraph = Get-MgServicePrincipal -Filter "AppId eq '00000003-0000-0000-c000-000000000000'"
$role = $Msgraph.AppRoles| Where-Object {$_.Value -eq $roleName}
New-MgServicePrincipalAppRoleAssignment -ServicePrincipalId $managedIdentityId -PrincipalId $managedIdentityId -ResourceId $msgraph.Id -AppRoleId $role.Id
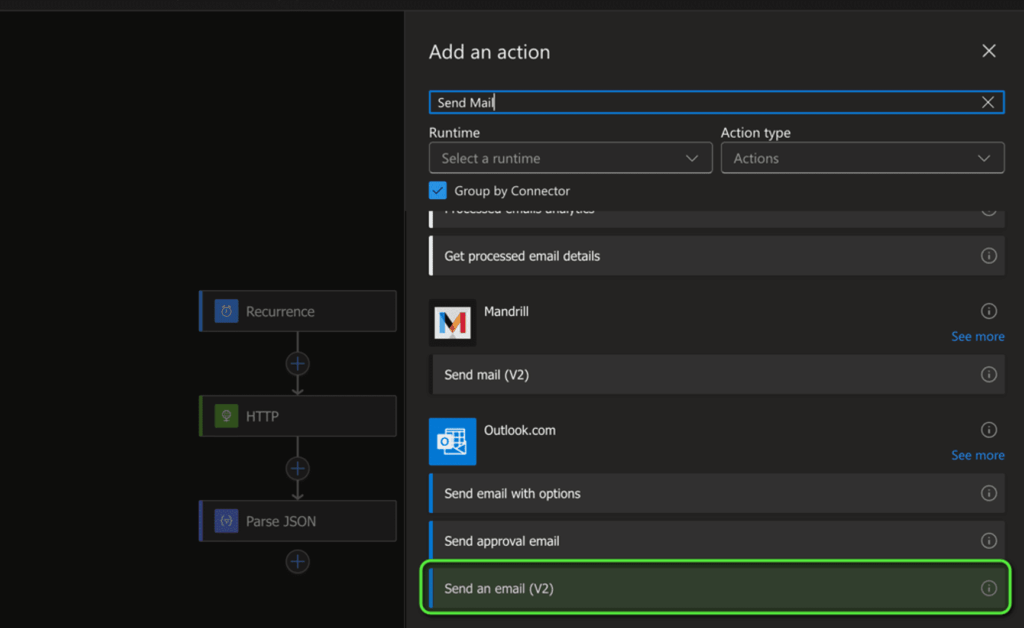
Disconnect-MgGraph Parse the Output and Send the Mail
Next, we have to parse the JSON so that we can use it in the email. To do this, add a JSON parser like this:
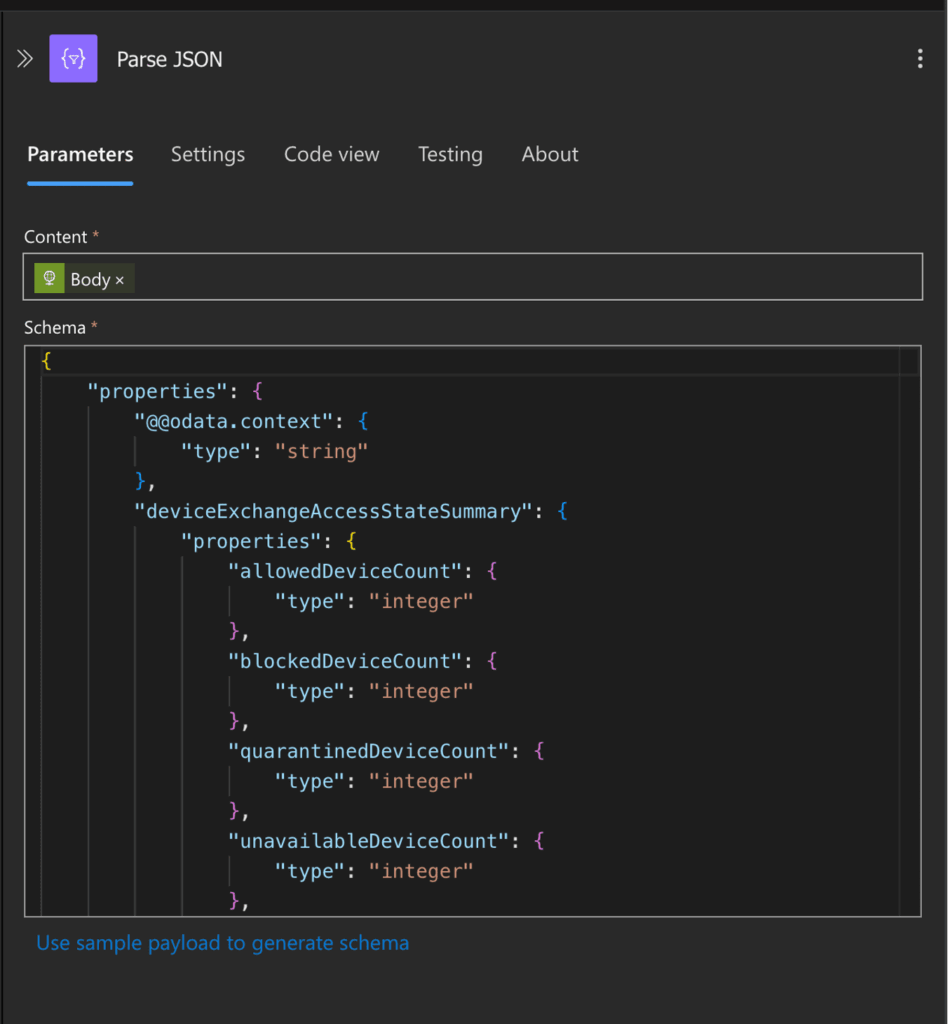
Click on “Use sample payload” to generate a schema from the results of a call to this API in the Graph Explorer, for example.
Once this is done, add the “Send an email (V2)” action and format the text as you like.
Finalizing and Running Your Azure Logic App
Save your Logic App. Once saved, your app is ready to be tested and will be triggered regularly.
This blog shows you how easy it is to build your custom automations without writing a single line of code. This is a very simple example, but you can extend it infinitely.