Application Management and Patching
Enhancing Workspace ONE UEM with Application Workspace Deployments
In this post, I’m excited to walk you through how to use Application Workspace Deployments during provisioning using Omnissa Workspace ONE UEM (Unified Endpoint Management), now part of the Omnissa platform and formerly known as VMware Workspace ONE UEM. This respected Mobile Device Management (MDM) solution also excels in Unified Endpoint Management (UEM), acting as a counterpart to Microsoft Intune. Leveraging the powerful Application Workspace platform will help you offer your end users all the applications and settings they need.
In a nutshell, both Omnissa Workspace ONE UEM and Microsoft Intune are robust MDM/UEM solutions. Each solution has unique strengths, particularly in ecosystem integrations.
So, let’s get started and explore how to make the most of Application Workspace Deployments with Workspace ONE UEM, ensuring your end users have everything they need when they need it.
Understanding Application Workspace Deployments
Although it’s possible to deploy the Application Workspace Agent and kick off a deployment from any deployment mechanism or MDM solution with minimal effort, in the world of Application Workspace, deployments are the pillar of the imaging process for both virtual and physical devices. Think of a deployment as a carefully orchestrated sequence of packages. But Application Workspace packages are not just for installing applications. They can also include driver installations, registry key settings, or even a combination of all these elements. This flexibility makes Application Workspace a powerful asset for managing both virtual and physical devices
Prerequisites for Application Workspace Deployments
To get started, make sure you’ve set up Microsoft Entra ID as your Identity Source. If you haven’t configured it yet, don’t worry—just follow the step-by-step instructions provided in the Microsoft Entra ID – Identity Sources guide. This setup is essential for a smooth experience, so double-check before moving forward!
What else is needed:
- Application Workspace Agent Bootstrapper: A powerful tool that assists in installing or updating the Application Workspace Universal Agent and optionally running a deployment after installation.
- Certificate (if using agent certificate-based registration): If you are using agent certificate-based registration, you will need a certificate. Alternatively, you can use credentials instead; in this case, a self-signed certificate for device registration will be used.
- Agent.json file: This file should be configured with the deployment part, specifying which deployment to kick off after the agent is installed and activated. Check out the documentation for a full list of settings you can use to create your JSON file.
- Note: Keep it straightforward—only include the options you need. If you’re fine with the default values, you can leave them out to keep the JSON file cleaner and easier to manage!
- Application Workspace deployment: The one specified in the Agent.json. Check out the documentation for a full list of settings you can use to create your JSON file.
A Complete Walkthrough of Application Workspace Deployments
In Application Workspace, there are three key aspects to consider for a successful deployment. Each of these will be addressed below, along with step-by-step video tutorials.
Setting Up Self-Signed Certificates
For the best device registration experience, it is advisable to use certificate-based registration. The steps outlined below will help facilitate a seamless process.
Creating a Device Collection
Create a new device collection that meets various criteria—known as filters in Application Workspace. In most organizations, devices are prefixed by Workspace ONE UEM; for example, you can use that as a filter in combination with System Manufacturer and System Model. This way we have limited the deployment to Workspace ONE devices only. Additionally, if an IT admin accidentally reuses the Agent.json from the Workspace ONE UEM deployment for a Citrix/AVD environment, there will be no impact.
Configuring the Deployment
In this example, only a few packages have been added, but there can certainly be more, including packages with specific settings such as setting the background or moving the Start Menu to the left. In the deployment, a basic set of packages can be defined that are necessary for everyone in the organization. The device collection that was created earlier will be used here for assignments.
Step-by-Step Guide for Omnissa Workspace ONE UEM
A step-by-step guide on how to use the Application Workspace Deployment using Ominssa Workspace ONE UEM:
Download and Create Required Files
- Log in to Application Workspace
- Open your web browser and log in to Application Workspace.
- Download the Device Registration Certificate
- Go to Manage > Device Registrations.
- Double-click on the certificate that was created earlier.
- Go to Settings and click on Download for agent registration.
- Save it in a folder you can access later.
- Download the Agent Bootstrapper
- Download the Agent Bootstrapper from the official website and save it in the same folder as the Device Registration Certificate.
- Prepare the Agent.json File
- Place the Agent.json that was created earlier in the same folder as the files above.
- Create a ZIP File
- Go to the folder where you saved the necessary files.
- Select all the files and create a ZIP file.
Log in to Workspace ONE UEM Console
- Access the Console
- Open your web browser and navigate to the Workspace ONE UEM console.
- Enter your credentials to log in.
Navigate to the Apps & Books Section
- Go to Apps & Books
- Select Applications and then Native.
Add Application
- Click on Add Application.
- Choose the platform (Windows) for which you are deploying the application.
Upload the ZIP File
- In the Upload section, click on Upload and browse to the location of your ZIP file.
- Select the ZIP file and upload it.
Configure Application Details
- Fill in the necessary details such as Name, Version, Description, and Category.
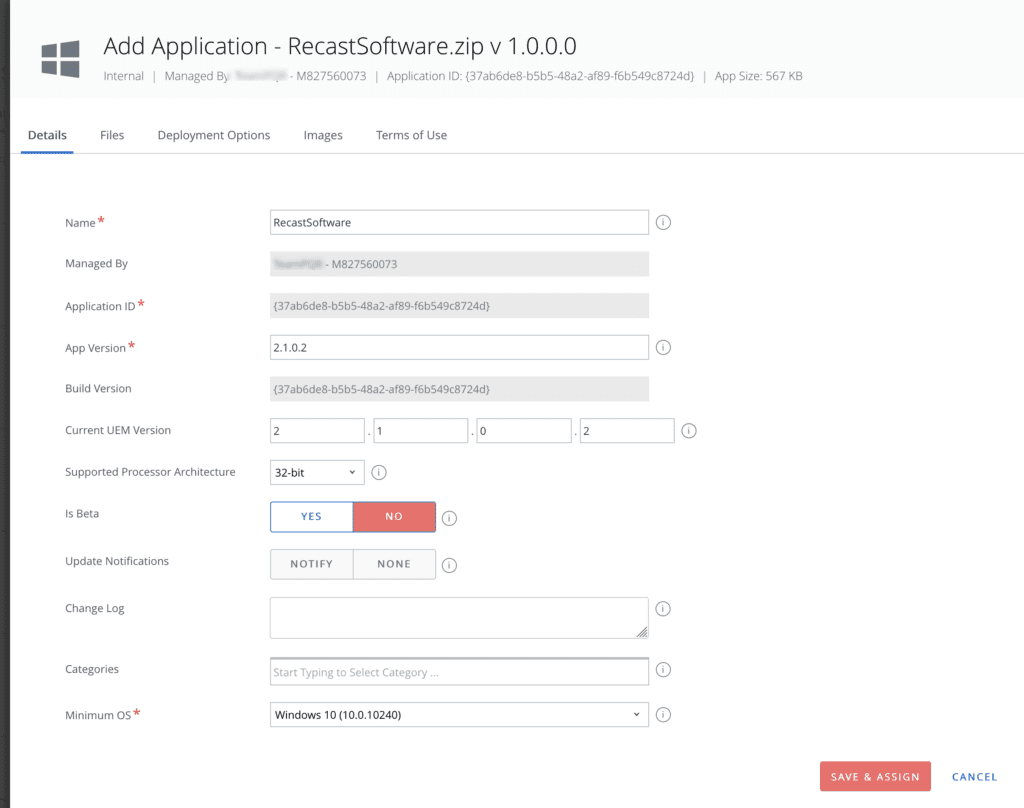
- Configure any additional settings required for your application
- Go to the Files tab.
- Choose Custom Script at Custom Script Type.
- Add the following to the Uninstall Command Line:
AgentBootstrapper-Win-2.1.0.2.exe /uninstall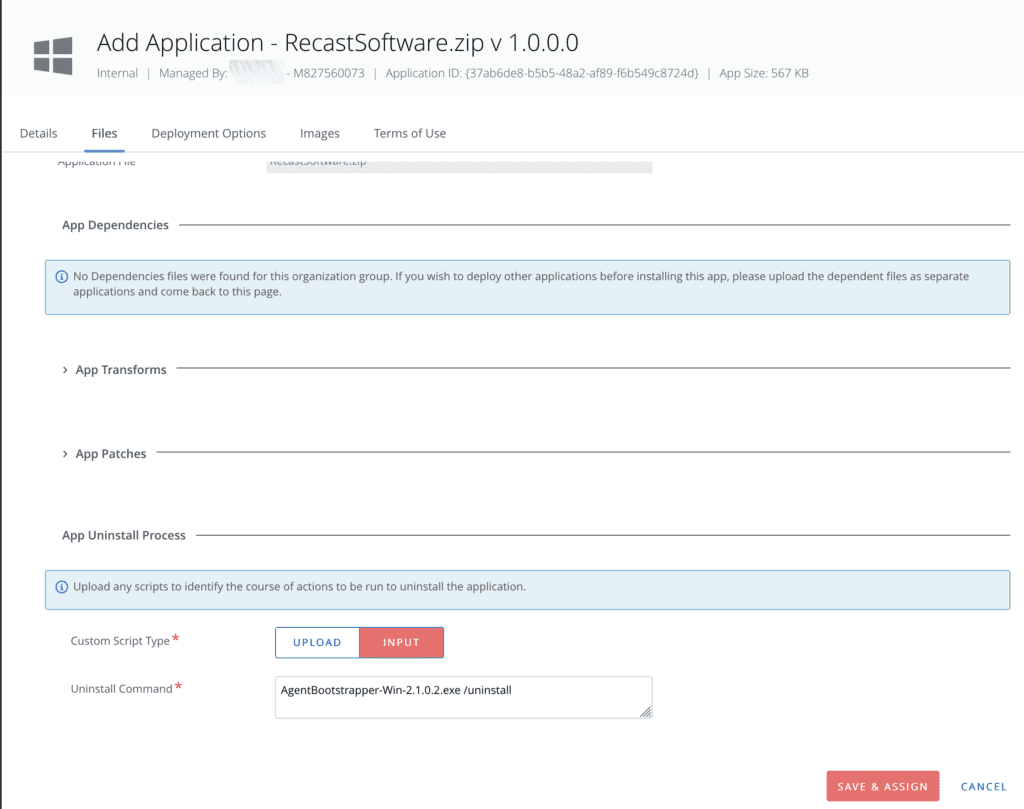
- Go to Deployment Options Tab and set necessary settings
- Add the following to the Install Command Line:
AgentBootstrapper-Win-2.1.0.2.exe /startDeployment /waitForDeployment /logPath=.\Install /certificate=.\AgentRegistration.cer- Set Admin Privileges to Yes.
- Use the MSI GUID to check if the app exists at the Identify Application By option.
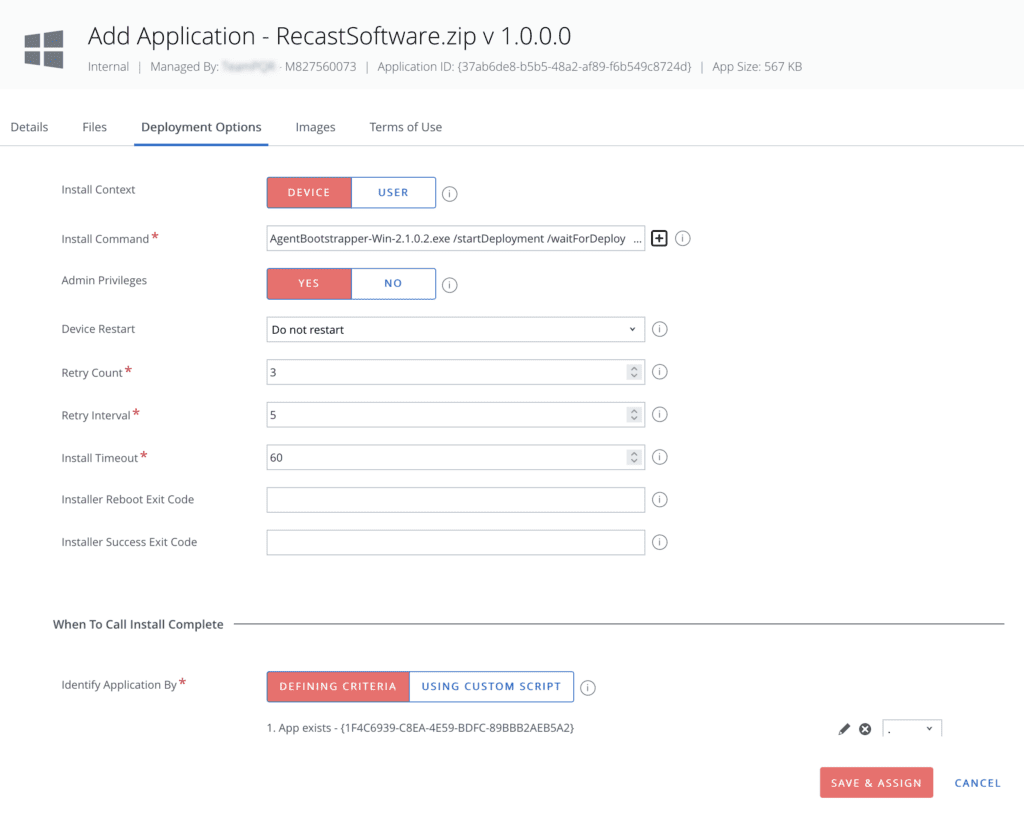
- Click on Save & Assign.
Assign the Application
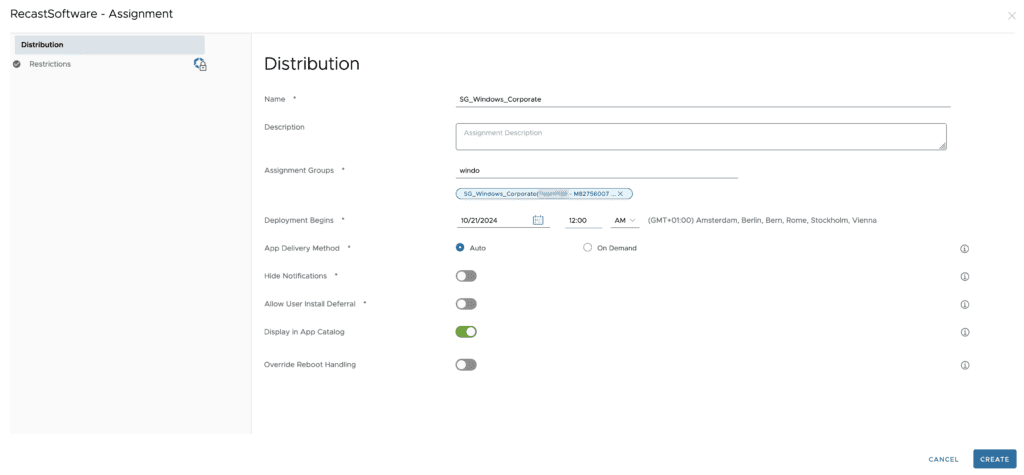
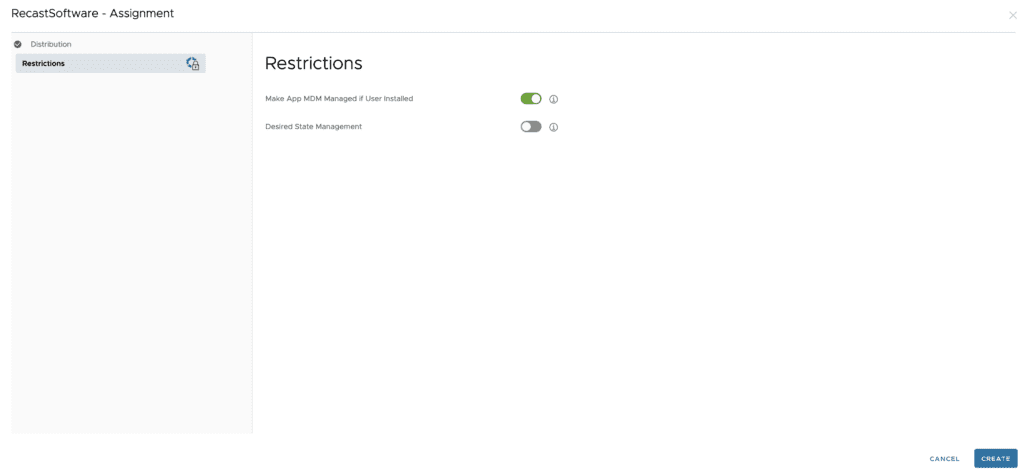
- Go to the Assignment tab.
- Select the Assignment Groups to which you want to deploy the application.
- Configure the deployment settings such as Push Mode (Auto or On-Demand).
Save and Publish
- Review the settings and click Save & Publish.
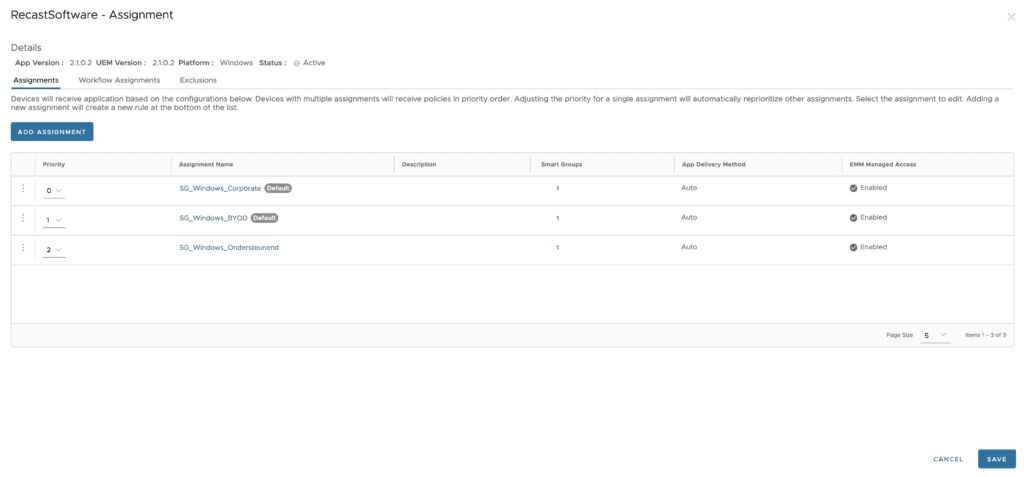
- The application will now be deployed to the selected endpoints.
Monitor Deployment
- You can monitor the deployment status from the Devices section.
- Check for any errors or issues and ensure the application is successfully installed on the endpoints.
Happy deploying!


