ConfigMgr
How to Manually Create a System Management Container for ConfigMgr
Topics: ConfigMgr
Manually Create a System Management Container for Configuration Manager
In my last blog post, I showed you how to apply permissions to an already existing System Management container created by ConfigMgr.
Two Methods to Create a System Management Container
There are two schools of thought about the best way to create a System Management container. The first school of thought recommends that the Active Directory (AD) Administrator produces the System Management container and then permissions are applied to it.
However, it is the second school of thought which I prefer. In this option, the AD Administrator allows the Configuration Manager (CM) site server to generate the System Management container itself. Then, the Admin adjusts the permissions to its final state.
This second method is a two-step process:
- Step 1 – Apply permissions to the System container, and then the CM site server creates the System Management container.
- Step 2 – Remove the permissions on the System container and apply the permissions to the System Management container.
I prefer this two-step method. Why? It ensures that Configuration Manager creates exactly what it wants, regardless of language settings, etc. And, it also helps to prevent typos.
How to Manually Create a System Management Container
Below are steps that you can follow in order to manually create a System Management container for use by any version of Microsoft Configuration Manager.
1. Logon to your Domain Controller (DC) using an account that is within the Schema Admins group.
2. Launch Active Directory Users and Computers.
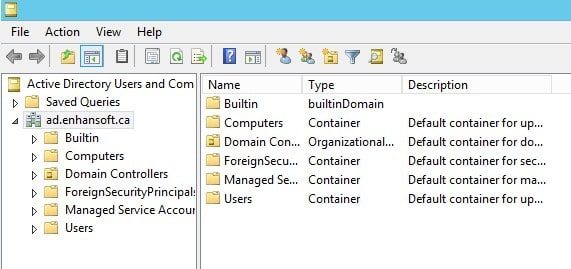
3. Notice that there are only 6 containers under ad.www.enhansoft.com and that the System container is not listed.
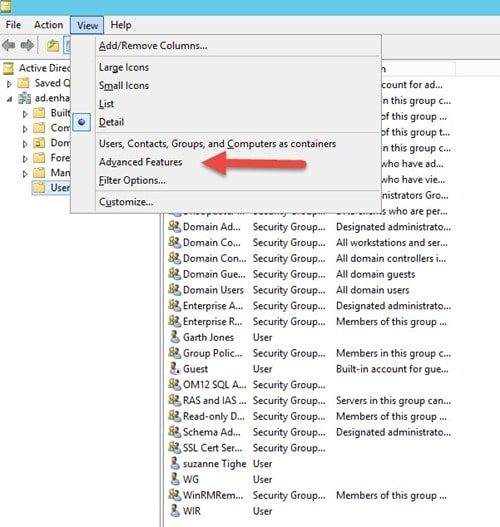
4. Click the View menu item and select Advanced Features.
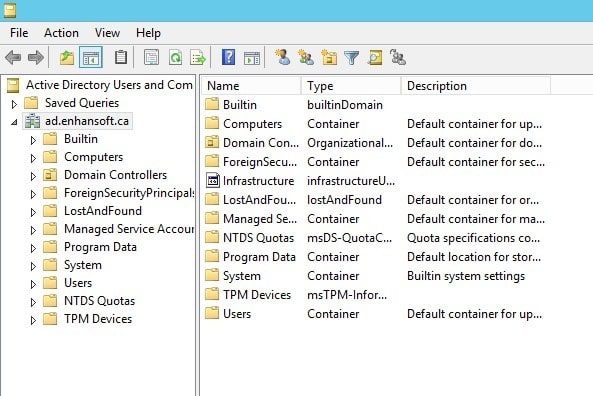
5. Notice that there are 11 containers under ad.www.enhansoft.com and that the System container is now listed.
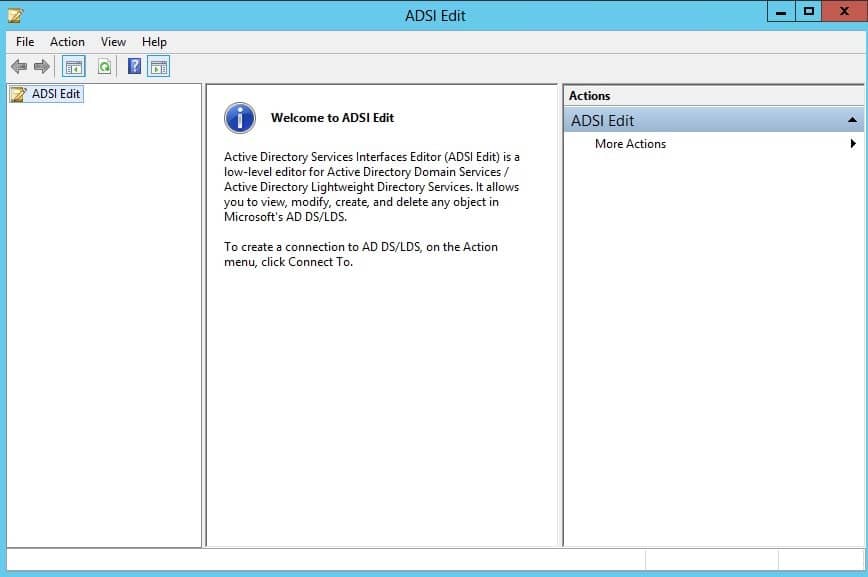
6. From the desktop, launch ADSI Edit.
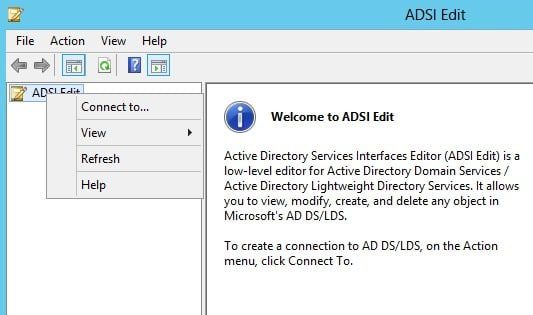
7. Right-click ADSI Edit and click Connect to…
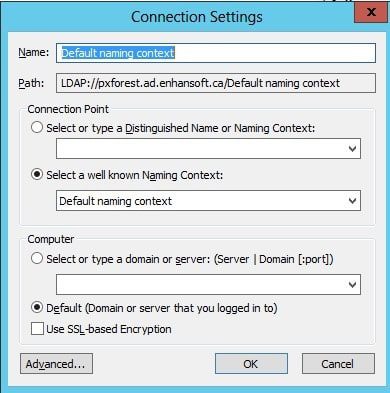
8. Accept the defaults, and click OK.
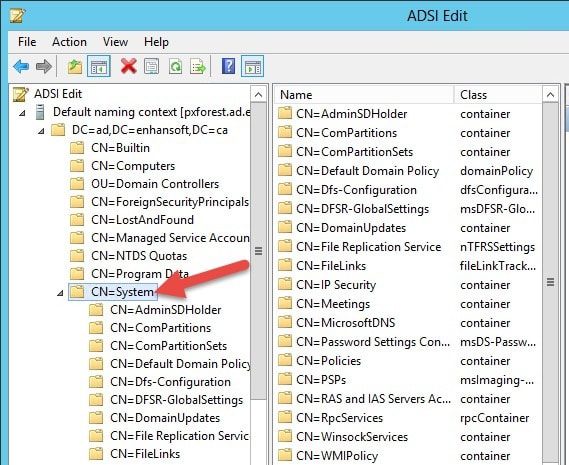
9. Expand the tree until the System container is displayed.

10. Right-click and point to New, and then click Object…
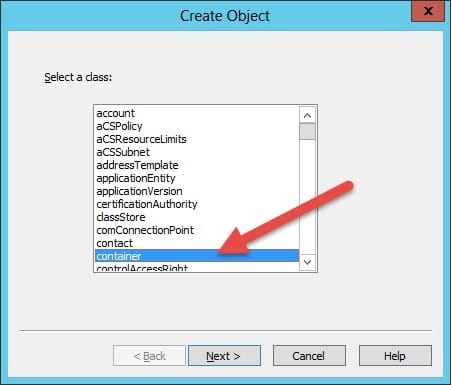
11. Select container and click Next.
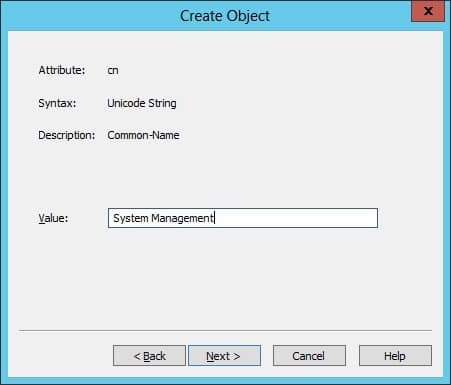
12. Enter System Management and then click Next.
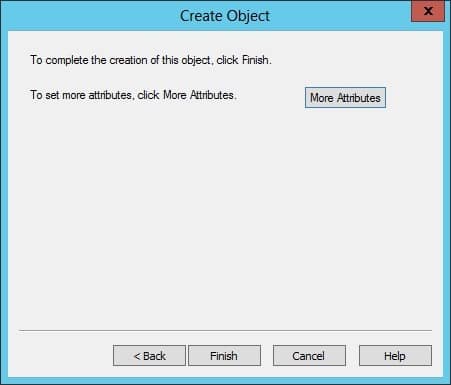
13. Click Finish.
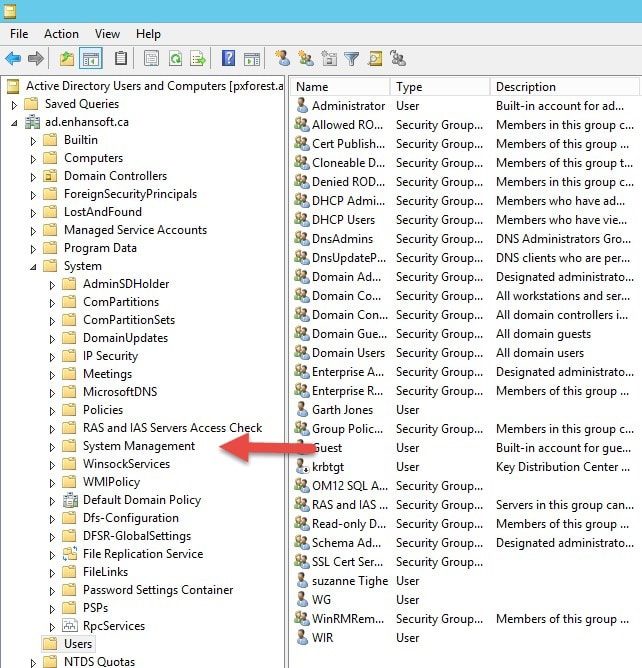
14. Back in Active Directory Users and Computers, refresh the System container. Notice that the System Management container is listed, and also notice that the containers are NOT listed in alphabetical order.
Additional System Management Container Posts
- System Management Container AD Security Rights
- Once the System Management container exists you can then apply permissions to it as I defined in this post.


