ConfigMgr
Configuration Manager Deployment Test #2
Topics: ConfigMgr, Systems Management
Configuration Manager Deployment Test #2
Deploying an Application
In yesterday’s post, “Configuration Manager Deployment Test #1,” I indicated that there are two ConfigMgr deployment tests that should be performed if you have any doubts about the health of your ConfigMgr environment. The first test, demonstrated yesterday, ensures that the basic software deployment process is working correctly. This procedure, however, does NOT test the deployment of source files to a Distribution Point (DP) and then the source file deployment to a ConfigMgr test client. This is where Configuration Manager Deployment Test #2 comes into play.
In today’s test, I will show you how to create a package and program with a small application, deploy it to your DPs, and then deploy it to your test computer. When this test is completed it will prove the functionality of the site server, Management Point (MP), DP, and ConfigMgr test client by showing that all are working as expected.
Choosing a Test Application to Deploy
What application should you deploy? It doesn’t really matter, but I always like to use something small in order to quickly complete the whole process. In this case, I will create a package and program that will copy CMTrace to the %windir% directory. The batch file will be called install.bat and it consists of a single line:
copy %~dp0cmtrace.exe %windir%
Yes, I know that this command line in the batch file could be done within the program execution line, but I also know that over time my batch file will grow to include other items, such as bginfo.exe, which I will install on all computers. By the way, bginfo.exe is super-handy for VMs and labs.
Note: this is not a step-by-step guide. It will only cover high-level steps or important items.
Let’s get started!
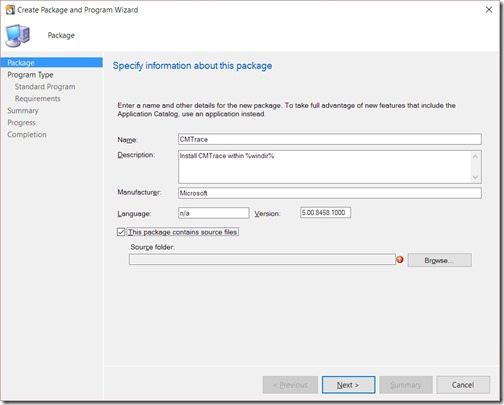
First, create a package with the name, CMTrace, and then provide the appropriate details. Next, ensure that you select the This package contains source files check box.
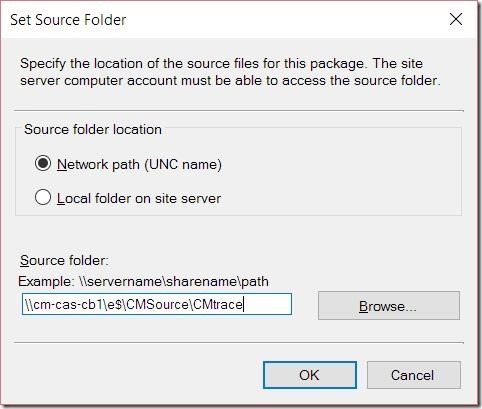
Provide the location of the source files and then complete the rest of the wizard steps as you would for any other package.
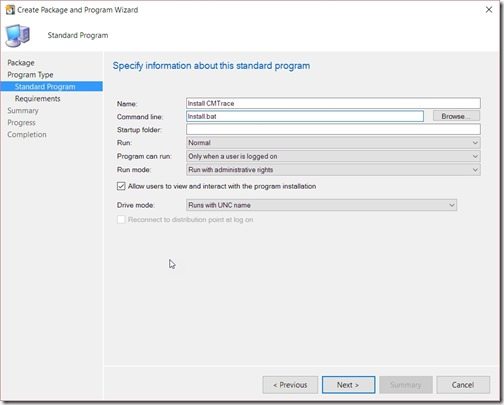
My Standard Program properties window looks like the above screenshot. Notice that I have changed a few of the options to meet my needs.
Now that my package and program are created, I will distribute the package content to all of my DPs. I like to do this step at this stage instead of distributing the package within the deployment wizard. Why? It can take several days (especially in large organizations) to deploy an application to all DPs. This also allows me to determine if there is a problem with the content distribution before I create the deployment to my test collection.
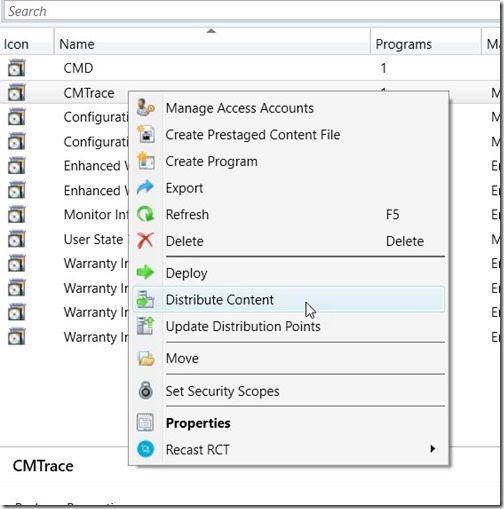
Start by right-clicking on CMTrace and then select Distribute Content.
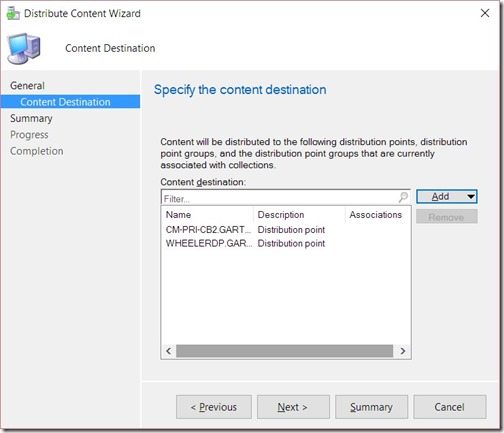
Add all of the DPs that you would like to test this deployment on. Complete the wizard as you normally would.
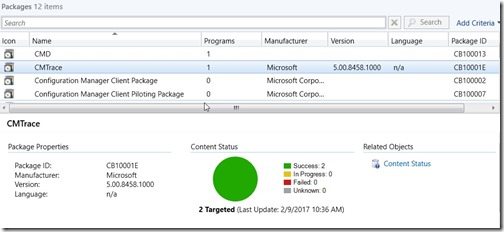
Wait for the content distribution to complete. Notice that I have successfully distributed content to my two DPs. Now it is time to create the deployment.
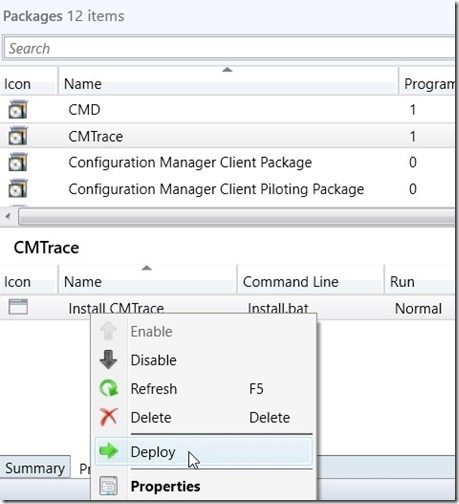
Right-click on the program and select Deploy. Complete the wizard as you normally would to your test collection.
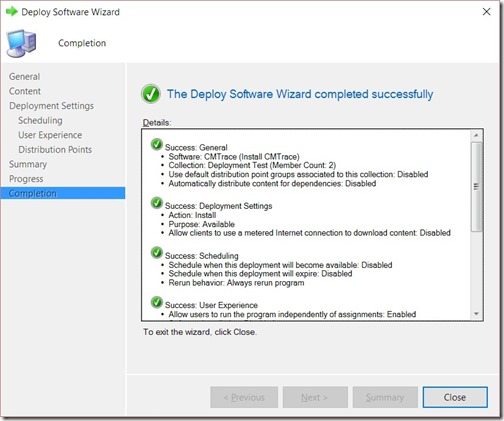
You can see by the Completion window that I made my deployment as Available.
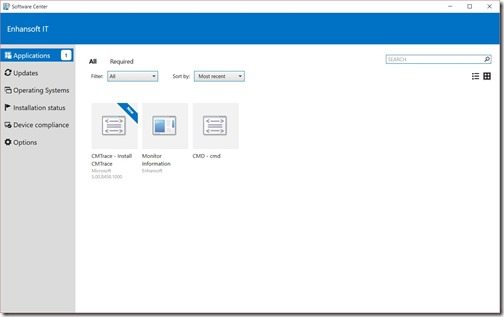
At this point you can either wait for the Software Center to display the application or you can force the Machine Policy to run, thereby speeding up the process of it being displayed in the Software Center.
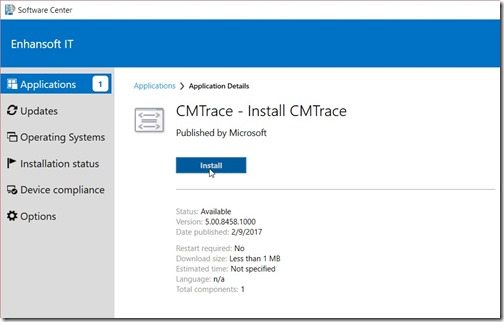
Once you see CMTrace in the Software Center, click on the icon and then click on the Install button to start the installation.
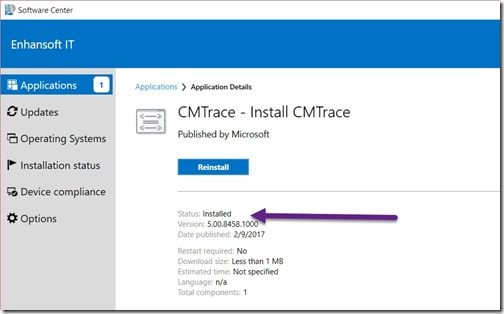
The install.bat will complete the install in 1 second or less, so it is very likely that you will miss it! You need to validate that it completed correctly, so first review the Software Center and ensure that Status is Installed (see purple arrow).
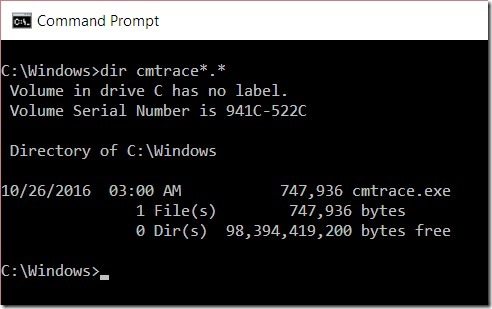
Next open a CMD and confirm that cmtrace.exe is within the Windows directory (%windir%).
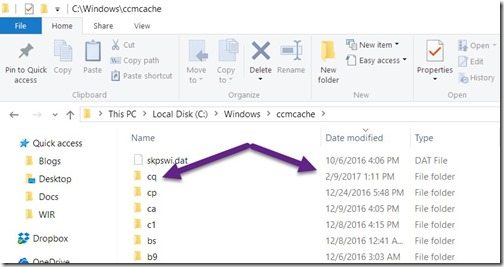
Lastly, confirm the date and approximate time the installation was executed. You can do this by opening C:Windowsccmcache and locating the cache folder. In my case the cache folder is called, “cq.”
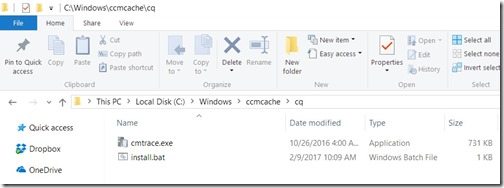
If you like, you can open the cache folder (in my case C:Windowsccmcachecq) and see all of the source files for your package.
Testing Configuration Manager Deployment
By performing this deployment test you proved that your ConfigMgr environment can deploy an application with source files. How?
First, the package content was distributed.
Second, the installation completed successfully. This proves that both the package and the downloading of the source files to the ConfigMgr cache occurred.
Third, the source files within the cache folder confirmed that the cache was used.
This test proves the functionality of the site server, MP, DP, and ConfigMgr test client.


