Endpoint Insights
Cloud Reporting: How to Setup a Linked Server
Topics: Endpoint Insights
What about cloud reporting? What if your cloud provider doesn’t have the tools that you need to create reports from a database in the cloud? These were the questions on my mind when I was asked, “How can I get a daily report on an internal application?” Based on my discussions with IT professionals at conferences and online in forums, etc., reporting is still the number one item that people need and want. I don’t escape these reporting requests as I’m often asked by the endpoint management software team to create internal reports.
This blog post will show you how I setup a linked SQL Server connection on one of my on-premises SQL Servers. This was done so that I could report on results from my cloud-hosted SQL Server database. Ultimately I created a SQL Server Reporting Services Report (SSRS) dashboard which was emailed out to our team.
What do you need to start this process? You will need an account and the password to connect to the SQL Server database. You will also need the DNS name and the database name for the SQL Server.
Since each hosting provider is different, you are on your own to create a SQL Server account, but once you do, you are off to the races.
Now that you have the account, password, DNS name, and database name, you can get started.
Cloud Reporting – Setting-up a Linked Server
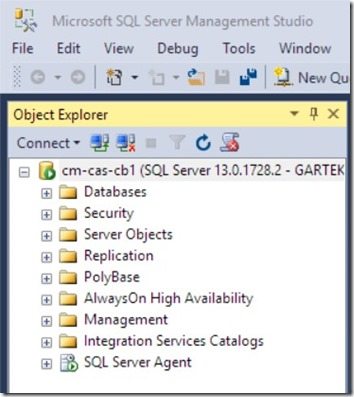
Using SQL Server Management Studio (SSMS), login to your on-premises SQL Server.
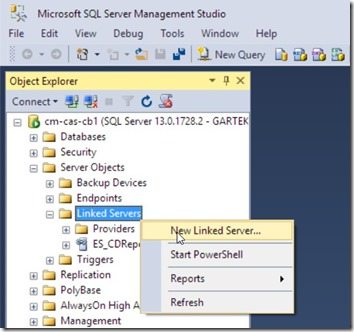
Expand Server Objects | Linked Servers and then right-click on Linked Servers. Next click on New Linked Server…
In the Linked server field, provide a friendly name for your cloud-hosted SQL Server. A friendly name should be short and easy to remember.
Within the Provider field’s drop-down box, select SQL Server Native Client 11.0. In the Data source field enter the DNS name for the SQL Server and the database name within the Catalog field. Click on the Security node.
At this point, since I will be using a SQL Server login to access the server, I will select the Be made using this security context radio button. Next, in the Remote login field and the With password field, enter the user name and password. Click OK to complete the creation of the linked server.
Technically you are done. You can now access the cloud-hosted SQL Server from your on-premises SQL Server.
How to Run a Query
Before closing out this blog post, I can hear some of you saying, “This is great, Garth, but how can I run a query against this database?”
Honestly, if you follow SQL Server query guidelines, this will be easy for you!
Writing the query is no different than what you are used to. The only difference being that within your From section for the SQL Server view name, you will use a four-part name (Server name.database name.schema owner.object name). Normally you would use a two-part name for most queries.
Here’s an example of a two-part name query:
dbo.v_R_System_Valid
Whereas here’s a four-part name query:
CM_CAS_CB1.CM_CB1.dbo.v_R_System_Valid
This is what I’m using to query my cloud-hosted SQL Server database:
Select
‘Total devices’ as ‘type’,
count(*) as ‘Total’
from
eswire.wire.dbo.v.R.System.Valid RV
That is it! Now you know how to leverage your existing environment to query a cloud-based SQL Server database.
It’s all about setting-up linked servers and having the right query. Except for updating your queries, you will notice no other difference when it comes to creating dashboards or reports for cloud servers or on-premises servers.
Note: This linked server procedure will even work with PowerBI desktop!
If you have any questions, please feel free to contact me @GarthMJ. Do you have an idea for a blog post about a ConfigMgr query or reporting topic? Let me know. Your idea might become the focus of my next blog post!


