Systems Management
Building a ConfigMgr Lab from Scratch: Step 15 – Azure Services Connection
Topics: Systems Management
Building a ConfigMgr Lab from Scratch: Step 15
Azure Services Connection
In the previous posts, we’ve created the Certificates required for CMG and looked at Azure to confirm we have things in place. We also confirmed we have the rights set up in Azure that is needed. Let’s start the process in the CM Console.
Disclaimer, I’m following along the MS Docs page here, basically adding images.
At this point in the process, if you’re following along with the MS Docs, we’re right about HERE
In the Console, we’re in the Administration Node -> Cloud Services. Right Clicking on Azure Services and running the wizard to Configure Azure Service.
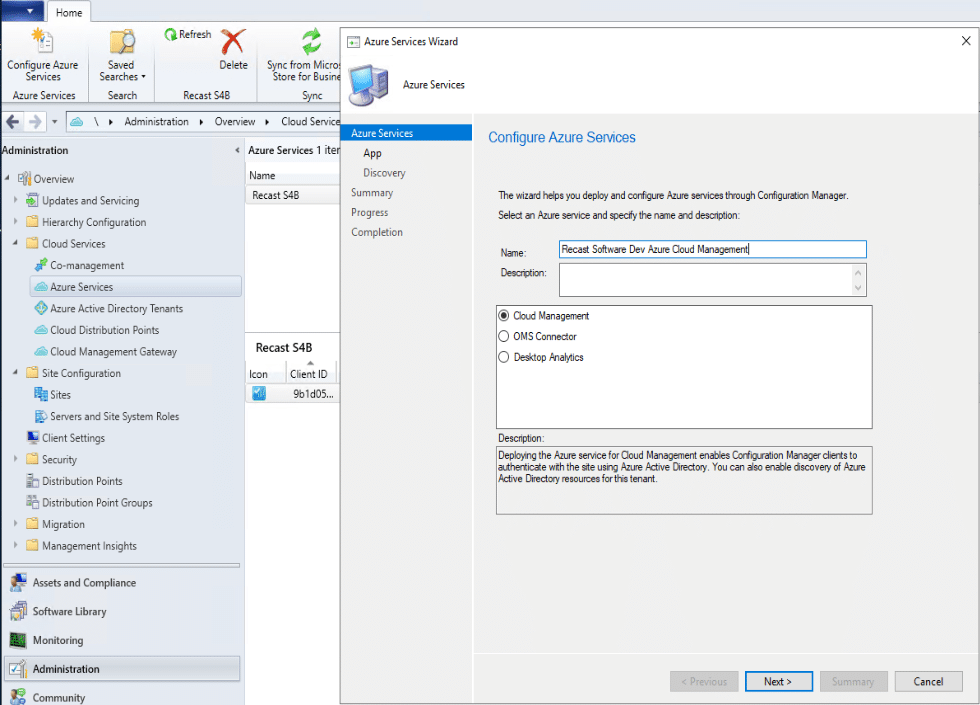
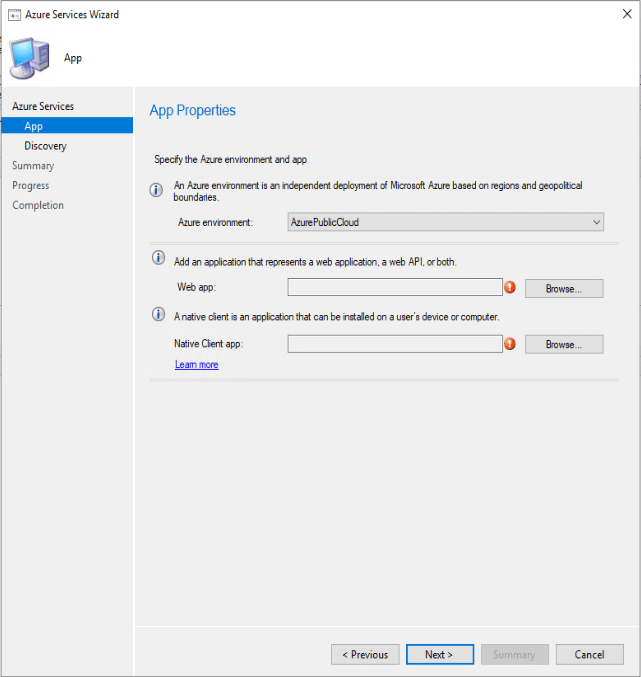
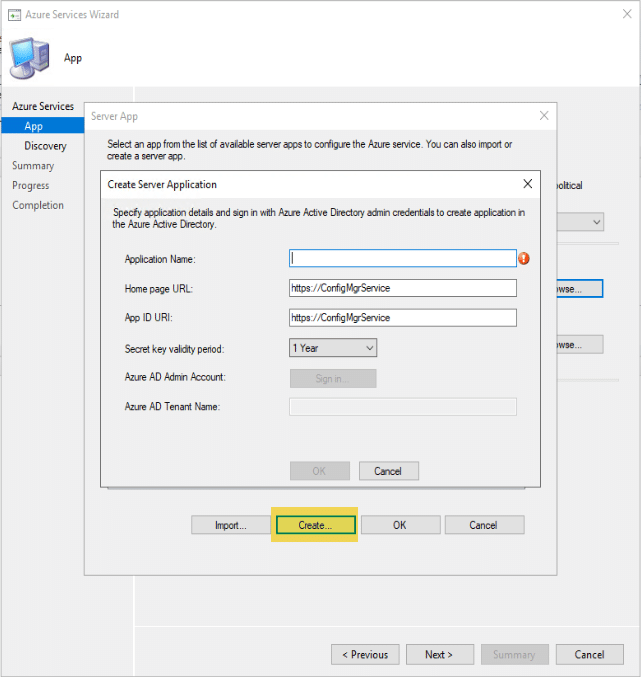
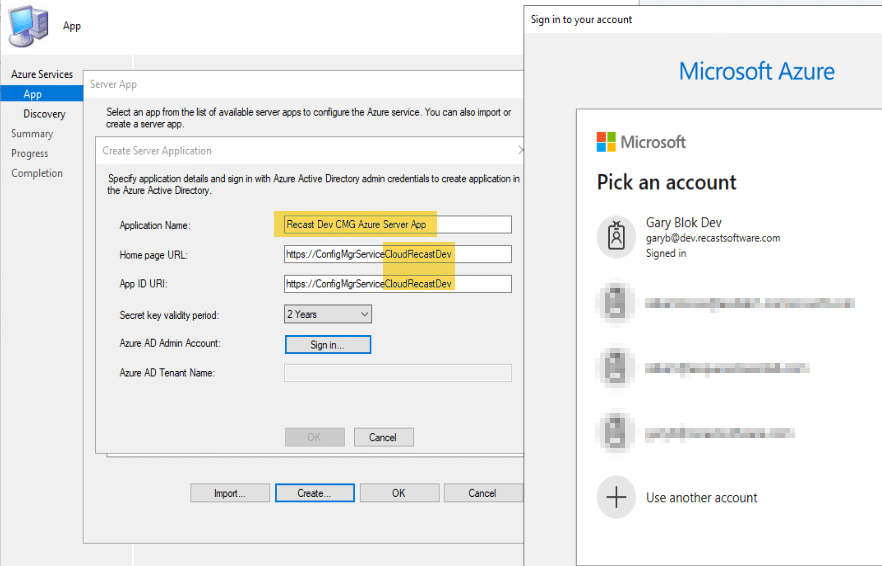
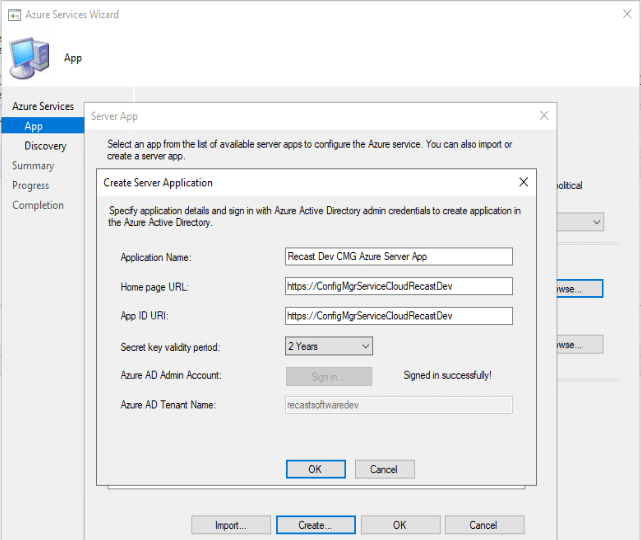
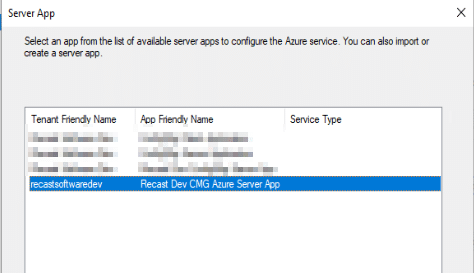
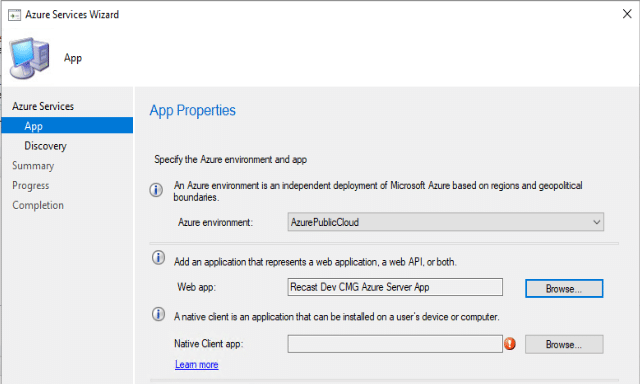
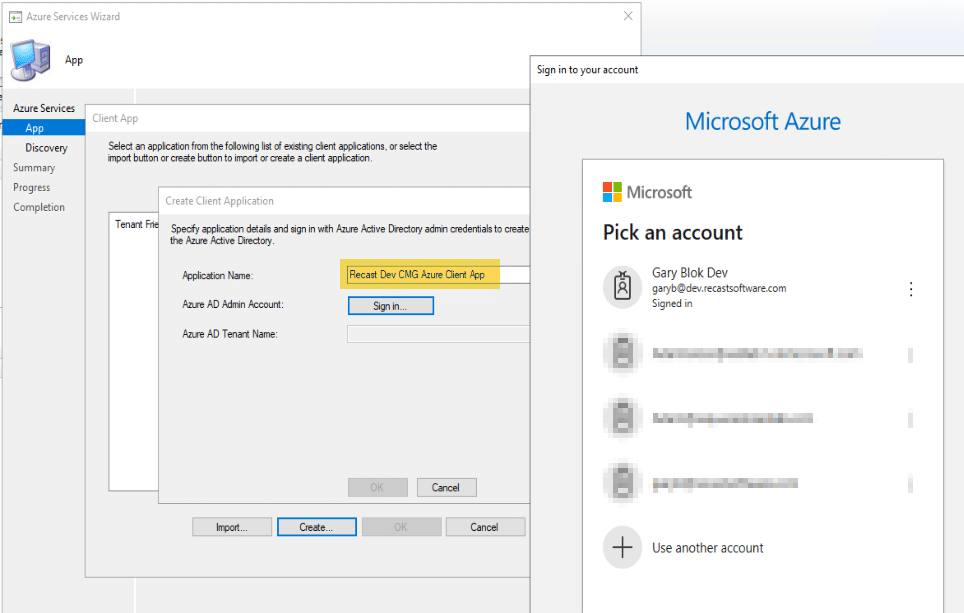
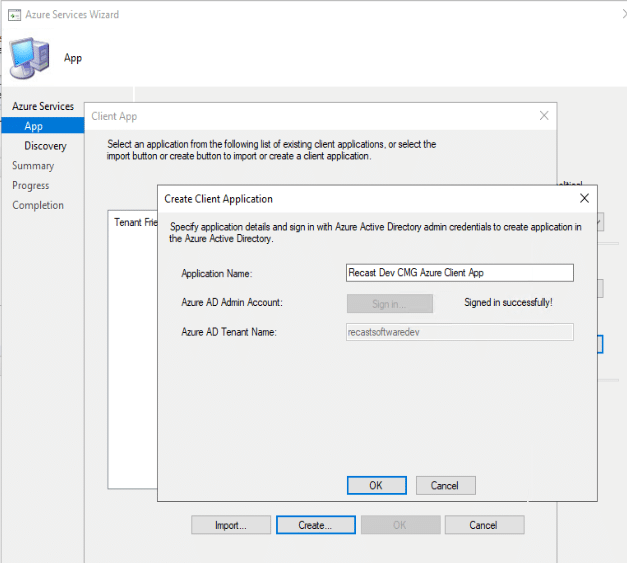
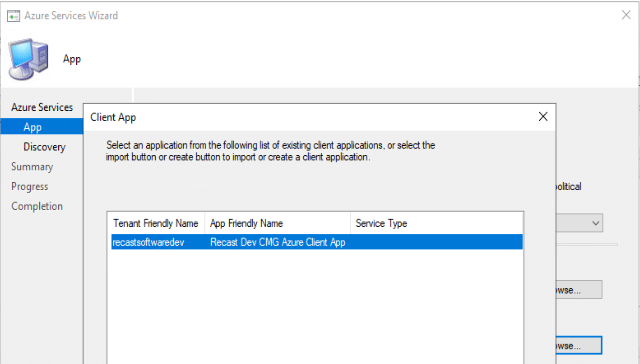
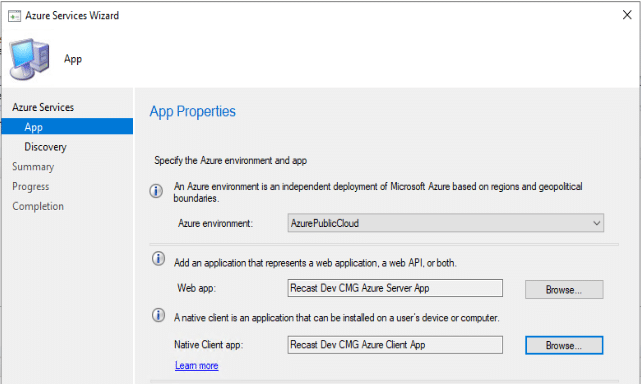
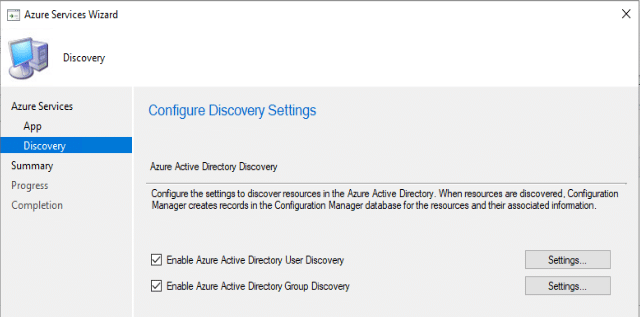
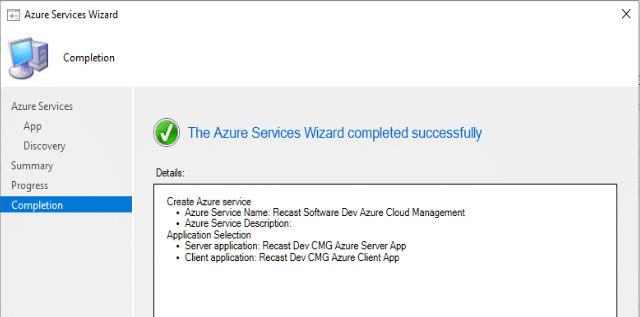

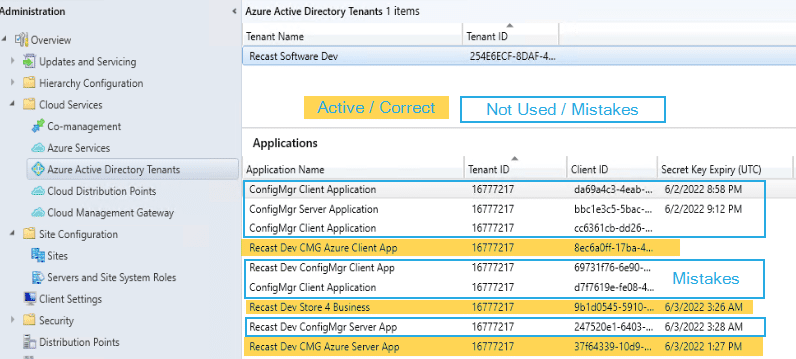
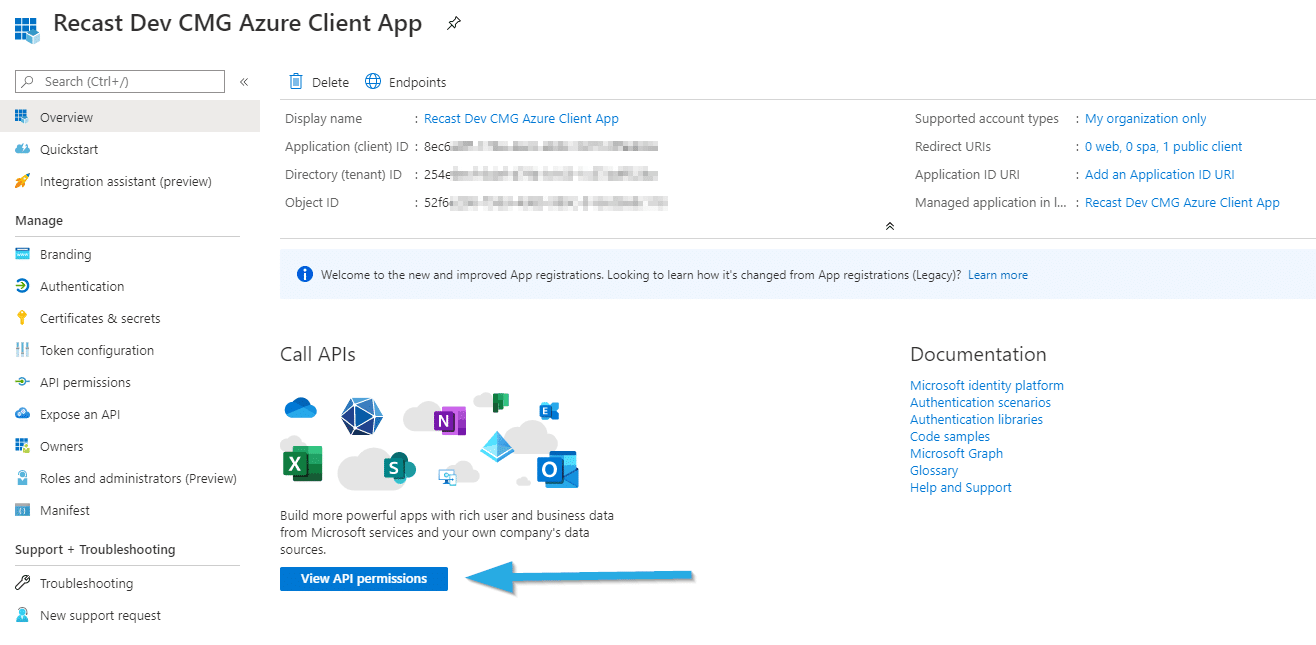
At this point, we need to move over to the Azure Portal to confirm and set some additional permissions.



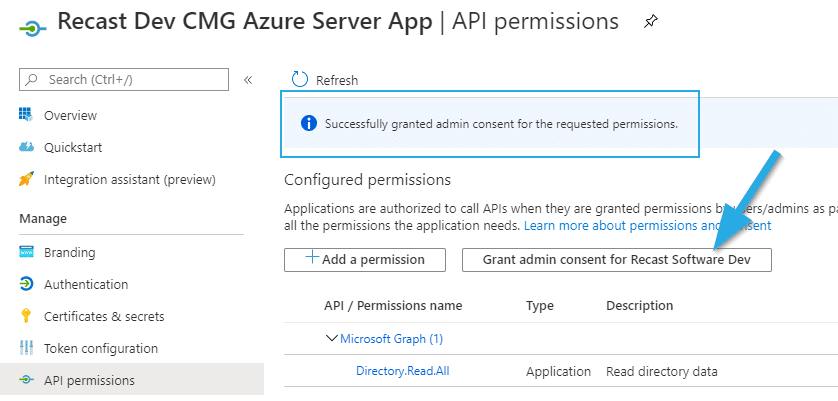
Conclusion: Step 15 – Azure Services Connection
Ok, we’ve set up the Azure Services Connect and added the permissions in the console. In the next post, we move back into the CM Console to set up the CMG.
Building a ConfigMgr Lab from Scratch Series
Series Introduction – Building a CM Lab from Scratch
- Setting up your Domain Controller
- Creating a Router for your Lab using Windows Server
- Certificate Authority – On Domain Controller [Optional]
- ConfigMgr Server Pre-Reqs (Windows Features)
- Configuration Settings (AD & GPOs)
- Source Server (File Share)
- ConfigMgr SQL Install
- ConfigMgr Install
- ConfigMgr Basic Settings
- ConfigMgr Collections & App Deployment
- ConfigMgr OSD
- ConfigMgr Reporting Services
- Cloud Management Gateway (CMG) – Certs PreReq
- Cloud Management Gateway (CMG) – Azure Subscription
- Azure Services Connection – You are Here
- Setting up CMG in the Console
- Cloud Management Gateway (CMG) – Post CMG Config
- Cloud Management Gateway – Client CMG Endpoints


