


Application Management and Patching
Application of the Week – Adobe Creative Cloud (Part 1)
Introduction to Deploying Adobe Acrobat DC with Liquit Workspace
Like AutoCAD, Adobe Creative Suite is probably one of the most time consuming applications when it comes to preparation and testing for a successful deployment. You definitely need patience for this one, a coffee machine standing by, smiles from your dear colleagues and time to read and learn from others who have dealt with deployment.
In this blog I will describe what’s needed to use the Adobe Admin Console to create a package to deliver Adobe Acrobat DC using Liquit Workspace.
Understanding the Adobe Admin Console for Package Creation
Adobe used to have what was called Creative Cloud Packager. Our first Adobe Creative Cloud KB article still refers to using that technology, based on a Windows utility which needed to be installed by the one who wanted to create packages for Creative Cloud.
But Creative Cloud Packager is no longer in development and no updates will be provided. Also, Creative Cloud Packager cannot be used to create packages that include Creative Cloud 2019 apps or later.
The new option is web based and is called Adobe Admin Console. Using it only is an option when you have a subscription for Adobe Creative Cloud for Enterprise or Adobe Document Cloud for enterprise.
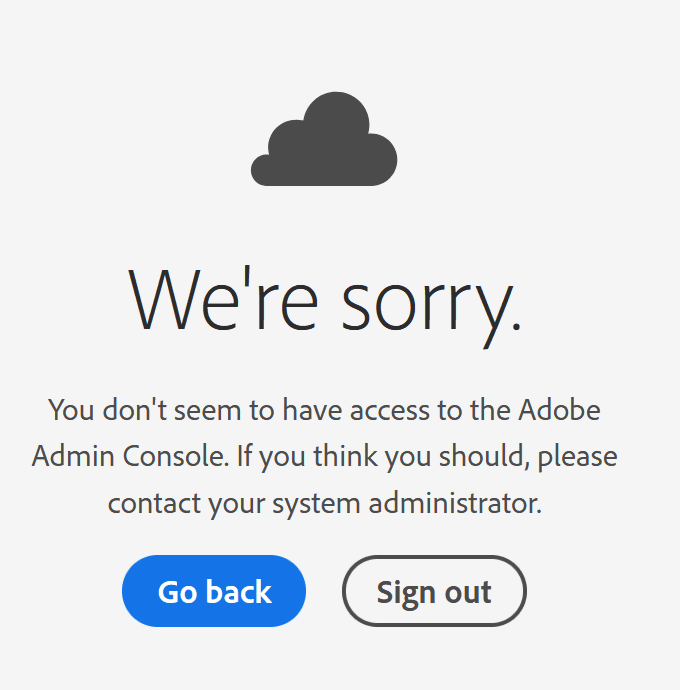
I’ve tried using this with an Adobe account which holds a subscription for Adobe Acrobat Pro DC:
But this fails without telling me that the Adobe Admin Console is only available for Enterprise customers. Apparently individual customers or SMB’s have to do things different. How? I don’t know.
After logging in with an enterprise account, this is the dashboard where we have to start from:
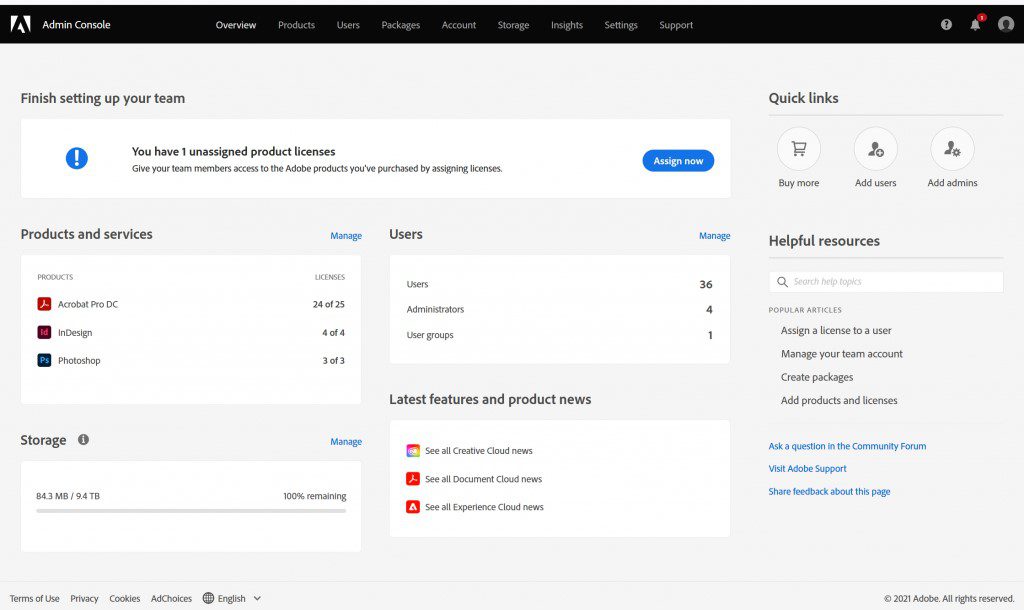
This particular account has licenses for Acrobat Pro DC, InDesign and Photoshop products only:
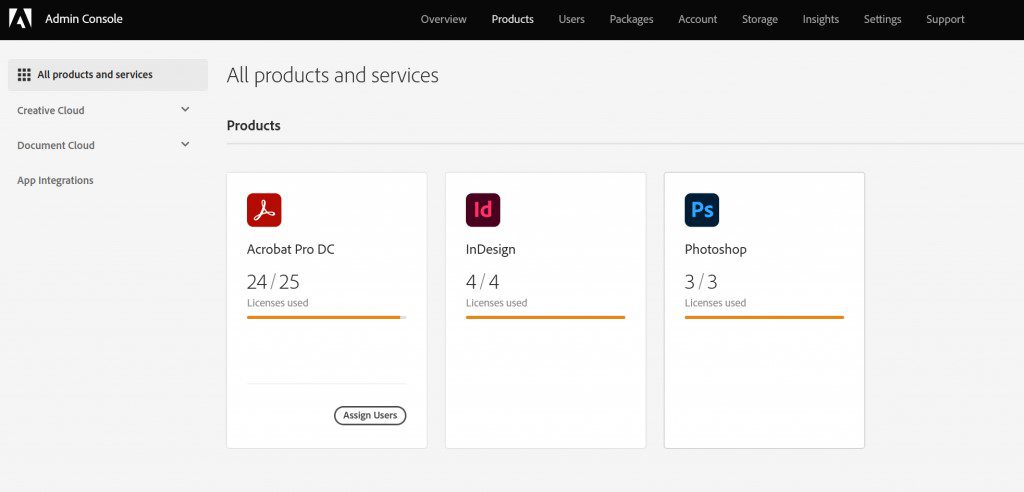
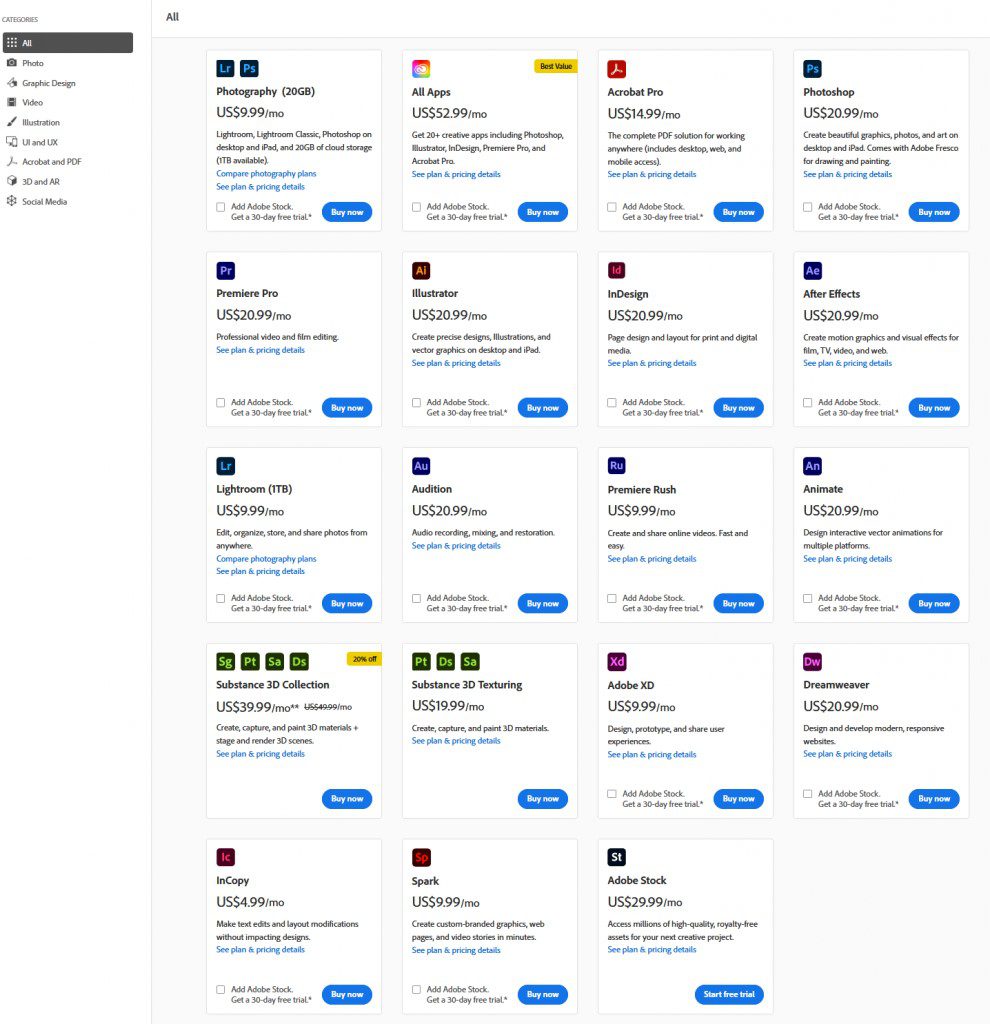
But Adobe Creative Cloud has many more products to choose from:
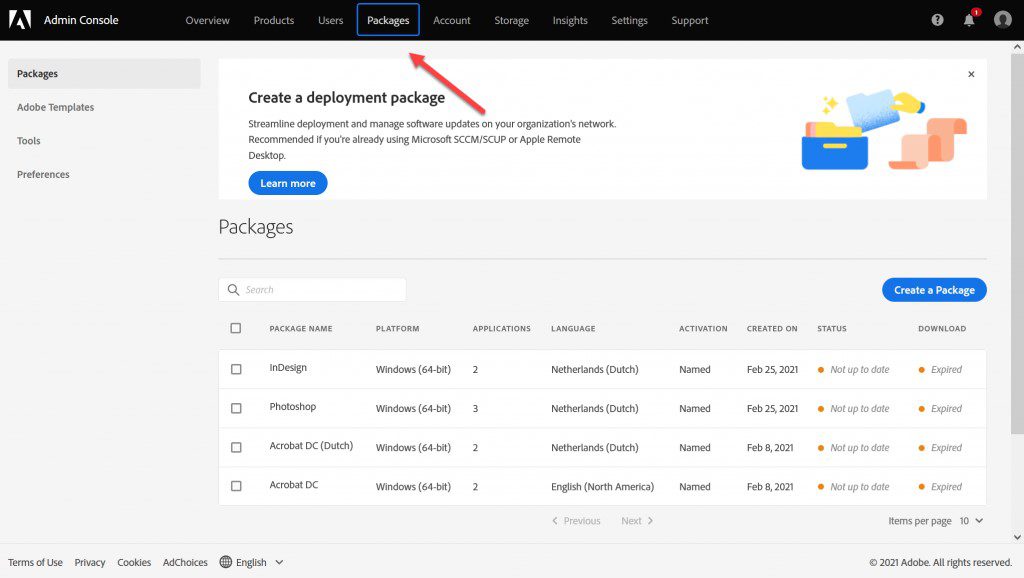
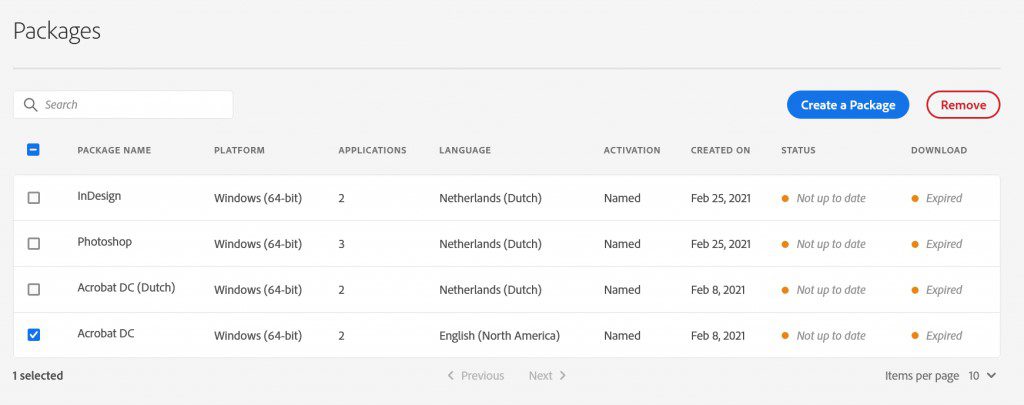
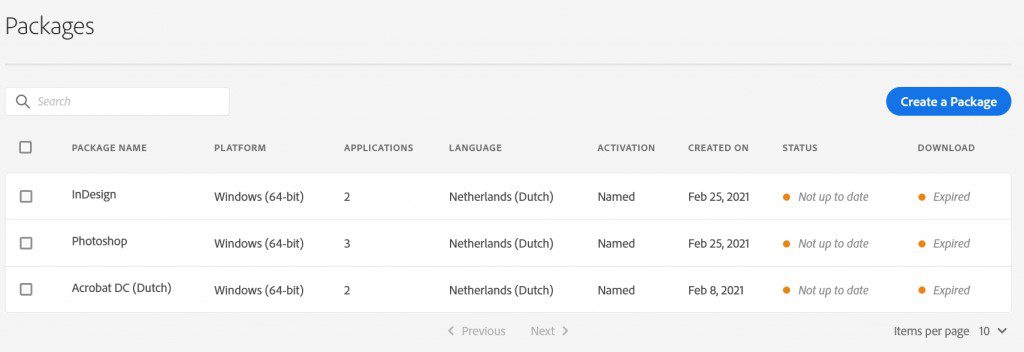
Click the ‘Packages’ tab to create a deployment package. In the list below you see packages which I’ve created before:
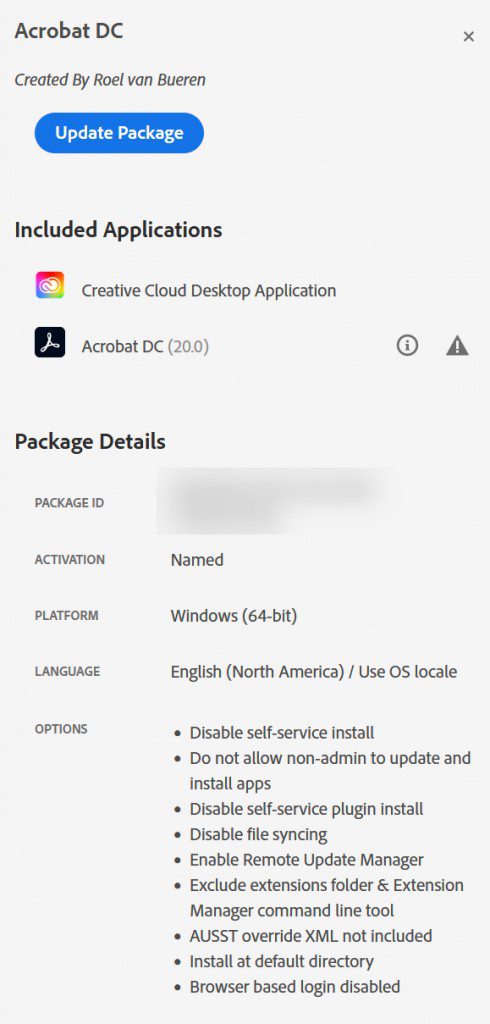
When you click one of these packages, you’re able to see more details of which options have been used to create them:
Setting Up Adobe Acrobat DC in the Adobe Admin Console
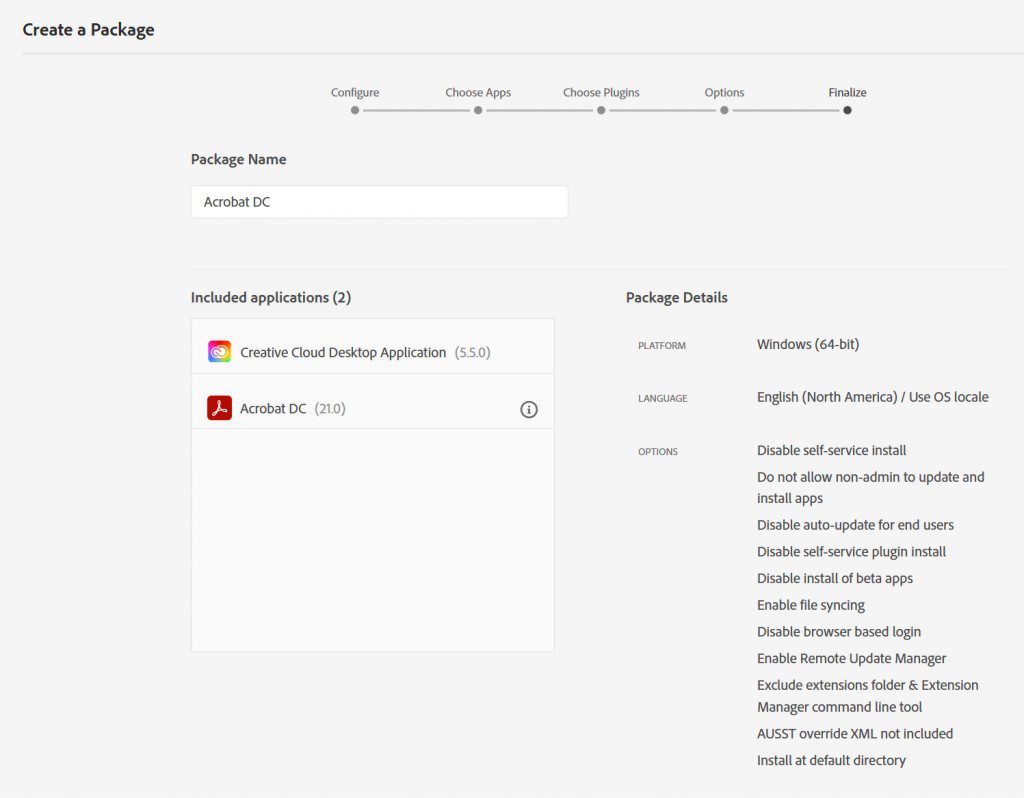
After reviewing these settings, I recommended to document these options first. After documenting the options, packages can be deleted safely when you’re planning to create new ones. In this case I’m deleting the ‘Acrobat DC’ package, in order to create and show you the process of creating a new one to deploy Acrobat DC:
Click ‘Create a Package’:
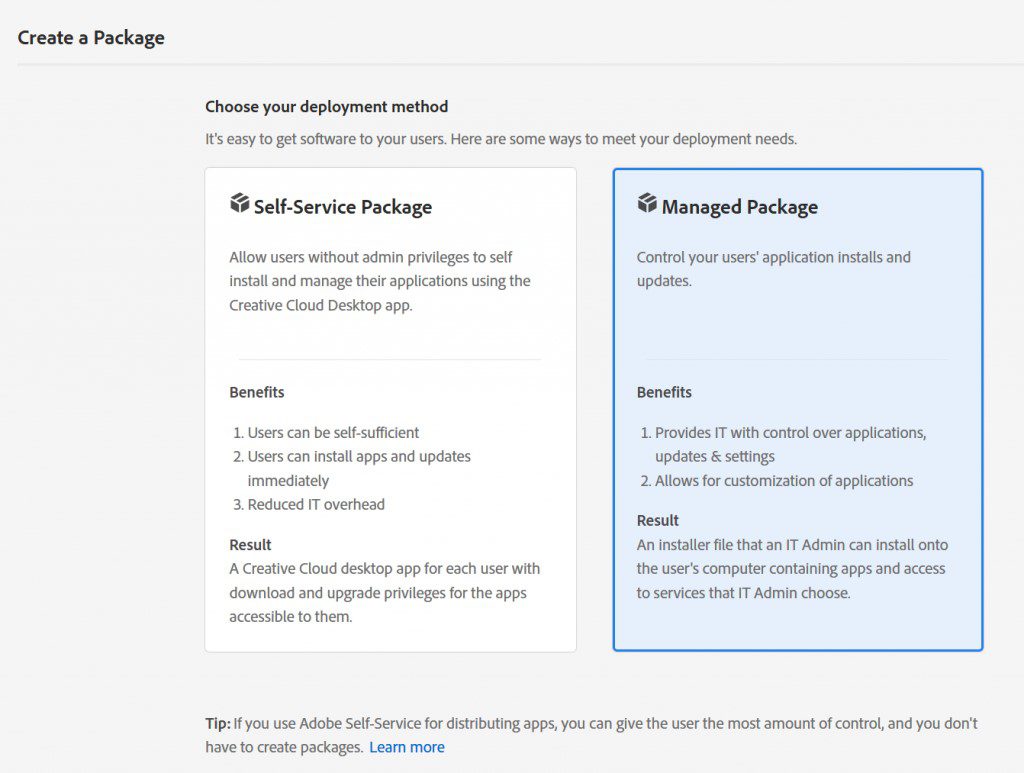
And choose your deployment method:
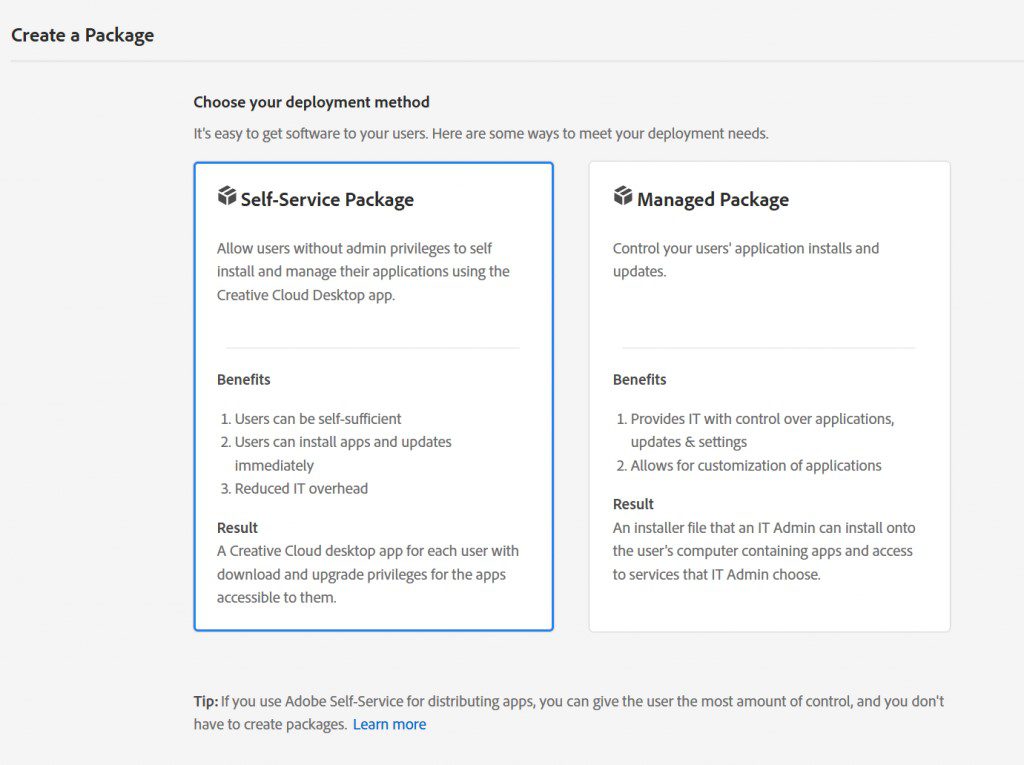
If you as a Liquit Workspace administrator wants to be in control of the delivery of Adobe Creative Cloud, a ‘Managed Package’ (where did we hear about that one before?) is the deployment method to select:
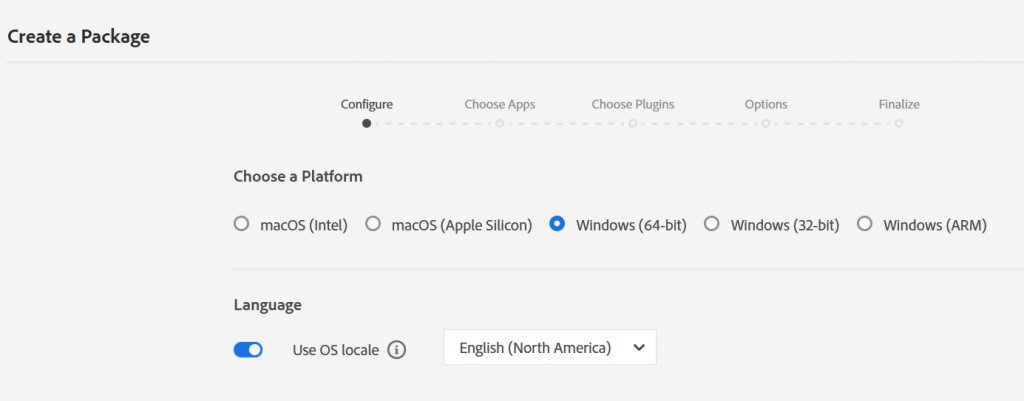
Click ‘Next’ and choose a Platform. I’ve selected ‘Windows (64-bit) and left the Language option to use the OS locale which means it will inherit the language from the language which used in Windows by the end user:
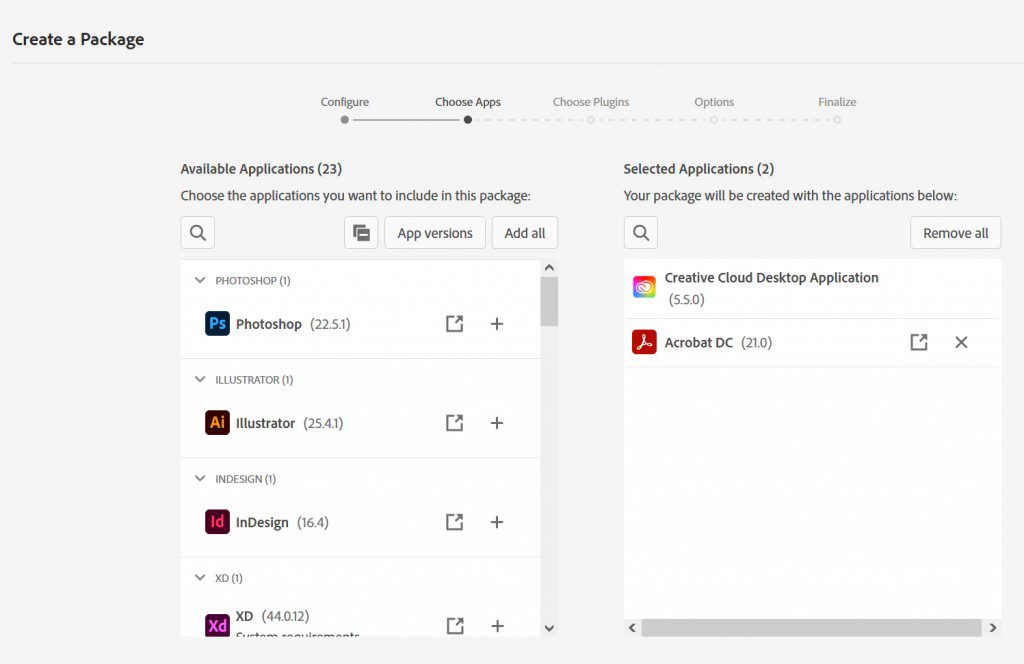
Click ‘Next’. A list of ‘Available Applications’ is shown.
The Adobe Admin Console shows all available applications, also the ones for which you don’t have a license for that is:

Leave ‘Creative Cloud Desktop Application’ selected and add ‘Adobe DC’ by clicking the + icon.
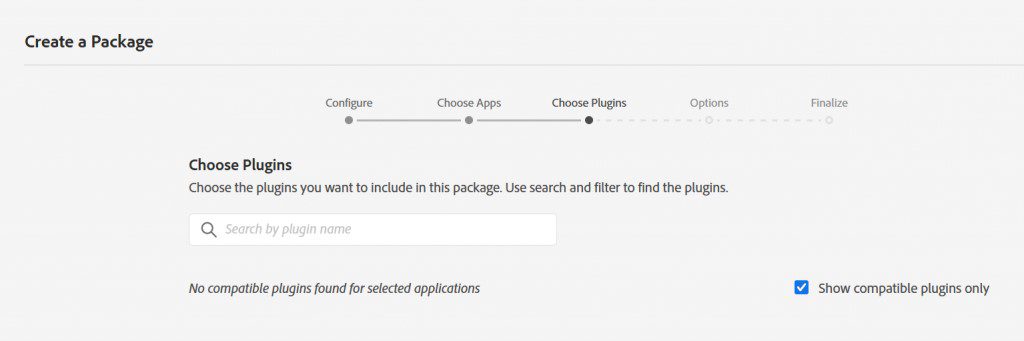
Click ‘Next’. Plugins are not available for Acrobat DC, therefore click ‘Next’:
Remember I advised you to document the Managed Package options? Here’s why:
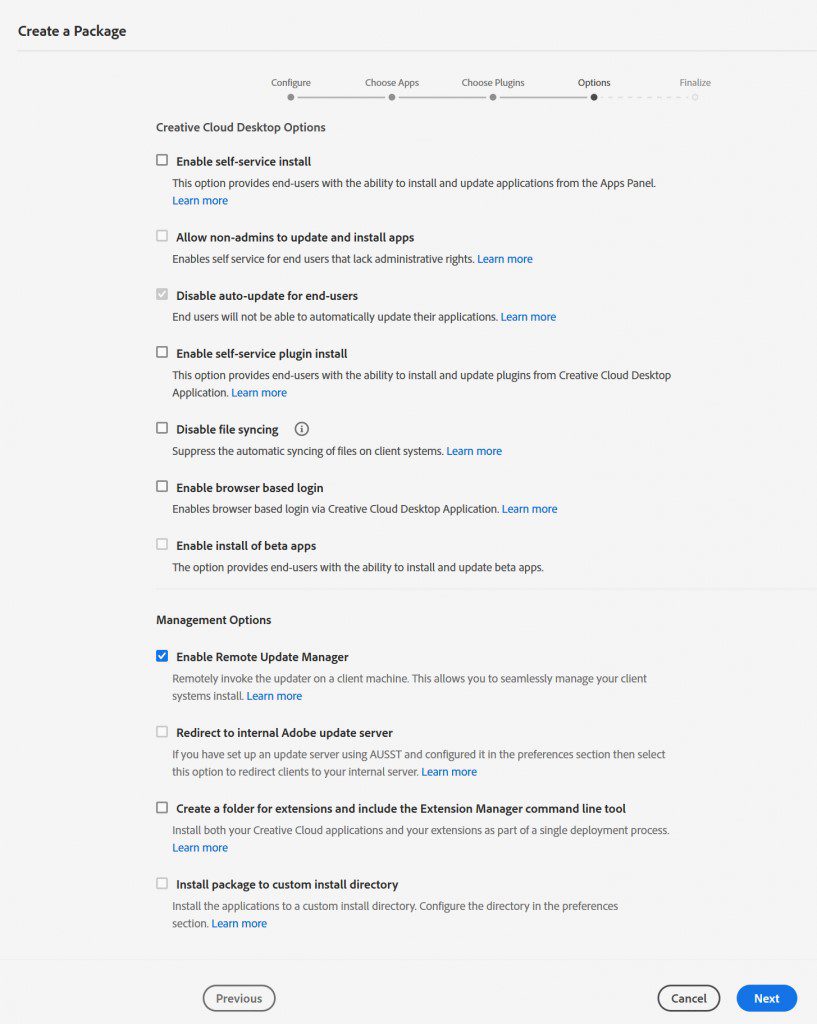
Uncheck all check-boxes except for the ‘Enable Remote Update Manager’ checkbox. I’ll discuss how to use the Remote Update Manager in Part 2 of this blog.
Use ‘Acrobat DC’ for the Package Name and click ‘Build Package’:
The Adobe Admin Console starts building the ‘Acrobat DC’ package for you:
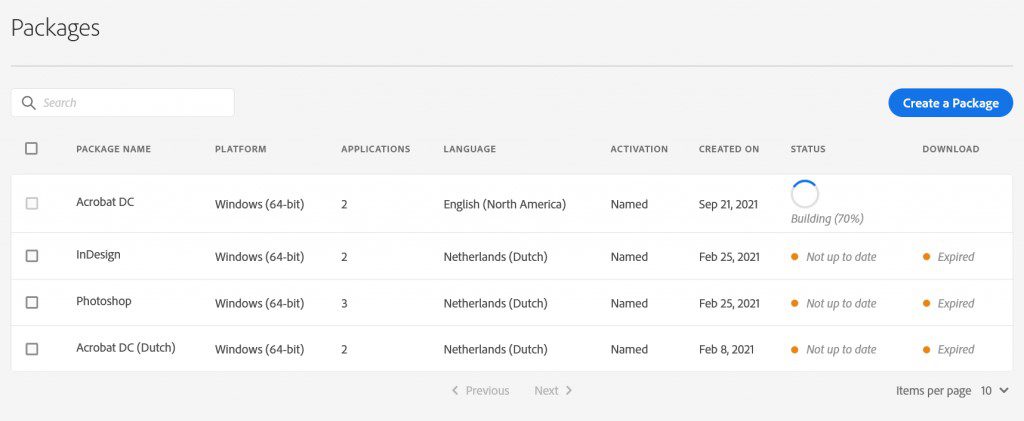
When it’s ready for ‘Download’, a Download option is provided. These downloads expire over time automatically:
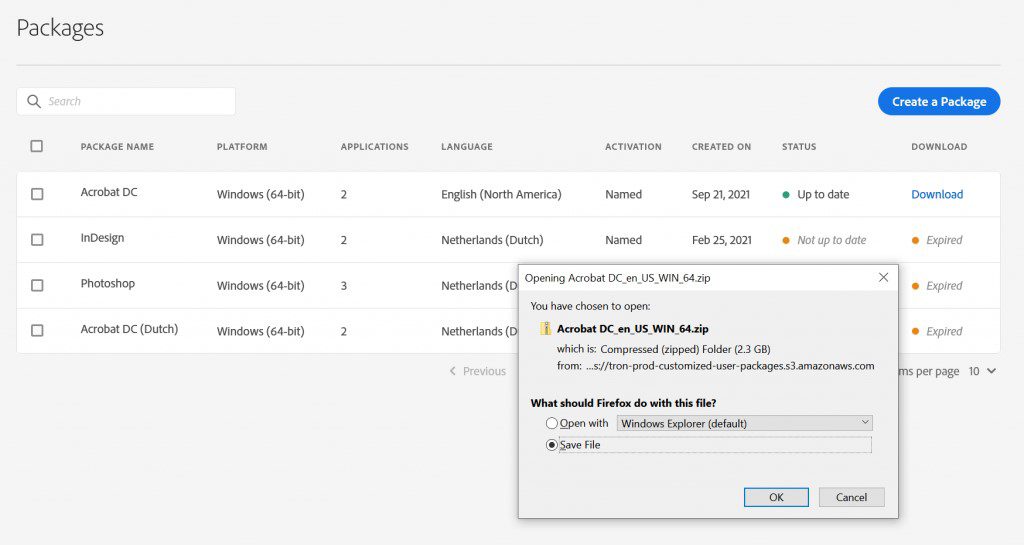
After downloading, extract the zipfile ‘Acrobat DC_en_US_WIN_64.zip’ to e.g. c:tempAcrobat DC_en_US_WIN_64 and review it:

The core of this zipfile is setup.exe. In the Deploy Packages section of the Adobe Enterprise & Teams: Administration guide you will find information about to use this setup.exe to run an unattended installation of Adobe Creative Cloud using these parameters:
setup [--silent] [--ADOBEINSTALLDIR=] [--INSTALLLANGUAGE=]That’s all there is, apparently, to run a full unattended installation. But no wait … customization. That part is missing. Adobe doesn’t provide any options in the Adobe Admin Console to configure Acrobat DC.
But you don’t want to show an EULA when the user starts Acrobat, you don’t want to see advertisements in Adobe, you don’t want to the default shortcuts when using Liquit Workspace, you don’t want notifications about updates etc. etc.
Liquit Setup Commander (which is part of Liquit Release & Patch Management) to the rescue!
Launch Setup Commander and in the left panel browse to the directory on your file system in which you’ve extracted the downloaded zipfile. Then select ..Acrobat DCBuildSetupAPRO21.0Adobe AcrobatAcroPro.msi. Right click and select ‘Generate Transform’. This Configuration Wizard will then be shown:
Every setting which enterprise customers normally use in an MST for Adobe DC are already pre-checked and set in the Configuration Wizard. Review these settings and then save the AcroPro.mst in the same directory as the MSI.
Now, there’s only one thing left to include this MST during silent installation.
In the ..Acrobat DCBuildSetupAPRO21.0Adobe Acrobatfolder there’s a setup.ini which needs to be changed.
Include the ‘CmdLine=’ line shown below. That’s all there is to it:
[Startup]
 RequireOS=Windows 7
 RequireOS64=Windows 10
 RequireMSI=3.1
 RequireIE=7.0.0000.0
 Require64BitVCRT=1
 [Product]
 CmdLine=TRANSFORMS="AcroPro.mst"
 PATCH=AcrobatDCUpd2001320074.msp
 msi=AcroPro.msi
 vcrtMsi=vc_runtimeMinimum_x64.msi
 vcrtDir=VCRT_x64
Creating a Liquit Package for Adobe Acrobat DC Deployment
Now it’s time to create our Liquit Package for which we are using two actions sets: ‘Install’ and ‘Launch’.
‘Install’ is the Install action set which handles the silent installation for Launch Acrobat itself.
This is what it looks like:
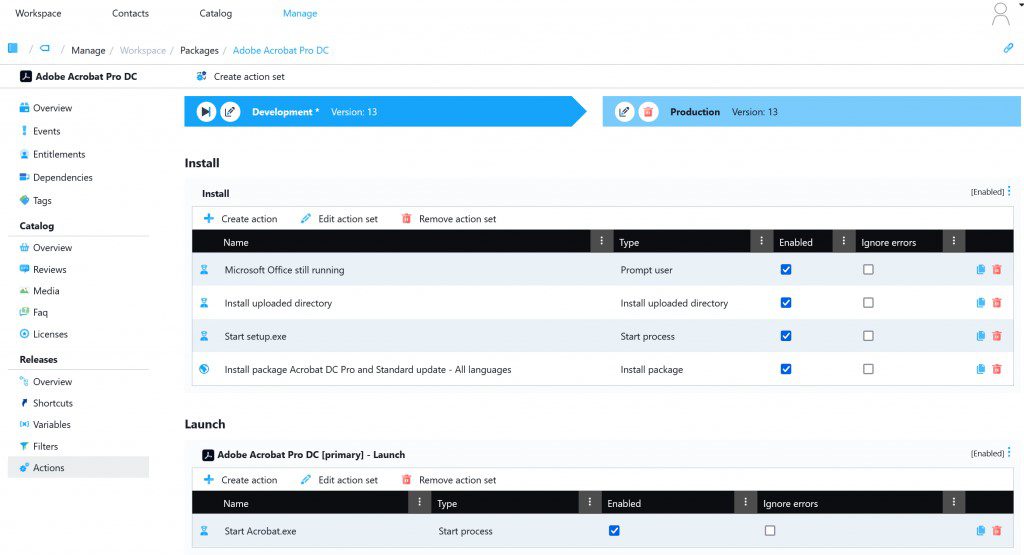
The first install action of this action set is a ‘Prompt user’ action which came out of real life testing. When one of the Microsoft 365 apps is running, e.g. Word of Excel, the Adobe setup errors out with an error code 5:
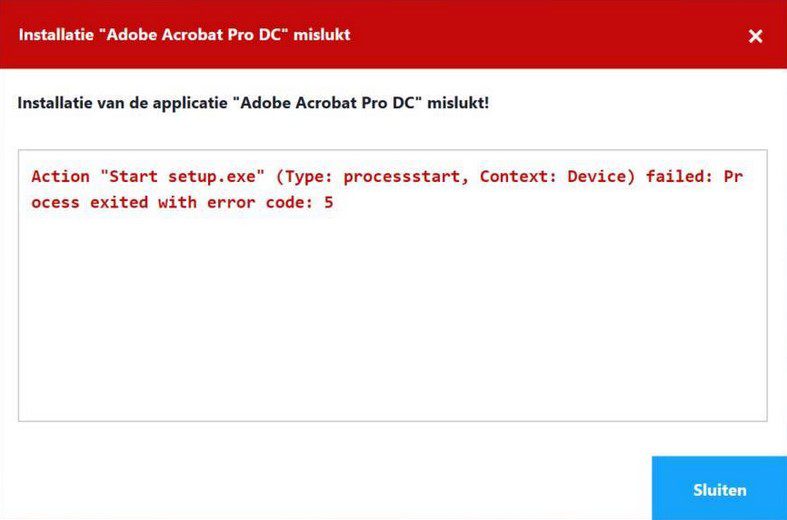
More information about that here. The first action therefore Prompts the user when one of these apps is running:
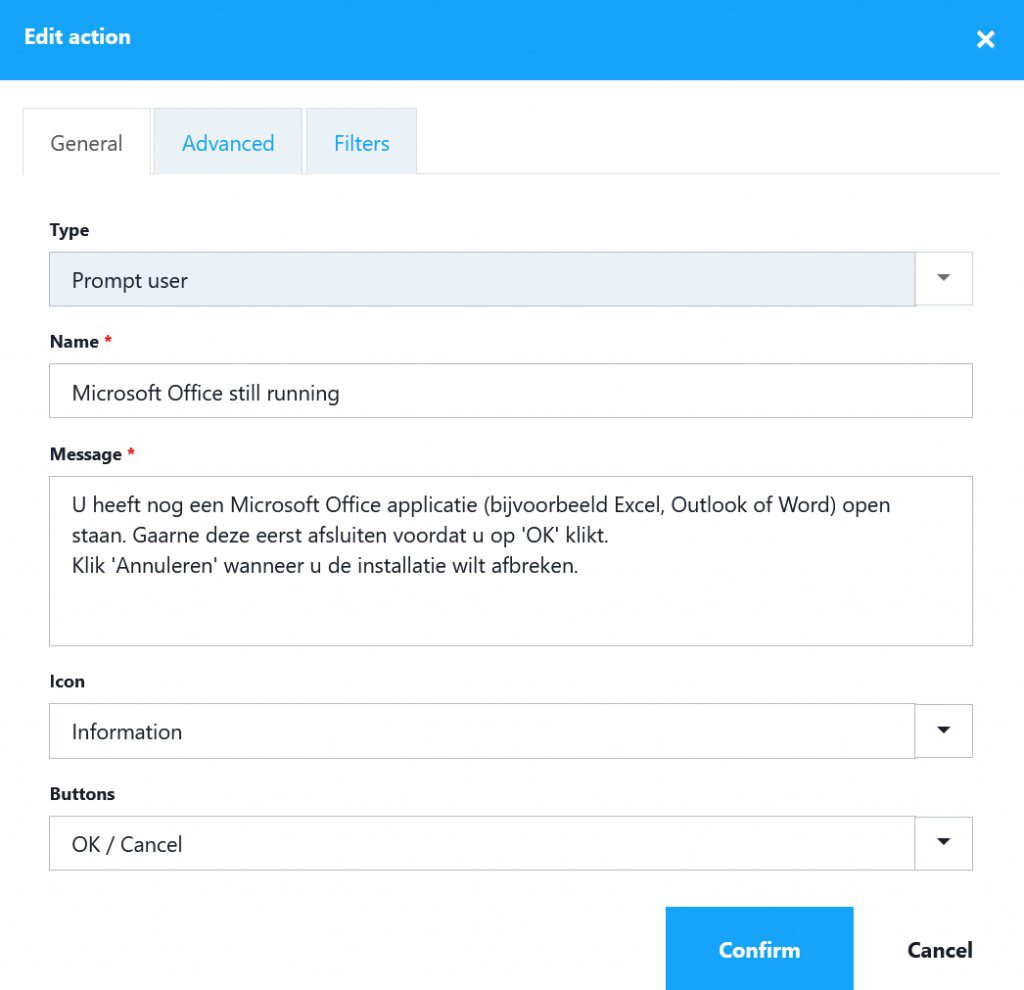
In this case by checking the different Microsoft 365 apps processes:

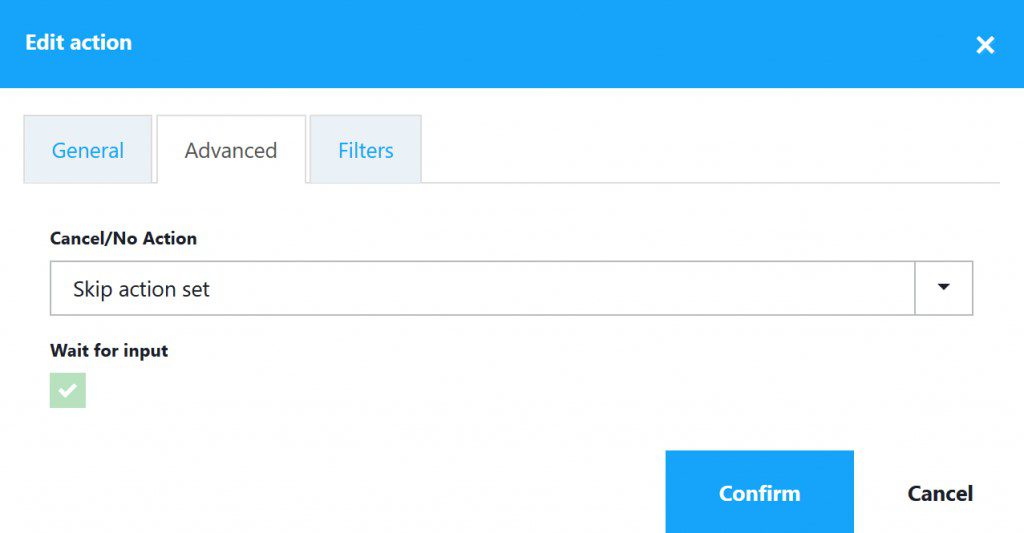
If this is the case, it notifies the user, and the rest of the install actions will be skipped when
‘Cancel/No Action’ is configured like this:
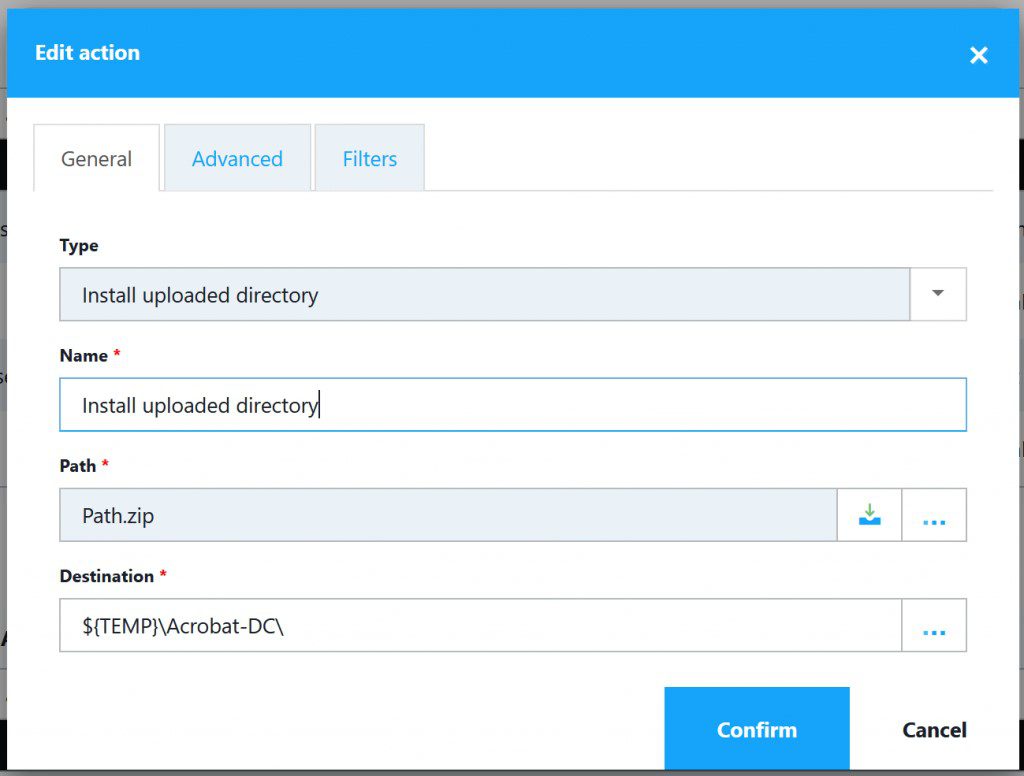
Then for the second ‘Install upload directory” action you need to select the “c:tempAcrobat DC_en_US_WIN_64” directory which will be zipped first as Path.zip and then uploaded to your Liquit environment.
When downloaded on the users device, this zipfile will be extracted to ${TEMP}Acrobat-DC:
The third install action runs the unattended installation using setup.exe using the parameter ‘–silent’:
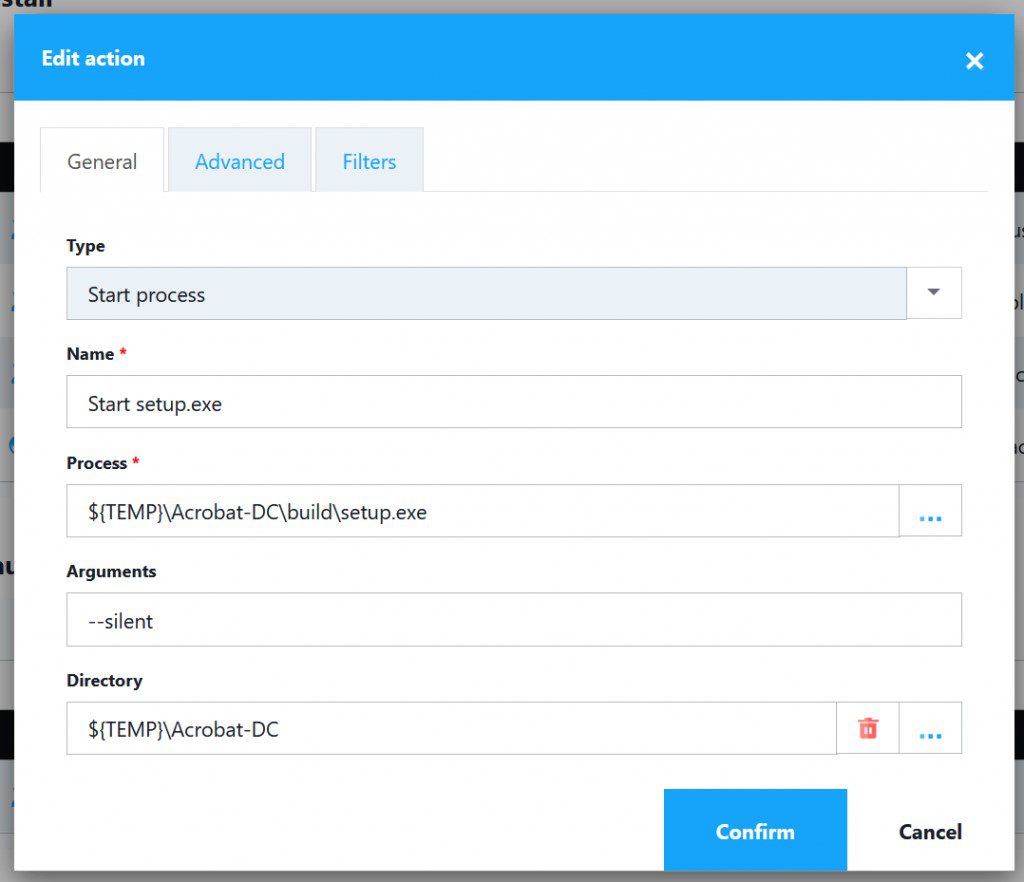
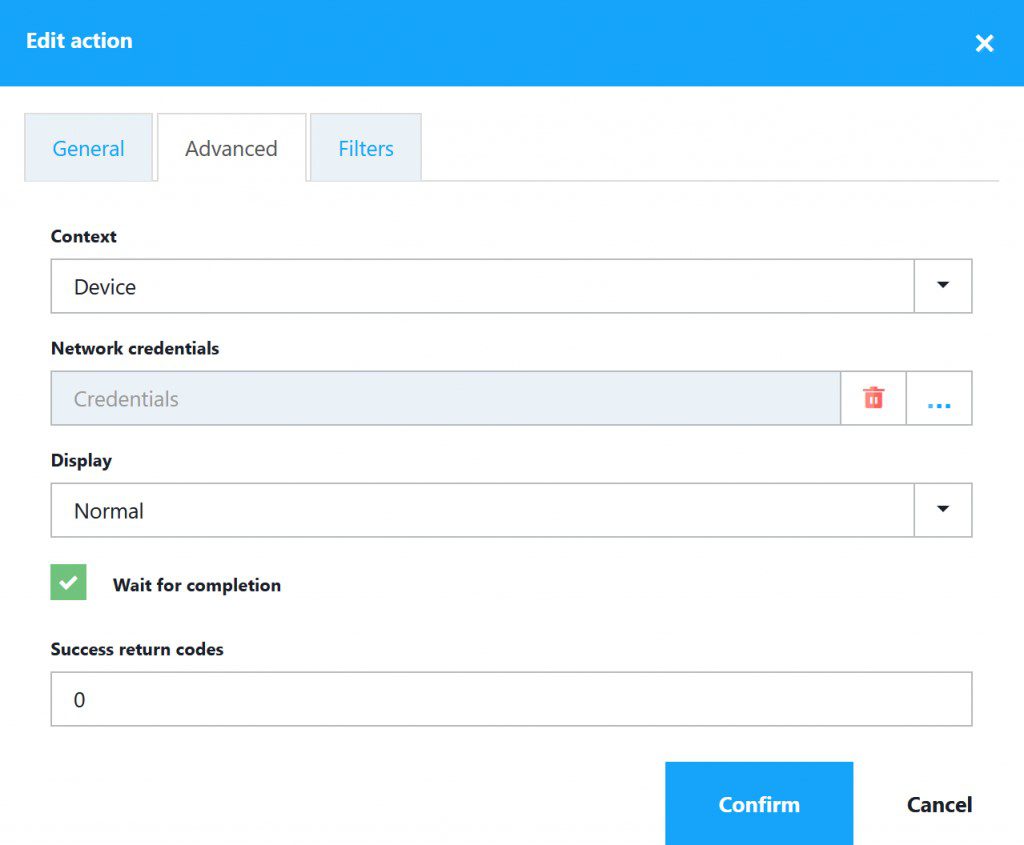
Make sure to set the ‘Context’ to ‘Device’ and to check the ‘Wait for completion’ checkbox:
The last install action is bringing in a managed package out of the Setup Store. But that’s to be discussed in Part 2 of this blog.
Maximizing Efficiency with Liquit Workspace and Adobe Acrobat DC
The best way to fully appreciate the power of the Liquit Digital Workspace is to see the above example and other features in action.
Book your demonstration today! Just click the ‘Request a demo’ button in the upper part of this web page. You will be joined by a Liquit expert who will take you on a guided tour of the Digital Workspace, demonstrating features and functionality, specifically focused on the needs and requirements of your organization.
Check out part II of this blog series: Application of the Week – Adobe Creative Cloud (Part 2)