Systems Management
How to Get a PFX Certificate for CMG
Topics: Systems Management
How to Get a PFX Certificate for CMG
A while back, I was trying to get Cloud Management Gateway (CMG) setup. I reviewed the docs for CMG and understood that it was best to use a server authentication certificate issued by a public provider. What I didn’t find in the docs was how to do this, nor was there a warning about needing a PFX certificate. That’s when I decided to write a post, so here is the story of what happened to me and how I finally created the PFX file.
PFX Certificates
What Is a PFX Certificate?
This is what Geocerts’ website says, “A PFX file, also known as PKCS #12, is a single, password protected certificate archive that contains the entire certificate chain plus the matching private key. Essentially it is everything that any server will need to import a certificate and private key from a single file.”
Why Do You Need a PFX Certificate?
It boils down to two major reasons. First, the PFX certificate is used to secure and validate the communication between CMG and clients. The second major reason, if the certificate type allows it, the PFX file can be used for code signing. In either case, all of the steps for creating a PFX file are the same.
CSR/SSL Certificates
What is a CSR?
CSR stands for Certificate Signing Request. According to TheSSLstore, “A Certificate Signing Request (CSR) is a file that contains information a Certificate Authority (or CA, the companies who issue SSL certificates) need to create your SSL certificate. The purpose of the CSR is to have a standardized method for providing this information to CAs. A CSR is quite literally a request to have a certificate created and digitally signed by a CA.”
This just means that the CSR is text that you copy and paste into a website. Sometimes you get this information as a file and other times it’s text in an email or chat.
How Do Your Order an SSL Certificate?
A few years ago, I wrote a blog post about how to order an SSL certificate when I was updating my website to HTTPS. It is the EXACT same process. There is nothing complicated about ordering an SSL cert. You need a CSR file before you start, but you can read about that in my post. Depending on what type of certificate (see the SSL Certificate Types section in the blog post for the different types) you ordered, this process can take a few minutes to several days to complete. Note: Requesting for a reissue of the SSL certificate typically takes less time than the original request.
PFX Certificates/Private Keys
Certificate Private Key
In order to create a PFX certificate, you need a couple of things. First, you need the certificate issued from your provider (Digicert, Entrust, etc.). In this post (about how to order an SSL certificate) I used GoDaddy, but for CMG I needed (really, I wanted) a wildcard certificate. I ended up using Namecheap for this certificate. The second thing you need, which is harder to locate, is the private key for the certificate. Depending on how you created the CSR, and therefore the private key, the private key is generally stored on the computer which generated the certificate request.
This was where my frustration began. Certificate providers do NOT give out PFX files. Instead, they provide you with a CER file or maybe a P7B file. Neither of these have the private key. The private key is only on your computer! None of the CMG guides nor the official docs provide guidance on how to get your PFX file, which has the private key too!
I Don’t Have My Private Key, Now What?
The very first time I needed a PFX file (for Enhansoft’s code signing certificate) and I didn’t have the private key, I thought, what a waste of time, effort and money! Getting a certificate, depending on the type (especially an EV or code signing one) can be time consuming. Simple certs (DV) only take a few minutes to get, but don’t forget about the costs associated with these certificates.
One of the first questions I had was whether or not I needed to purchase a new certificate just because I couldn’t find the private key. Fortunately, you do NOT need to purchase a new cert. You need to request for a reissue of your cert. The request process creates a new CSR file, which in turn creates a new private key.
How Do I Create a CSR File?
This is a bit of a trick question. If you are using the certificate for hosting, then most of the time your hosting company does this for you and you are sent the CSR file. BUT, here is the important part you need to know, again, about PFX files. You NEED the private key too! There is no getting around it. I can tell you all of the things that I did wrong when ordering the cert and having a hosting company create the CSR file for me. At the end of the day, it was a mistake. Don’t have your hosting company create the CSR file for you if you can’t find the private key. If you create the CSR file then you control the private key.
Let’s get started. It doesn’t matter who you get the certificate from. Start by downloading DigiCert Certificate Utility for Windows. Open the Zip file and copy DigicertUtil.exe to your desktop. Double-click on the DigicertUtil.exe.
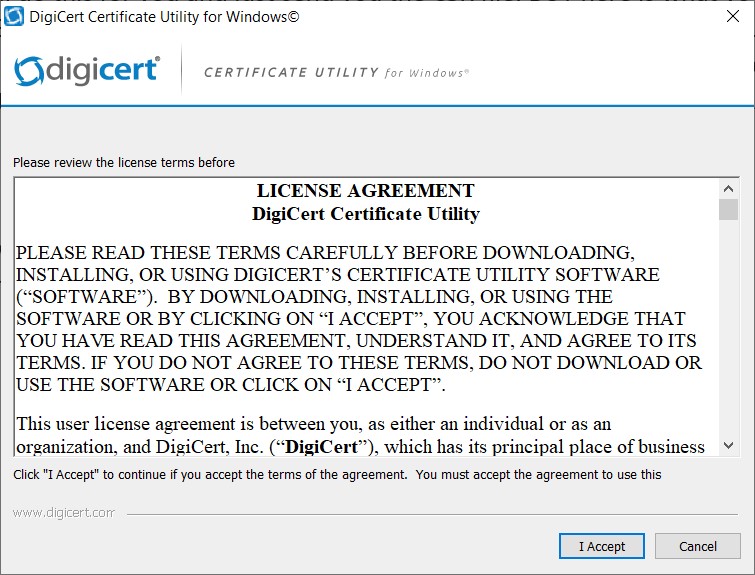
Click I Accept.
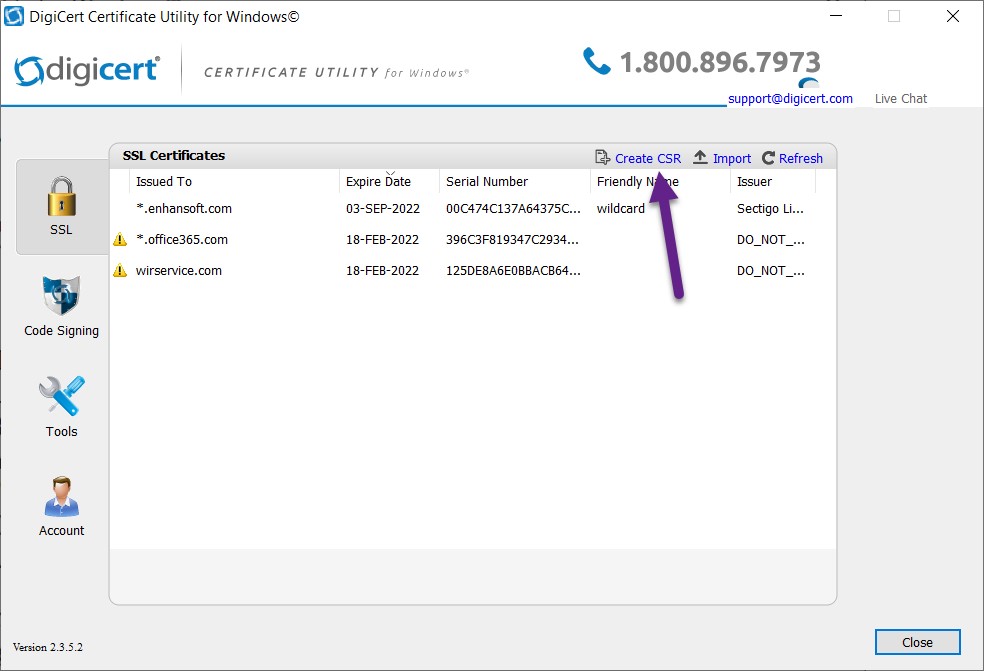
On the SSL node, click on the Create CSR link.
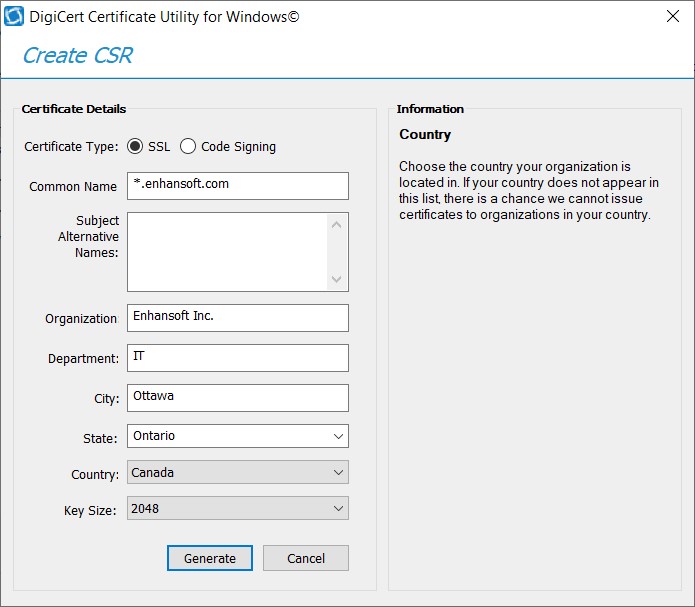
Select your Certificate Type and fill in the details. Complete the details before clicking on the Generate button!
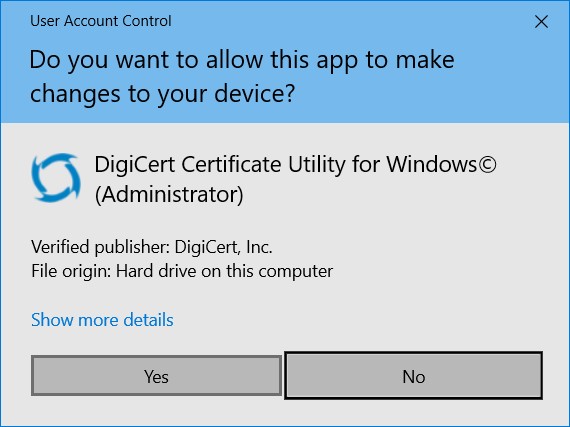
If UAC puts up this message, click Yes to continue.
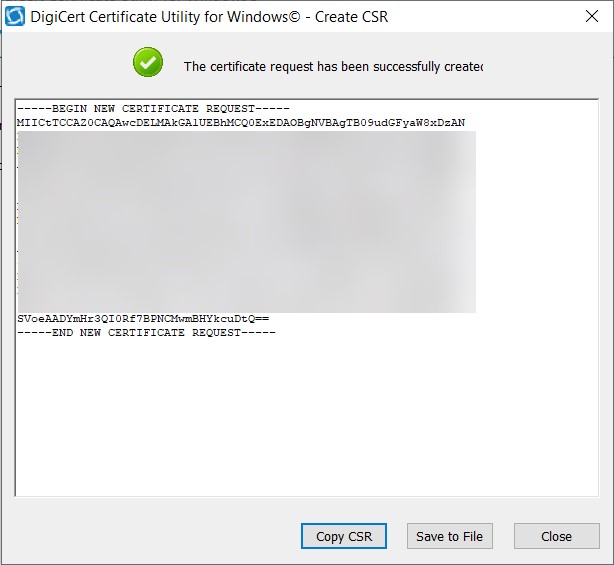
Even though I don’t plan on using this CSR for anything else, I still blurred out most of the request for security reasons. Click on the Save to File button in order to make a copy of it. If you are going to use this CSR right away, just copy the CSR and then paste it into your website. You can see where I pasted the CSR in Step #4 of this blog post.
That’s it! The CSR is created, and more importantly, the private key is stored on your computer. Now what? Wait for the certificate to be issued by the certificate provider. Again, this can take anywhere from 5-minutes to several days.
How Do I Import the Certificate from the Certificate Provider?
This isn’t really complicated, but since the certificate was issued within a few minutes (and because of my private key issues) I am going to show you the steps. I completed this task using the DigiCert Certificate Utility which was still open when the certificate arrived in my inbox. Feel free to use MMC.exe, PowerShell or any other method you want to import the certificate.
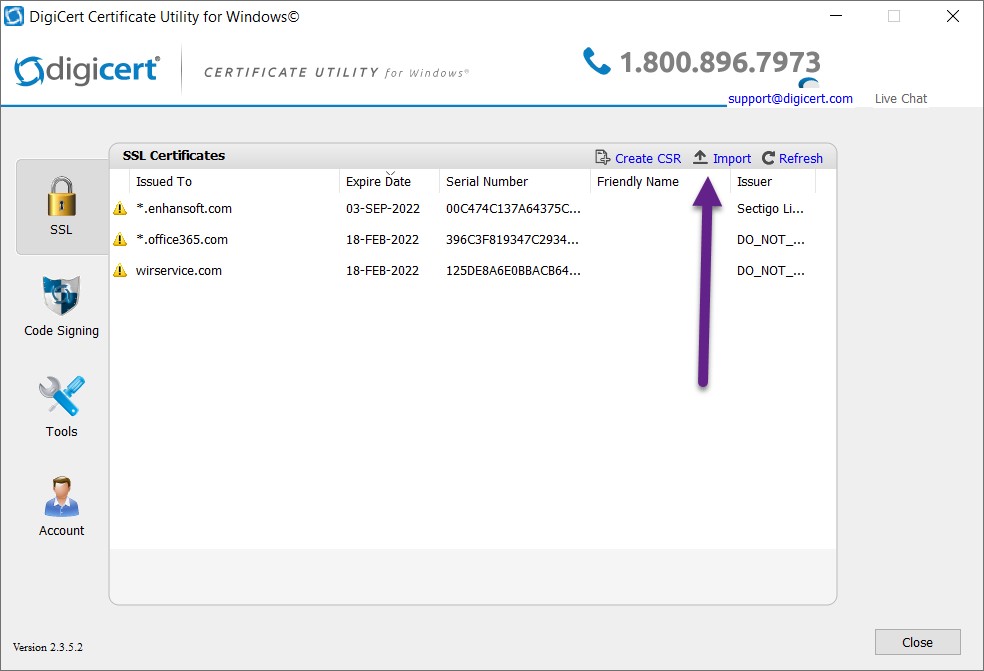
After unzipping the certificate, I clicked on the Import link.
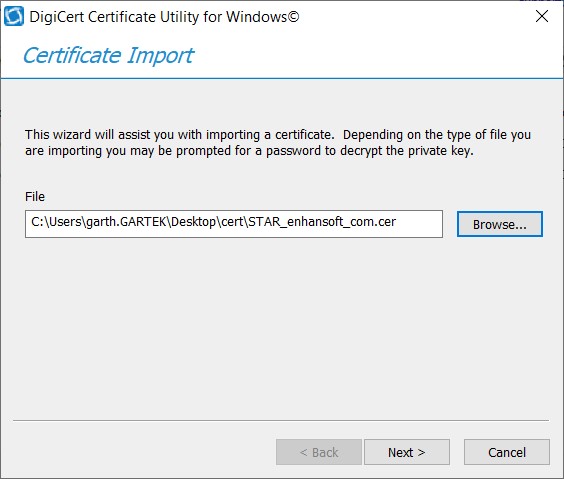
Browse for the certificate and click Next.
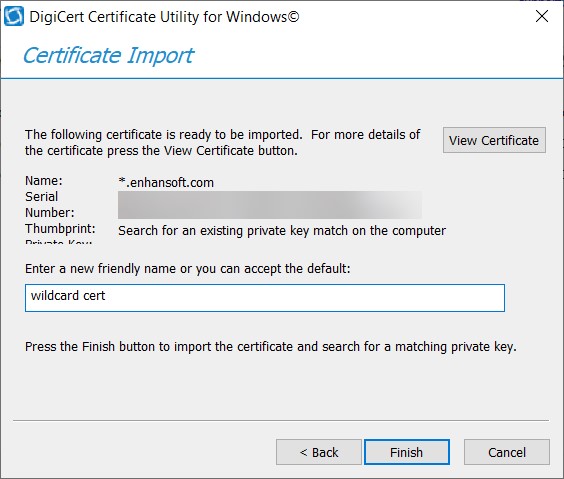
Give the certificate a friendly name and click Finish.
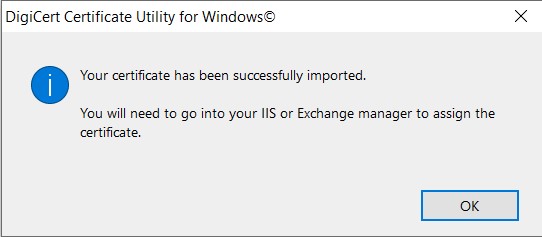
Click OK.
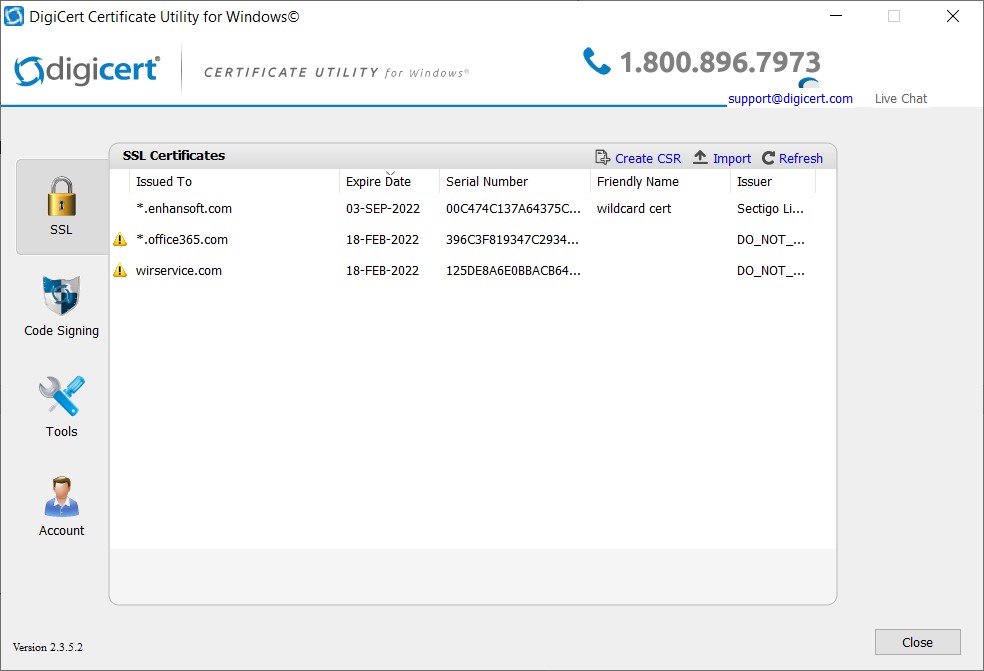
Finally, you can click on the Close button.
Now you have everything that you need to create a PFX file. You can create it within the DigiCert Certificate Utility or within the Microsoft Management Console (MMC).
How to Export a Certificate?
Since you need the PFX file for CMG, you need to export the certificate with the private key in a PFX format. This is also a fairly simple process, so I am not going to complicate things with a full-blown discussion on the subject. Below, I describe a couple of methods.
MMC.exe Method
The basic steps for exporting a PFX certificate can be found within this post, Collection Evaluation Viewer and Certificate Chain. The only places that are different are Step #14 (select PFX file) and between Steps #15 and #16 where you are prompted for a password. That’s it for the MMC method.
DigiCert Certificate Utility Method
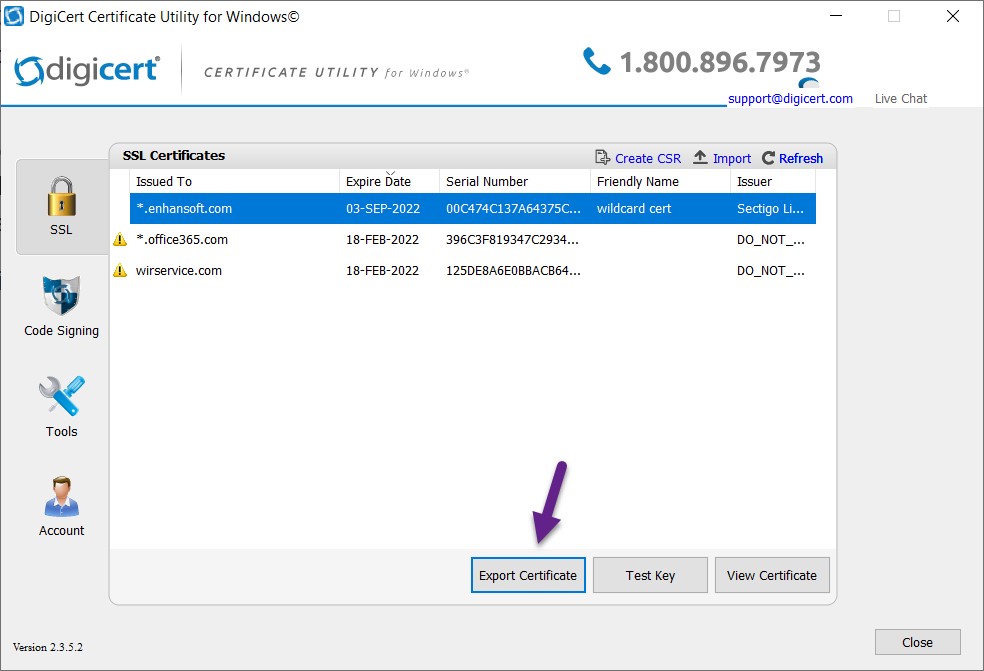
Select the certificate and click Export Certificate.
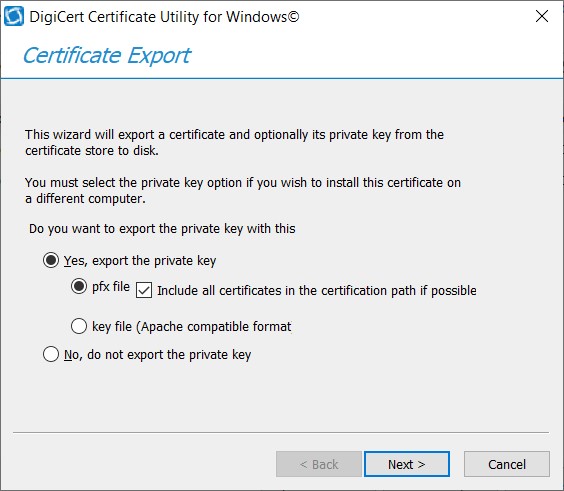
Click Next.
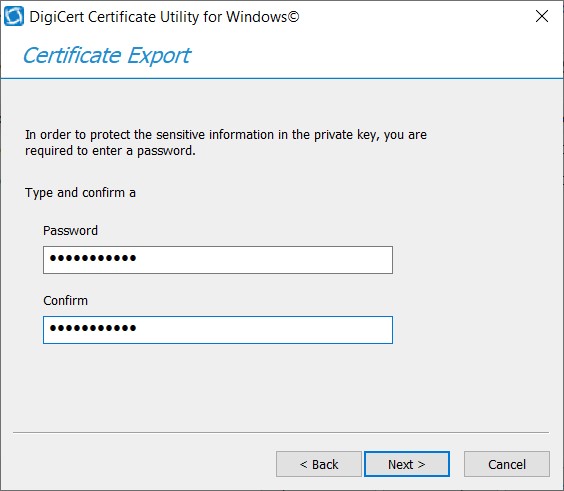
Enter a password and click Next.
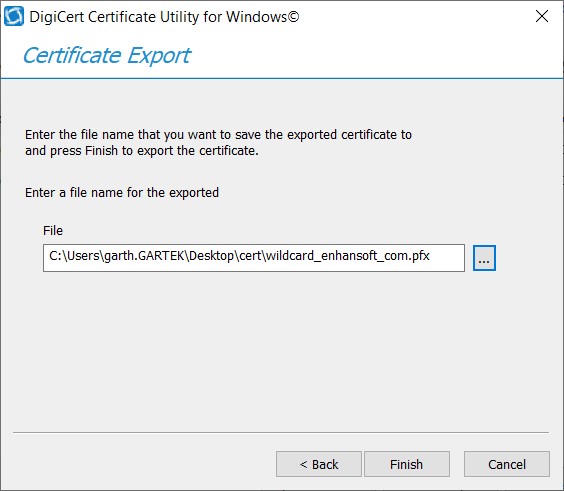
Browse for the file location and click Finish.
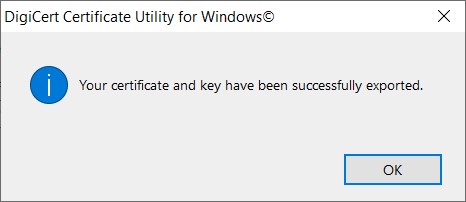
Click OK.
With that last step completed, you now have the PFX file needed for CMG and you can move on to the next step of actually creating the CMG connection. If you have any questions about how to get a PFX certificate for CMG, please feel free to touch base with me @GarthMJ.


