Sometimes I work remotely from my office, especially when travelling, so I always want to ensure that everything runs smoothly when I’m not there. Whether in coffee shops, hotel rooms or from a plane, I know I can work anywhere when I use Windows 10 offline files for all of my key data. Below are a number of useful tips, eleven to be exact, about how to work with offline files.
The topics covered are:
- Checking the Cache Size
- Changing the Cache Size Limits
- Viewing Offline Files
- Caching a Network Folder
- Deactivating Offline Files for a Folder
- Deleting Cached Copies of Offline Files
- Deleting Offline Temporary Files
- Disabling Offline Files
- Enabling Offline Files
- Sync Status Errors
- Offline File Sync Conflicts
How to Check the Cache Size of Windows 10 Offline Files
If there is ever a problem with my offline files, one of the first things that I do is to check the cache size. I do this in order to ensure that it is not over its limit, so this section will show you how to check it.
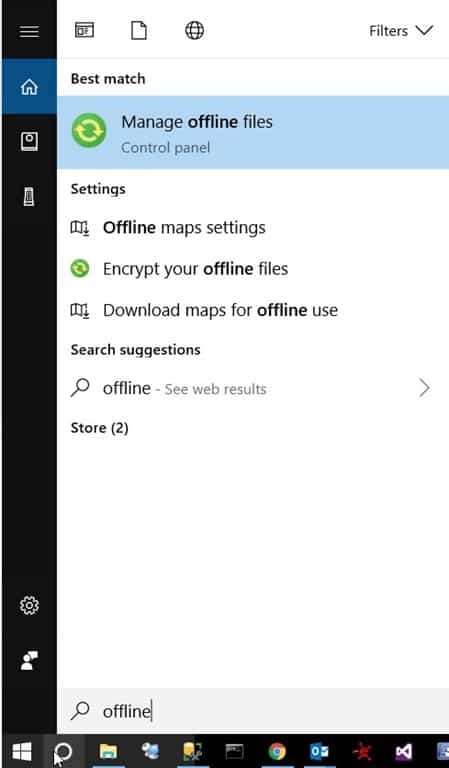
Start by opening Manage offline files. In order to do this, open the search window and type, “offline.”
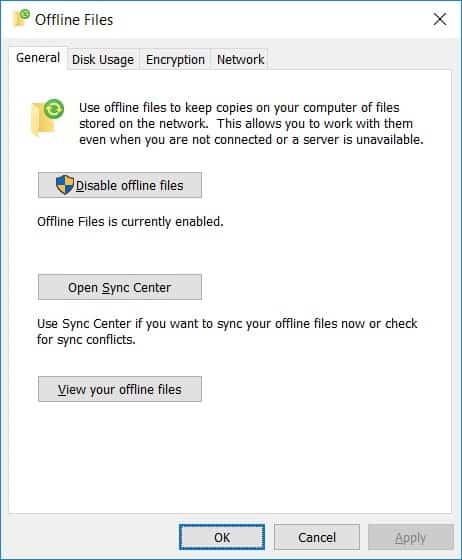
Select the Disk Usage tab.
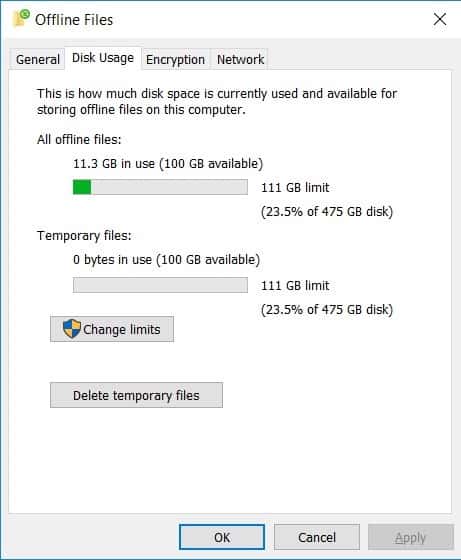
This tab displays the disk usage of your offline files. You can see that I have not exceeded the cache size limit. If I had, I would either turn off offline files for a folder I don’t need anymore, or I would increase the limits of the cache size.
How to Change the Cache Size Limit of Windows 10 Offline Files
Simply follow these steps to either increase or decrease the size limit of the cache.
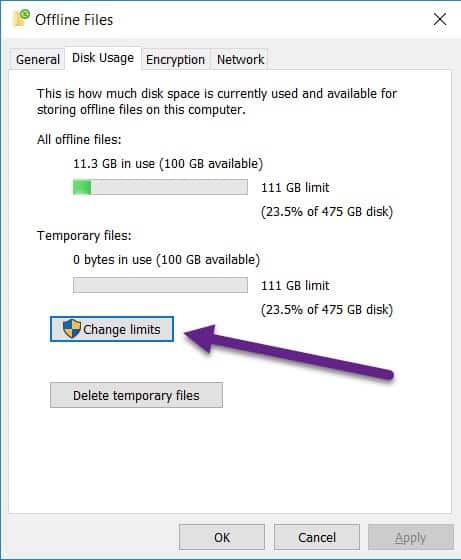
Open Manage offline files and on the Disk Usage tab click on Change limits. If a UAC prompt appears, accept the prompt in order to change the limits.
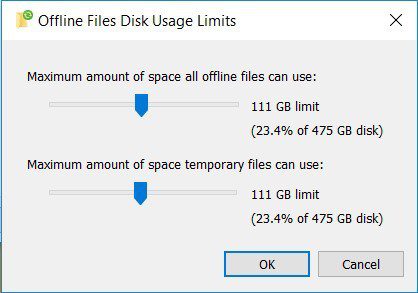
Adjust the slider bars as needed before clicking on the OK button. Once the adjustment is made the cache size is immediately updated.
How to View Windows 10 Offline Files
Before working remotely, knowing what files are available to you offline is very important. Use the steps in this section to confirm what files are offline and then make adjustments where necessary.
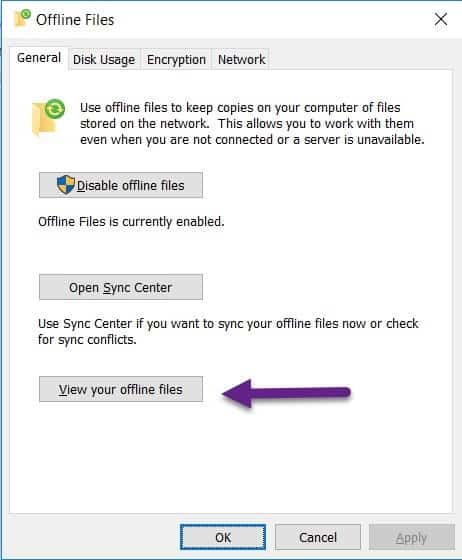
Open Manage offline files. On the General tab, click on the View your offline files button.
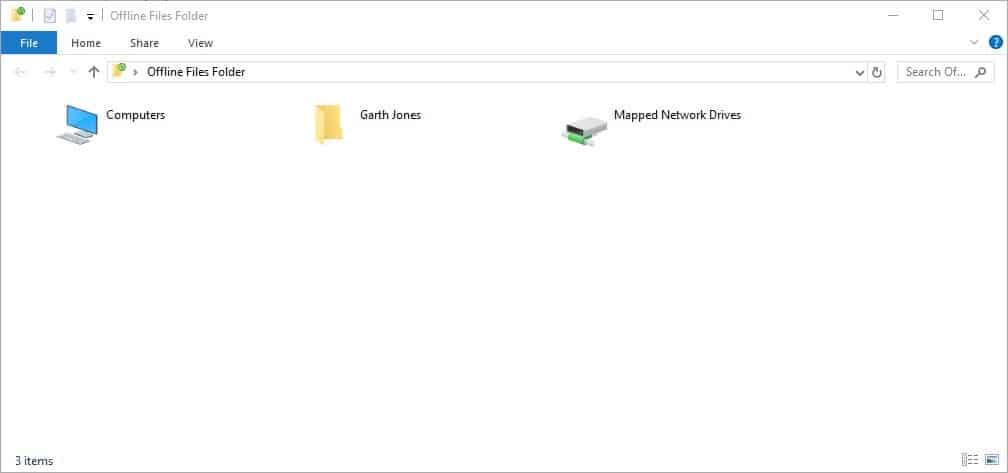
A new window will open. Click on Mapped Network Drives.
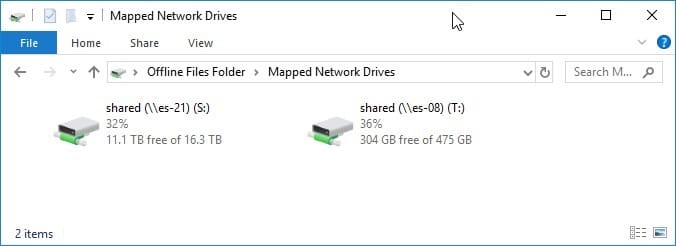
I want to see what files are available to me offline on the S: drive, so I click on it.
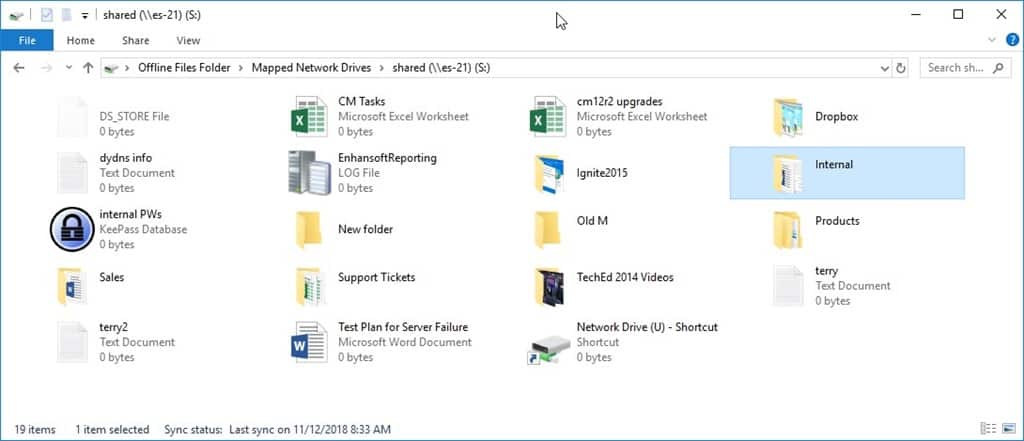
The root () of the S: drive is shown in the screenshot above. Looking closely, you will notice that all of the files listed are 0 bytes in size. Obviously, this tells me that none of these files are available offline, but it also indicates that there is at least one folder that is cached offline. I know this to be true simply by the sheer existence of these files and folders.
I want to take a closer look at the Internal folder because all of my, “work in progress,” blog posts are stored here and the, “Blogs,” folder which is found in the, “Internal,” folder is cached.
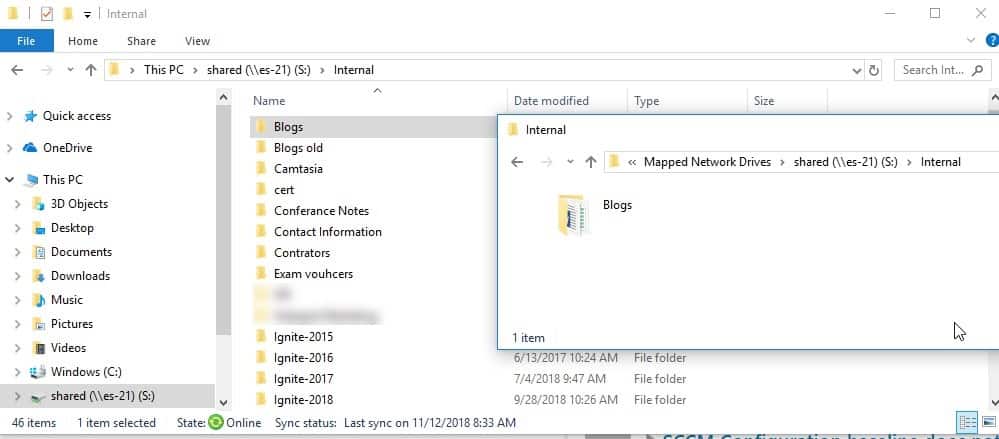
As expected, the screenshot above shows that only the files in the Blogs folder are available to me offline.
How to Cache a Network Folder
Sometimes you need more than an individual file to be available offline, so this section will show you how to make a folder and all of its contents always available to you offline.
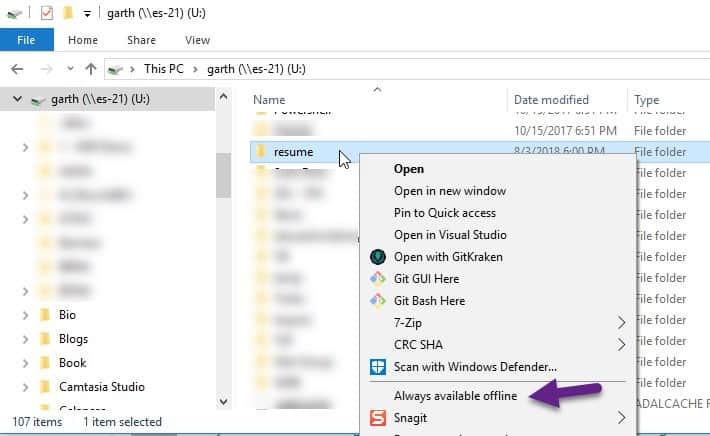
Start by opening File Explorer. Next, browse to the folder that you want to keep offline. Right-click on it and select Always available offline.
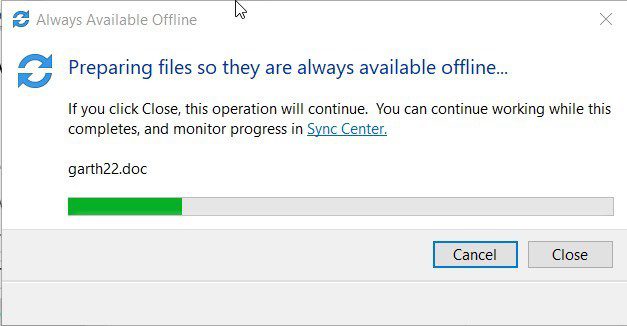
A new window will pop-up with the synchronization status. This pop-up will automatically disappear once the sync is complete. If you don’t want to wait, you can also click on the, “Close,” button. The pop-up will disappear, but the synchronization will still continue.
Please note that you need to have enabled offline files first before proceeding with the steps in the following sections. If you are unsure about how to enable offline files, the steps on how to do this are covered later on in this blog post.
How to Turn Off a Folder’s Offline Files in Windows 10
In order to free up space, you should get into the habit of turning off a folder’s offline files once a project is over and you no longer need to access these files offline.
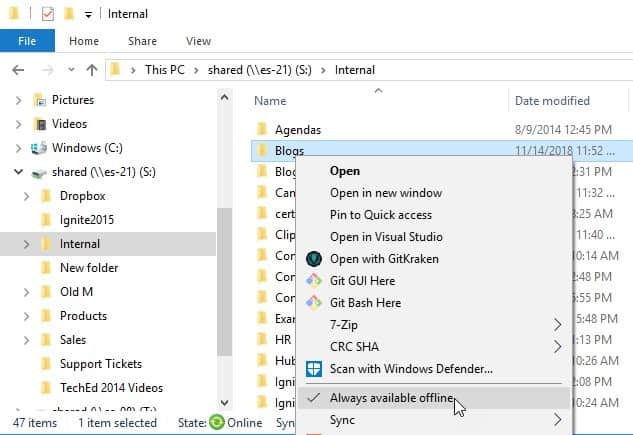
Start by opening File Explorer and then browse to the folder where you want to cancel the, “Always available offline,” function. Right-click on the folder and deselect Always available offline.
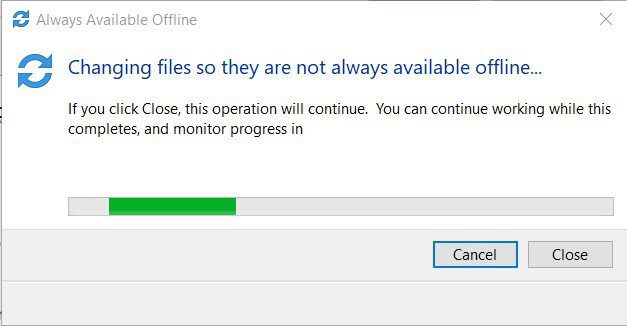
A new window will pop-up with the synchronization status. This window automatically disappears once the sync is completed.
Important:
Once you change the files, so they are not always available offline, you also need to delete the cached copies of the offline files. This is covered within the next section.
How to Delete the Cached Copies of Windows 10 Offline Files
This tip is for those who want to force a resynchronization of their offline files or for those who recently deselected the, “Always available offline,” option for a particular folder and want to reclaim disk space.
If you are forcing a resync or if you are reclaiming disk space, you need to remove the cached copies of offline files locally first. The following steps help you perform this task. In the next section I’ll show you how to delete the cached copies from the network.
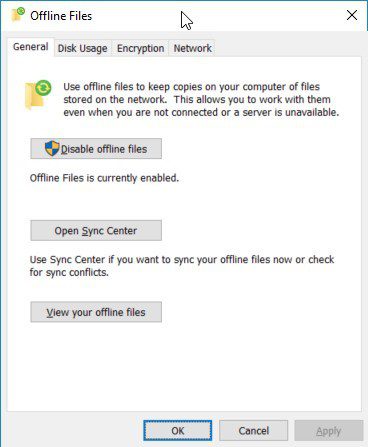
First, open Manage offline files. On the General tab, click on the View your offline files button.

A new window opens.
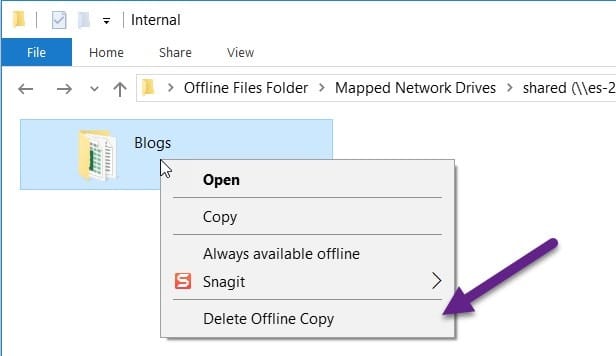
Locate the folder where you want to delete the cached offline copy. Right-click on the folder and select Delete Offline Copy.
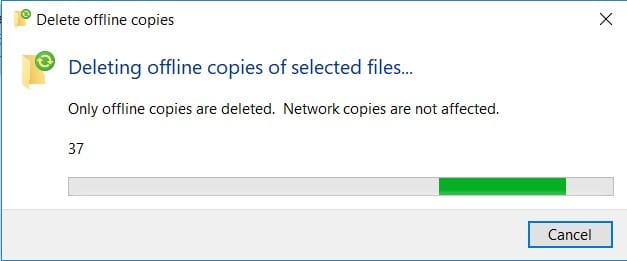
A sync popup window will appear. It is important to notice that only a local copy and not the network copy of those files are deleted.
Once this is complete, you must delete the temporary files in order to reclaim the disk space, so see my tip in the next section.
How to Delete Offline Temporary Files
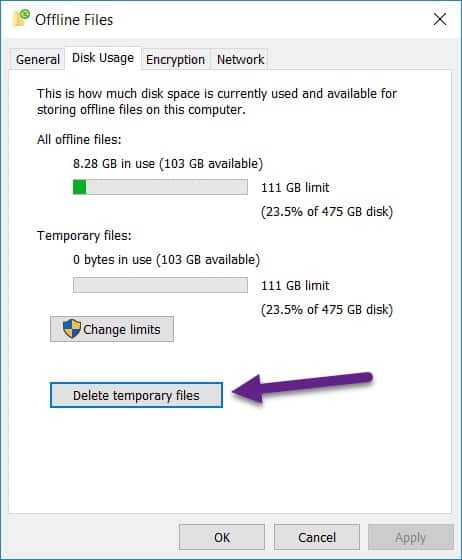
Open Manage offline files. On the Disk Usage tab, click on the Delete temporary files button. Once this is complete, the cached space is returned back to Windows 10. This space is now available to be reused.
How to Disable Windows 10 Offline Files
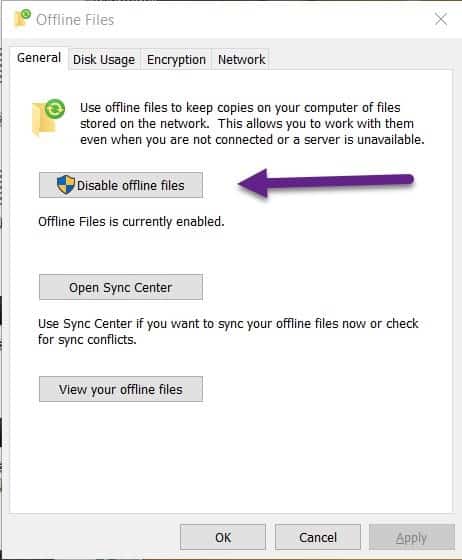
Open Manage offline files. On the General tab, click on the Disable offline files button.
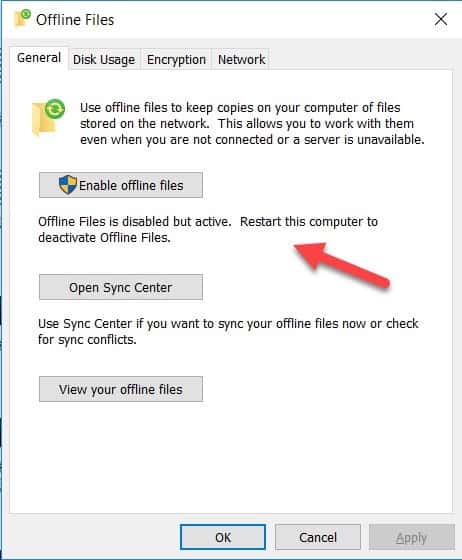
Notice that the text changes once you select the Disable offline files button?
Reboot the computer to allow the offline files to reset.
How to Enable Windows 10 Offline Files
There are multiple ways to enable offline files, but in this section, I show you how to do it manually.

Open the Control Panel. In the top-right search area type, “sync center.” Click on the Sync Center icon.
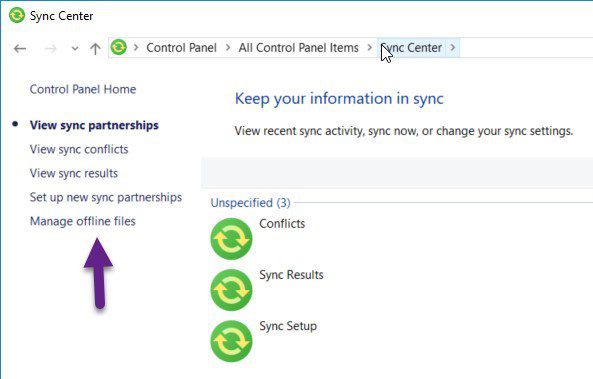
Click on Manage offline files.
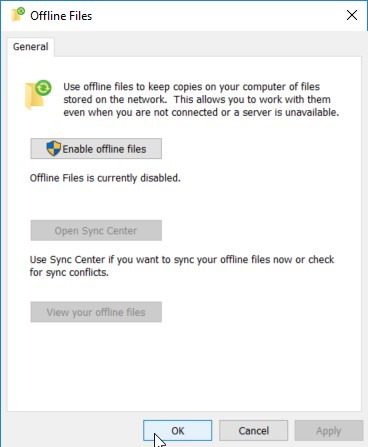
Click on the Enable offline files button.
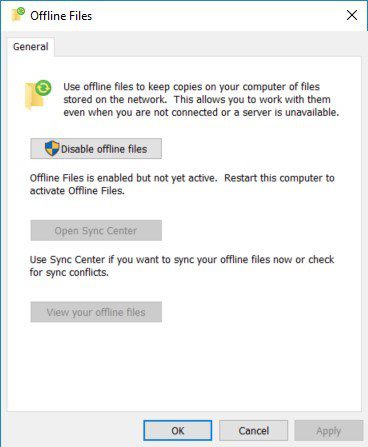
Click OK.
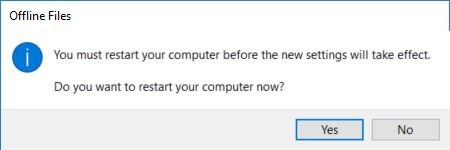
Click Yes. With that last step complete, you manually enabled offline files.
Sync Status Errors
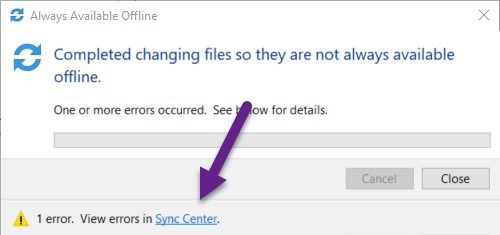
If you receive a synchronization error, click on the Sync Center link.

Notice that there is only one error in the above screenshot.
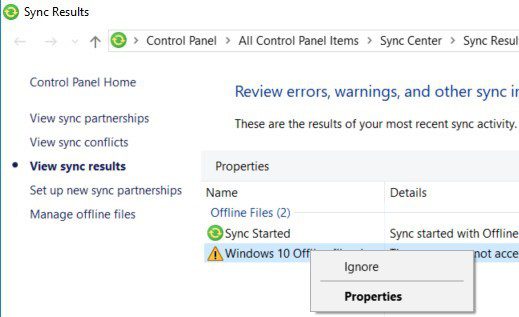
In order to resolve this issue, right-click on the file and look at your options. Since this particular file is in use there is only one option: ignore the issue.
Offline File Sync Conflicts

You might receive a conflict error within the Sync Center similar to the one above.
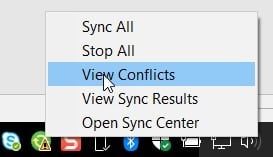
Rick-click on the Sync Center icon and select View Conflicts.

In the Sync Center, right-click on the file and select View options to resolve…
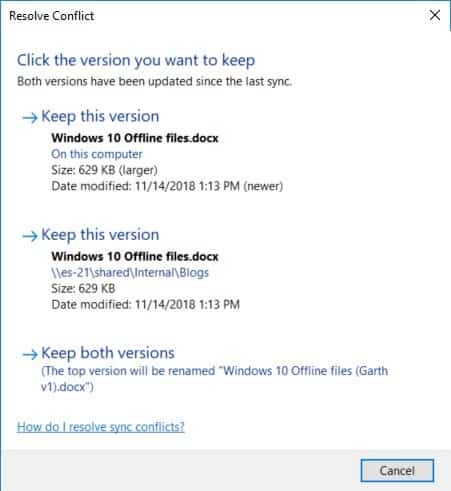
There is no right or wrong answer in this example, so select the best option for you.
If you have any questions about Windows 10 offline files, please feel free to contact me @GarthMJ.


